Showing posts with label Graffiti Grunge. Show all posts

Sunday, 13 March 2022

Breathe by Tracey Campbell

 Hello Bee Arty Peeps, it is Tracey Campbell here today with another Creative Team creation to share. I decided to give the Bee Arty Creative Hive (Facebook Groups) Monthly Challenge a go. The cool fresh colours and beautiful sketch made me wish for crisp spring mornings in this dreary wet weather we are having. I am in New South Wales and we have had two weeks of rain, with for to come, there is flooding and mud slides happening around us. So retreating into my creative zone with this months challenge was a great way to escape. 

Here is the sketch and colour combo for the March Challenge, no you don't have to use both, but I have. You can find the challenge here: Bee Arty Creative Hive


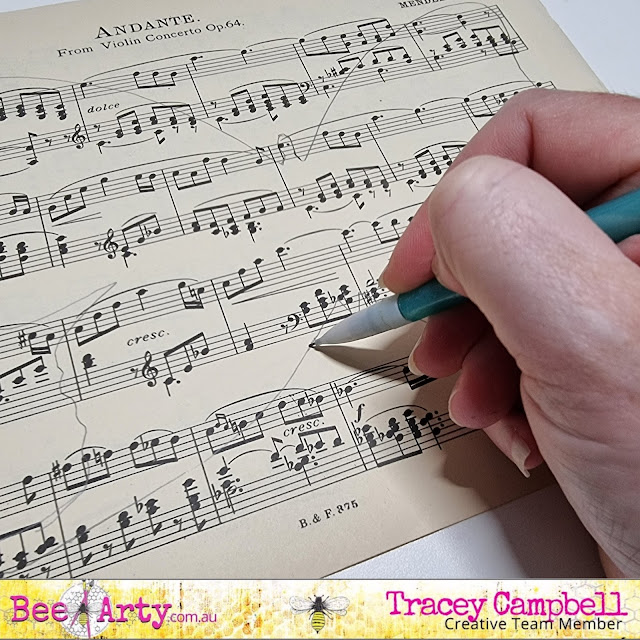
To start with I drew an outline of butterfly onto some sheet music.
Next I fussy cut the hand drawn butterfly and two butterflies from the Turning cut-a-part sheet in the Embrace Change collection


With a paint brush paint Tangareen Dream Colour Shimmer Spray in the centre of Steel Plate pattern paper from the Graffiti Grunge Collection. Graffiti Grunge is an older collection that is full of fun surprising papers that are great a starting place for messy backgrounds and perfect to represent the grey from the colour challenge for this creation.


Next I spread some Apple of My Eye Colour Paste through the Party Lights stencil. I repositioned the stencil so that the leaves ran off in three different directions, pointing towards the top left and top right corners and then bottom left hand corner. See the photo below to see the positioning. Once it was dry I repeated the stencilling process with Lemon Zing Colour Paste. Sorry I didn't take a photo with the Lemon Zing stencilling at this stage, but you can slightly see the two over lapping colours in the final layout, it is very subtle.


When the Colour Paste was dry I used the straw from the bottle of Stormy Weather Colour Shimmer Spray to splatter drops of the stray across the page.


To add the line boarder that is on the sketch I used a fine paint brush and some Stormy Weather Colour Shimmer Cube to paint the outline around the very edge of the base. Note: the Colour Shimmer Cubes are no longer available in the store as but you can substitute this part by using a thin paint brush and the Colour Shimmer Spray. If you choose to do this, don't shake up the bottle of the Shimmer Spray dip the brush in to get the thick sediment that settles on the bottom. It will give you a great amount of media to paint at the right consistency. If you do shake it up, then you will have to apply a few coats over the outline, letting to dry between each application. 


The photo below is how my base looked before adding the photo, title and embellishments.


Next while waiting for the Colour Shimmer Spray and Cube to dry I fussy cut a title and a few words. One of the great things of the Bee Arty Collections is that you can mix and match things from a few different collection. Here I have fussy cut from:
The word "Breathe" from the Breathe patterned paper in the Find Paradise Collection, the words "I Love You Even When You Do Dumb Stuff" from the Love Letter patterned paper in the Chit Chat Collection and the words "Happy Memories" from the Love patterned paper from the Love and Grace Collection.


Next I double matted my photo, I did a thin 2 mm mat with the blue side of the Journey patterned paper from the Aim High Collection and then a 7 mm mat with some of the lime green tones found in the Arty Farty Collection. 


I then adhered the music sheet butterfly in roughly the same position as on the sketch onto my base. Then stuck the matted photo down overlapping the butterfly. At this stage as I was embellishing with the fussy cut butterflies from the Embrace Change collection I decided that they were a bit dark and I wanted to add a pop of colour. So I pulled out some of my very ignored butterfly punches and punched out some from the blue and lime green paper that I used before to mat the photo. Tip: If you don't have butterfly punches you could always stamp the butterflies and emboss them to the colour you want. The Bee Arty Beautiful Butterflies Stamp/Die Set would be perfect for this and at only $10 (available at the time of this post) it is an absolute steal. 


I finished off the layout with some yellow and orange twine tied in bows and adhered the fussy cut words down.


Thanks for popping in and I hope I have inspired you to give the challenge a go and to pull out those collections you and an mix and match.

Hugs
Tracey


Sunday, 7 November 2021

Go For It with Belinda Spencer

 Hello Arty Bees!!


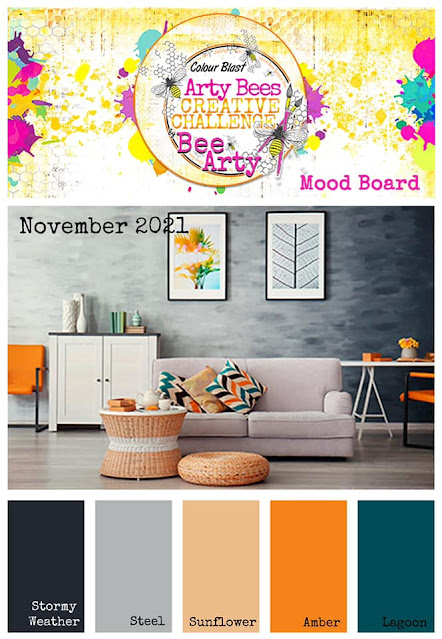
It's Belinda here today to share my latest layout for Bee Arty inspired by the November Mood Board.


Here's a peek at the mood board for November:


I started my layout by cropping a piece of Graffiti Grunge patterned paper and mounting it onto a sheet of the 350gsm White Cardstock. I then spritzed a little Sunset Colour Spray in three places and then placed a piece of plastic over the top to spread out the ink.


I repeated this process using Lagoon Colour Spray.


And for a third time adding Road Base Colour Spray. I then flicked all three colours over the page and dried with a heat gun.


I added some stencilling using the Three Six Five A5 Stencil Three Six Five and the Black Heavy Gesso. I stamped some stars over the page too using the Going My Way Clear Stamps and Ranger Jet Black Archival Ink.


I used the Graffiti Grunge Linked In Metal Die to cut two pieces from extra white cardstock and stapled them onto the page.


I added a paper stack on top of the die cuts using some patterned papers from both the Graffiti Grunge and Fearless, Brave And Free collections. I added my photo on top.


Next I used some Ranger Archival Inks to stamp some more stars using the Going My Way Clear Stamp set again. I fussy cut the stars and added to the layout along with all remaining elements.


I cut the quotes from the Graffiti Grunge Be Yourself Word Sheet and added them to the layout using 3D foam.


Thanks so much for stopping by the blog today. I hope you find some time to play along with the November challenge too.

Cheers
Belinda


Sunday, 19 September 2021

Fierce Mind Brave Spirit by Belinda Spencer

 Hello Arty Bees!!


It's Belinda here today to share my latest layout created for Bee Arty featuring the awesome Graffiti Grunge collection.


I cropped a sheet of the fabulous 350gsm White Cardstock and mounted on a sheet of heavy weight black cardstock from my stash. I then spritzed the focal area quite heavily with water and sprinkled some Midnight Colour Shimmer Dust over it. I used a soft paintbrush to move the colour around and to 'mix' the Shimmer Dust and water together. I used the same paintbrush to pick up the colour from the really wet parts and flick it over the page.


Next I cut out the tags I wanted to use from the Perfect Tag Sheet. There were still plenty of tags left over to make another layout or some cards. I inked the edges of the tags with some Cobalt Archival Ink.


Next I added some stencilling using the Gridlock A6 Stencil and White Heavy Gesso. I love how when the gesso dried it had picked up some of the individual colours that make up the Midnight Shimmer Dust. It gave it even more of a grungy look.


I added a little more stencilling. This time I mixed up a little of the Midnight Shimmer Dust with water in a palette and painted it through the stencil on the page. It gave a really messy watercolour effect pattern which just added to the grunginess. 
Once the layout was dry, I layered on the tags and added some cogs and the light bulb using the Cog Globe Metal Die Set with the white cardstock.


I added my photo and a cool chevron from Charm's Creations. I finished by fussy cutting some appropriate words from the Be Yourself  Word Sheet, inking the edges with Jet Black Archival Ink and adding to the page. I used a black journaling pen to add some doodling to the die cuts as well as scribbly borders around the words to make them stand out more.


Thanks so much for stopping by the blog today. Make sure you keep an eye out as this layout will soon be available as a kit so you can create your own version of this layout.

Cheers
Belinda


Sunday, 4 April 2021

'F*^k Cancer' by Belinda Spencer

 Hello Bee Arty fans!!

Happy Easter!! I hope the Easter bunny has been kind to you.

Today I am sharing my latest layout featuring lots of amazing Bee Arty products including papers from the Graffiti Grunge and Covid Capers collections.

***PLEASE NOTE: This post includes the 'f' word so if you are sensitive to swear words please look away. In this instance the 'f' word is perfect to describe the last year for my little family.***

'F*^k Cancer'


To start my layout, I cropped a sheet of patterned paper from the Covid Capers collection and mounted it on a sheet of the awesome Bee Arty Heavy Weight White Cardstock. I then used a palette knife to spread some of the Colour Blast Black Heavy Gesso over the central area.


Next I used the black gesso again with the That Way Stencil to add some more interest to the focal area. To apply the gesso, I use a latex make-up wedge with a very small amount of gesso and apply with a dabbing motion through the stencil. This ensures that the paint doesn't bleed under the stencil and you get nice crisp edges.

I used the tiniest star stamp from the Moments In Time Clear Stamp Set with some Jet Black Archival Ink to stamp around the focal area also.


I die cut the Honeycomb Metal Die from extra heavy weight white cardstock a couple of times and fussy cut some tags from the Graffiti Grunge Perfect patterned paper. I arranged all of the pieces and stapled them together before adding to the page.


I added the photo and embellishments next. Then I stamped some more stars using the Jet Black ink and stamps from the Moments In Time Set onto the extra white cardstock. I fussy cut each star and added to the page along with some quotes cut from the Covid Capers papers as well as the Graffiti Grunge Be Yourself paper. Finally I added the title using American Crafts Thickers as well as letters cut from the Untangle Lines patterned paper.


Bee Arty products used:


Thanks so much for stopping by the blog today. I hope you are finding some time to get arty with Bee Arty products over the Easter break.

Cheers
Belinda


Wednesday, 27 May 2020

You Don't Have to be Perfect to be Amazing Layout Tutorial by Julie Schinkel

Hi crafty bees! I'm back on the blog today sharing a layout that I've created using a few different Bee Arty products. This layout was to be part of a kit but missed the cut so I thought I would share it here.


Start with a plain white cardstock base. Take some watered Apple of My Eye Colour Paste onto some scrap plastic and smoosh onto the white cardstock as shown.

Next take a piece of the "Go For It' 12x12 paper and tear in half. The top half with the dark areas will need to be torn in half again and arrange above and below the other half as shown on the finished layout.

Take the Chain Links A4 stencil and some more of the Apple of My Eye Colour Paste and add randomly on the top torn later. Using the same stencil, stencil around the page using both patterns with grey ink.

Randomly stamp around the page using the Life is Tough Clear Stamp Set and black archival ink.

Stamp and heat emboss flowers from the Make Me Happy Rubber Stamp Set onto some black and white cardstock using Apple of My Eye Embossing Powder as shown on the final layout. You can add more if you wish.

Die cut the Frame Set and Beaded Metal Dies using black cardstock. Arrange on the layout as shown.

Cut out the "You Don't Have to be Perfect to Be Amazing" quote and mat onto black cardstock. Adhere to the layout.

white cardstock
black cardstock
black and grey ink

I hope you enjoyed this project. Thanks for stopping by.
Until next time, happy crafting.
Julie xx

Wednesday, 18 March 2020

'You Rock' by Amy C

Hi Everyone! 

I am sharing this page today for Bee Arty to showcase some of the fantastic products in store. 

I set out to design a masculine page with a photo of my eldest, Josh, when he attained his Learner's Permit.


I started with the 'Graffiti Grunge' range of papers and a sheet of white cardstock. I added some layers of other media over the layered papers - adhered together.

I splattered 'Road Base' and 'Rainforest' Colour Spray over the white cardstock alongside my doodling around the border. I have also stamped in various places using the 'Life is Tough' clear stamp set.


Before I adhered my photo down I used a strip of corrugated paper from my stash. I love using the corrugated cardboard as it adds a delightful texture to the page.
I applied some of the 'Steel' Colour Blast Colour Paste over the top of some 'Black' Heavy Gesso.
After I heat-dried the gorgeous 'Steel' paste, I applied some if the Shimmer pen, in 'Pewter', as pictured.
The combo of the black, steel and pewter provided a rustic look that compliments the papers well.

Finally, for my title, I used a quote from the 'Graffiti Grunge' range. I love how this page came together. 

In these close-ups, you'll see some Bee Arty and Colour Blast products - here is a list of them - with links to them 'in-store':

'Graffiti Grunge' papers
'Road Base' and 'Rainforest' Colour Sprays
'Life is Tough' Clear Stamp Set
'Steel' Colour Paste
'Pewter' Simmer Pen


Well that's it from me today - thank you for stopping by. I hope this leaves you feeling inspired.
Happy crafting!
Amy