Showing posts with label stamps. Show all posts

Saturday, 21 March 2020

"Beauty" by Anta Enright


Welcome back Crafters.

For my post today I wanted to use one of the gorgeous rice papers in my personal stash, so I teamed it with some of my favourite colours from Colour Blast by Bee Arty. The final result ended up entirely different to what I what I was first imaging but I love the end result.


 To start I took my chosen size canvas which had already been prepped with Gesso and attached my rice paper lady along with wording from the paper to the canvas using a clear glue.

I decided straight off I wanted to use the Sienna Colour Paste and needed a colour to combine nicely with it.  One of my favourite colours from Colour Blast by Bee Arty is Deep Water but I didn't have any in my collection so thought I would mix up something similar from my Artist Inks.  I chose the colour of Mermaid and Oasis combining equal quantities with some Heavy White Gesso. 
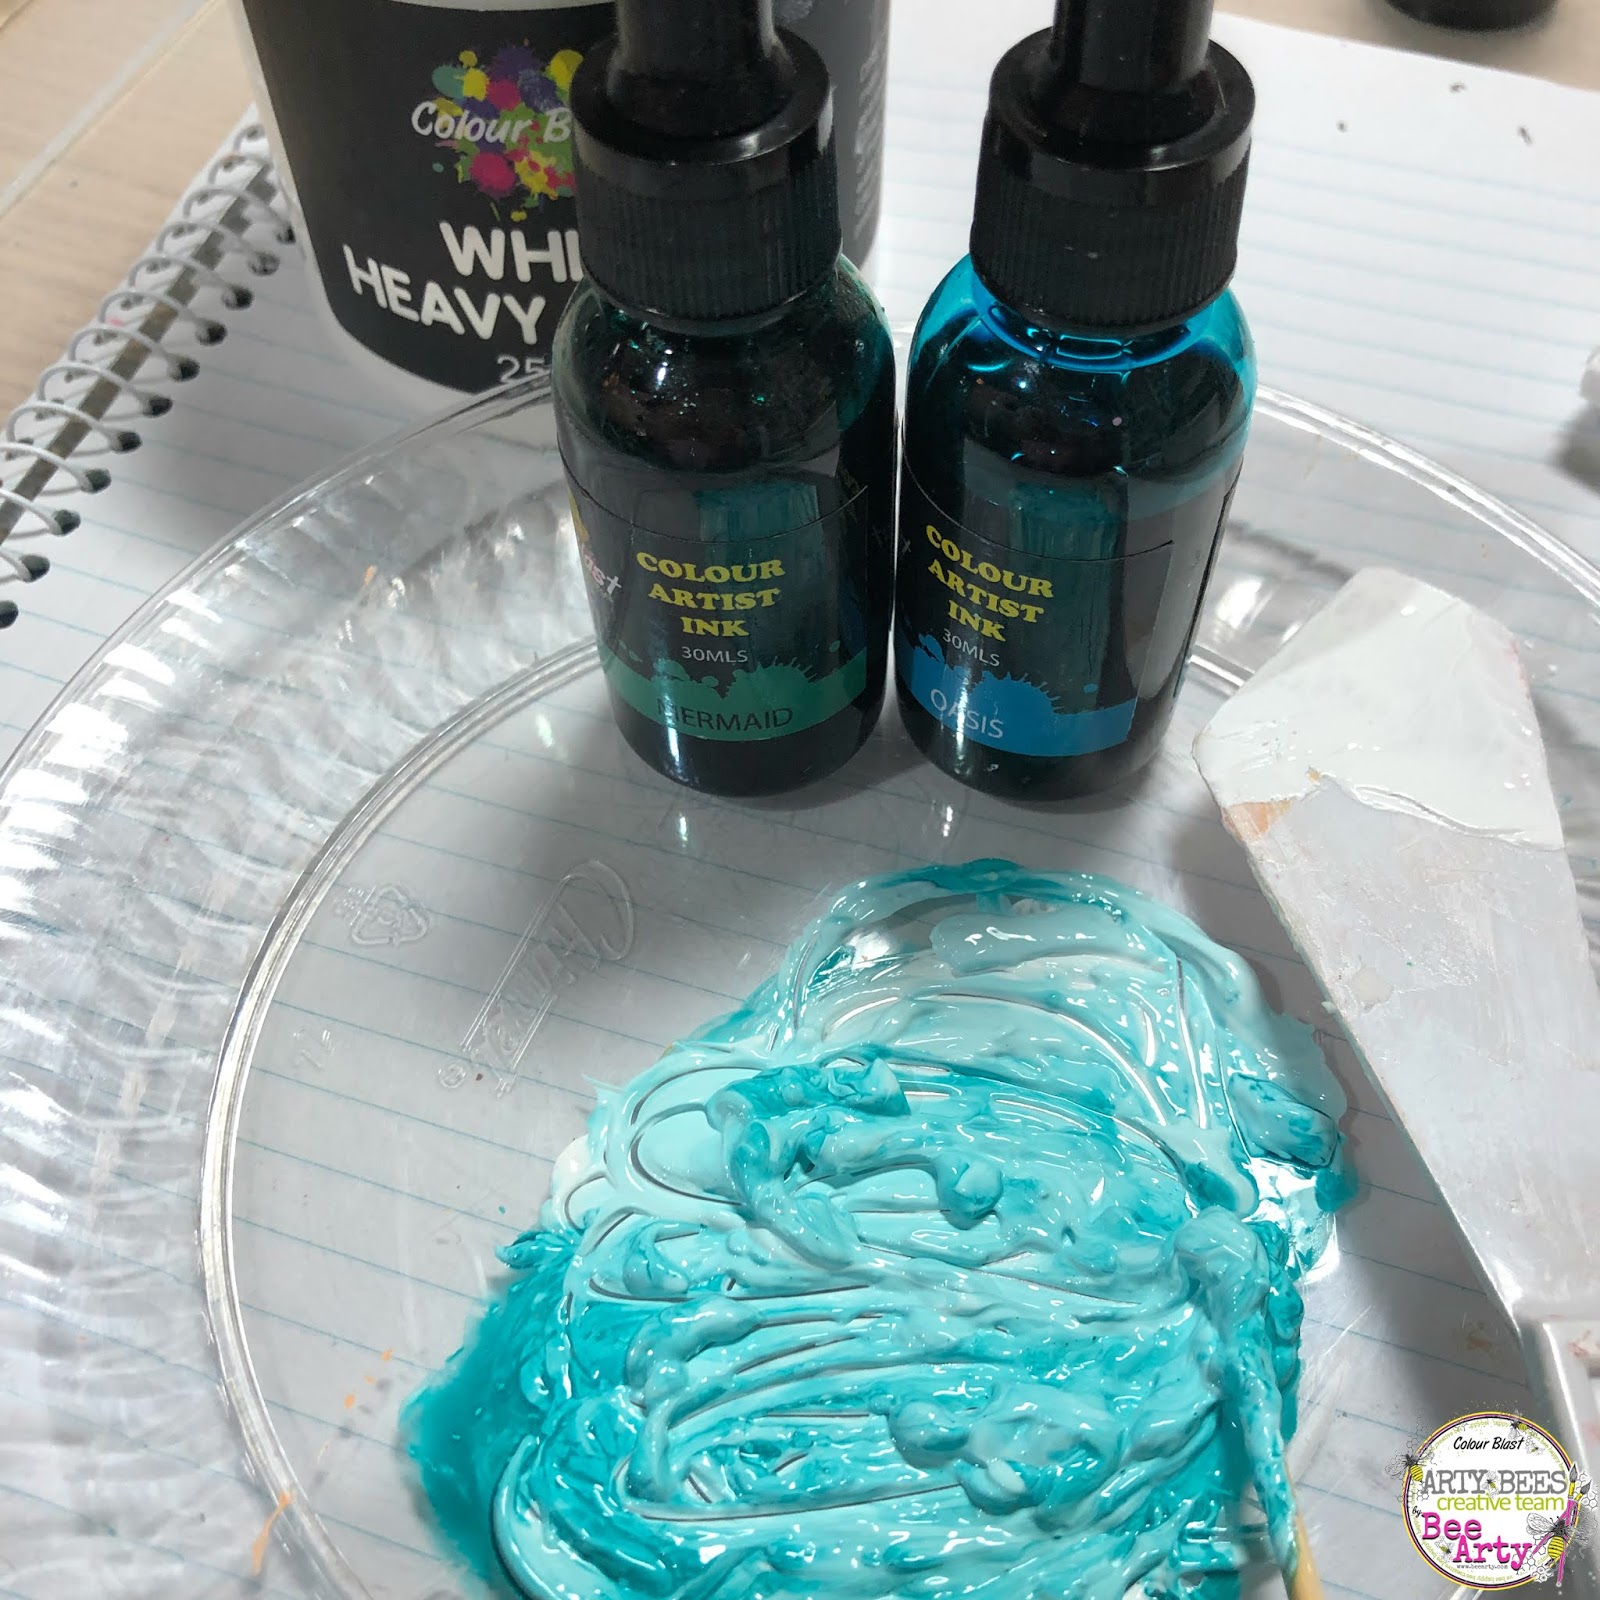


I covered the majority of the canvas front (kept away from the lady and also went around the edges (sorry forgot to take a photo).  The colour wasn't as intense as I wanted so I just mixed up the same Artist Ink colours together. This time I applied the colour directly to my project, no gesso used this time.  I dabbed it all over the canvas and as the first layer dried I then added more, going gently over my image.


Once dry I took the Sienna Colour Paste and the A6 stencil Rose Reveal from the Love and Grace collection and applied the Colour Paste around the edges of the canvas. I also took some of the Colour Paste on the edge of one of my fingers and smudged it in between the stenciling.


More interest needed to be added to the background.  I added some stamping using the script stamp from the Memories Stamp set using a matching ink pad from my collection.  
Next I added more texture using the Scripted Stencil and a mix of Heavy White Gesso and some of the Mermaid Shimmer Dust in a few random places. I then used the same stencil with some of the Mermaid and Oasis Artist Ink to add more details to the background.


The last couple of details I created before adding my embellishments was the colouring of my metal with some of the Deep Water Embossing Powder.  I heated up the metal embellishment with a heat gun and then sprinkled the powder over it.  Shake off the excess then set with the heat gun.


And lastly, using a combination of Colour Sprays and Colour Shimmer Sprays colour up some cotton gauze to match the colours of the canvas. I used Colour Sprays in Lagoon and Coffee and Shimmer Spray in Sienna .
I added a few strands of colours pearls along the top and bottom of the canvas and also coloured up a chipboard title with a matching ink.
I glued metal at the waist of the girl and added some matching flowers, tucking in some of the coloured gauze underneath.  Finally I added flowers to her hair and added the gauze also.


Check out the couple of closeups of the canvas.


Thanks for stopping by.  I hope you get some craft therapy some time this week.

Take care for now.

Anita E


Wednesday, 24 April 2019

"Brave Wings" by Sue Plumb


Hi everyone!
Sue Plumb here with my latest design team project for you. Today I have a mixed media scrapbook layout to share featuring the 'Spread Your Wings' collection combined with pieces of the 'Graffiti Grunge' collection; Colour Paste; Colour Shimmer Cubes and Heavy White Gesso. I also took the opportunity to do some flower stash-busting. 
This page was created to document a cool selfie of my bestie and I as we sat on top of Mount Beerwah (after climbing it in 36 degree heat.) 


Here's a look at the supplies I pulled out to start my project with...


I began with the Fly paper from the 'Spread Your Wings' collection for my background. To give the page some extra depth, I added some stamping using the Do It Stamp Set and 'Stormy Sky' Distress Oxide.

I then added a piece of the Fearless paper from the 'Graffiti Grunge' collection across the centre of the page, distressing the edges to give texture, before stamping over the left edge to blend it in with the background sheet.


Next, I wanted to tone down some of the colour and pattern, so I used a small brayer to apply Heavy White Gesso to the centre of my page.


Whilst the gesso was drying, I gathered up some paper pieces to create a layered mat for my photo. I arranged the pieces in a small stack and secured them with staples before sticking it down.

Next, I took the Peony Dreams paper and fussy cut some of the large floral designs from it, which I then tucked in under the edges of my photo mat. 


Once the floral pieces were stuck in place, I rubbed a small amount of white gesso over each of them to help blend them into the background.

Then it was time for some texture! I wanted it to be subtle, so I used a small floral design stencil with 'Snow White' Colour Paste and applied it in a few areas on the page and left it to dry.


To embellish my layout, I dug through my (extensive) flower stash and pulled out an assortment of paper and fabric blooms (most of these were from D-lish Scraps). I created a circle using a pip berry stem, which I layered behind and over my photo before sticking my photo down. I then adhered the flowers on my page using hot glue; starting with the largest flowers first and working my way down in size until I was happy with the arrangement.


With the flowers all stuck in place, I then dry-brushed a small amount of gesso over them. This helped tone down some of the brighter colours to make them more subtle.

To finish my page off, I fussy cut the with brave wings she flies quote from the Earth Angels paper and stuck it down using a strip of cardboard behind it to pop it up a bit.


I then took 'Apple of My Eye' and 'Singin' the Blues' Colour Shimmer Cubes (these are now discontinued, so simply substitute another product if you don't have them in your stash); and used a small brush to apply pools of colour to the page. This added subtle, shimmery detail to the layout once it had dried. 


You can see how brushing the gesso over the flowers not only toned down the colours, but also provided cohesion to bring the mix all together.


That's all from me today, thanks for stopping by so I could share this with you. Perhaps you might be inspired to pull out some old flowers from your stash and create something too? It's fun mixing old supplies with new!
Until next time, happy scrapping!


Wednesday, 10 April 2019

"Limited Edition" by Sue Plumb


Hi everyone!
Sue Plumb here today to share my latest design team project with you. Today I am sharing a mixed media layout that I created with the April release "Limited Edition" collection; as well as Colour Paste; Colour Shimmer Dust; and a Colour Shimmer Brush Marker. I even used some Colour Embossing Powder, AND dragged out my Big Shot to use the 'Going My Way' die. 

Here is my layout featuring a photo of my daughter and one of her best friends, which is aptly titled "Limited Edition" (just like the collection)...


I've got a really detailed step by step process for you today, so you can follow along at home and create your own version of this page. Here's a look at what I stated with (if you don't have everything the same, just substitute in something similar).


I began with the Individual paper as my page base; then took the Stand Out cut apart paper, and cut it into all the individual pieces. I followed the design on the background paper which featured distressed / torn edges printed at the top and bottom, and created actual tears in both places, securing the edges with small staples. I took one of the cut apart pieces and used it to back both of the tears to add some pops of blue.


Next, I added some stamping to my background using the 'Peony Dreams' stamp set from the January "Spread Your Wings" collection and 'Faded Jeans' Distress Oxide. (You will note I stamped randomly with sections of the stamp - I did not use the entire stamp image as whole.)


After the stamping, it was time to create some texture. I started with 'Bling' Colour Paste and a stencil from Flutterby Designs that featured a circular style design, so I could continue the circular theme from the background paper. After I added a few circles, I then wiped off the excess paste from my palette knife randomly around the page before drying it off with a heat gun.


I then went in with another stencil, this time a scripted design from The Crafters Workshop, and 'Singin' the Blues' Colour Paste. I chose this design so I could add more blue colour, as well as texture to the page, without any real structure. (And yes, you can totally layer one Colour Paste over another, as long as the first one is dry!)


At this point my background looked like this (you can see how I was working with the "rule of threes" which helps bring balance to your page)...


After the paste had dried, it was time to turn to paper again. I used pieces of the Stand Out cut apart paper I had cut earlier, as well as a larger piece of the Uniqueness paper to create a layered mat for my photo to sit on. I also fussy cut the quote from the Stand Out paper and adhered it along the bottom edge of the page.


I then took the 'Going My Way' die (from the 'Going My Way' collection) and another piece of the Uniqueness paper and cut it using my Big Shot. I then added some extra colour to it using 'Duke' Colour Shimmer Dust that I mixed with water and applied with a small brush.


Whilst that was drying, I turned my attention to the chipboard pieces I had chosen for my page, which were a mixture of circular style designs such as cogs and clocks; and a few stars as well. I stamped the pieces with embossing ink; then applied 'Steel' Colour Embossing Powder over the top; before tapping off the excess and using a heat gun to set it. (This is my favourite colour of embossing powder, as it makes the chipboard pieces look like chrome!)


With chipboard pieces ready, it was then time to start embellishing the page. I cut my die cut piece in half and added the two pieces on either side of my photo mat, as well as some frayed gauze on top of the paper layers. I then adhered my chipboard pieces, tucking some in under the edges of my photo mat, and following along the diagonal design of the page. 
With the embellishments in place, I then added my photo, using some scrap cardboard underneath to pop it up a bit.


For my page title, I fussy cut the limited edition plaque from the Exception Word Sheet and added a little extra colour using the 'Duke' Colour Shimmer Dust I had mixed earlier. I also used the brush to add small amounts of blue around the focal area of my page.


I then adhered my title piece onto the chipboard frame I had embossed earlier and tucked it into the layers above my photo.


With my page nearing completion, I took a Silver Colour Shimmer Brush Marker, and added a little extra definition and shimmer to some of the cogs and clocks printed on the page.


To finish off my page I added a scattering of pale blue Cocoa Vanilla Studio sequins.


The circular shape of the sequins helps bring the repeating circular theme of the whole page together and adds an extra layer of texture and interest. 


I hope this detailed insight into my process will help you create your own version of this layout. I love being able to inspire others to create, so make sure you share with me if you do! You can post your creations in the Colour Blast Creative Corner group on Facebook, or tag me @sue.plumb on Instagram.


Until next time, happy scrapping!

Wednesday, 27 March 2019

"Be Fearless" by Sue Plumb


Hi everyone!
Sue Plumb here to share my latest Colour Blast design team project with you. Today I am sharing a 12x12" mixed media scrapbook layout that features the February release Graffiti Grunge collection; as well as Colour Paste and Colour Artist Ink. I chose to document a fun photo taken with my kids when we were at a theme park.


Before I started, I gathered together my supplies - I chose the Tough paper from the Graffiti Grunge collection for my page base; along with the Direct Links die (also from the GG collection); the Peony Dreams stamp set (from the January Spread Your Wings collection); and Bling Colour Paste.


I began by adding some stamping to my page using the Peony Dreams stamp. Rather than stamping the entire image as a whole, I used parts of the stamp randomly with black ink to define the focal area of my layout where my photo was going to go; along with a small amount of stamping in the bottom right corner where I planned to place my title.


I then chose a Seth Apter designed stencil from StencilGirl to add some Bling Colour Paste over the top of the stamping, to add further interest to the focal area of my page. With the excess paste on my palette knife I simply wiped it off randomly around my page. 


At this point I decided the page needed some extra depth of colour, so I added a splattering of Rust Colour Artist Ink to the page using a small, stiff brush and then dried the page off. (You can see the shine and depth the Bling Colour Paste has once dry.)


Next, I set about creating some layers as a mat for my photo to sit on. I chose additional papers from the Graffiti Grunge collection and cut a variety of pieces; which I layered with book paper and then stapled it all together, bending and scrunching the edges for extra texture.


With my layered photo mat complete, I then attached it to my page, adding some frayed gauze and messy black cotton on top for soft texture. I also cut the Direct Links die twice from the Epic paper, cutting one in half and layering it over the top of the gauze so it the arrow head and tail were sticking out on both sides of the photo mat.


With the second die cut, I cut some of the extra chain links from it and adhered them so they would protrude from below the photo, then stuck an extra arrow head on the right side; before sticking my photo down on top.


With my photo in place, it was now time to embellish my page. I began with my title cluster - adding a couple of small torn scraps of paper (left over from my die cutting) over the stamping and paste I had on the page. To tie in with photo cluster, I also added some messy black cotton; then a butterfly sticker and the words "Be Fearless", which I had fussy cut from the Be Yourself Word Sheet.


I then tucked two butterfly stickers into the photo cluster (because "rule of threes", right?) and a die cut star. I then used several pieces from the Cocoa Vanilla Studio 'Boys Rule' chipboard pack to add a few pops of dimension to the page. I added a few small pentagons, some chipboard stars and used the negative from another piece (cut in half) to frame my title words.
To finish off, I added the "fun and games" chipboard banner piece along the bottom edge of my photo and I was done!


Thanks for stopping by today so I could share this with you. The Graffiti Grunge collection is currently available to purchase in the Colour Blast online store, along with the die, stamp, Colour Paste and Colour Artist Ink I used on this page. Alternatively, you can ask at your favourite craft retailer. 
Until next time, happy scrapping!