Showing posts with label quote. Show all posts

Monday, 11 February 2019

Imagine by Suzanne Franin


Hey Everyone Suzanne here

My turn on the Colour Blast Blog - make sure you check out the rest of the blog for lots of inspiration and check out the Colour Blast Kit Club - Check what kit would suit you 
It's so convenient everything you need all in one box 

I found this picture of John Lennon with the words to the song Imagine 
It's such a powerful song which we all need to read and do


I primed the canvas with the Colour Blast Heavy White Gesso


I used four different Colour Pastes - Apple of my Eye, Fire Engine, Sunshine and Tangerine Dream


 I used the four different Colour Pastes through the Memory Maze Pavement Stencil scraping each colour letting them overlap here and there
I liked the look of it as it was similar to the photo of John Lennon 


Here I'm rubbing some Dorland's Wax Medium over the paste - 1 it helps the paste from sticking to other thing and two it helps make the effect below (I'm sure there are lots more things I can use it for but we'll get to those)


Once I've heated where the wax is it bubbles all over and gives the pattern a really cool look
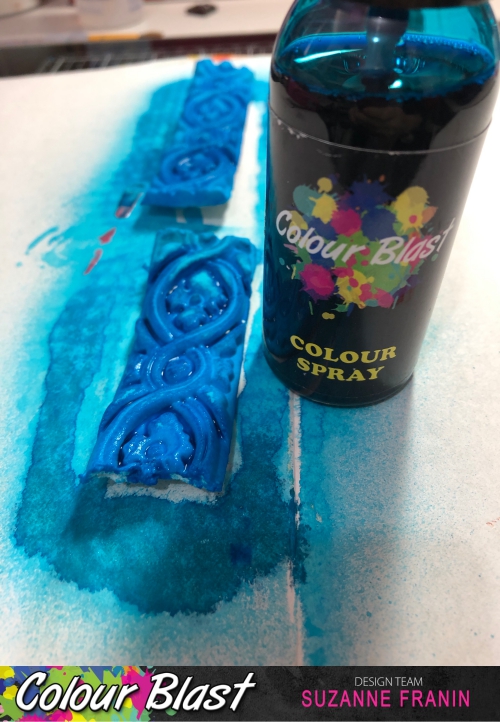
 

I sprayed a paper clay border with Colour Spray Carribean for a different pop of colour


I used Tim Holtz Idea-ology Small Talk sticker quote that I thought appropriate 
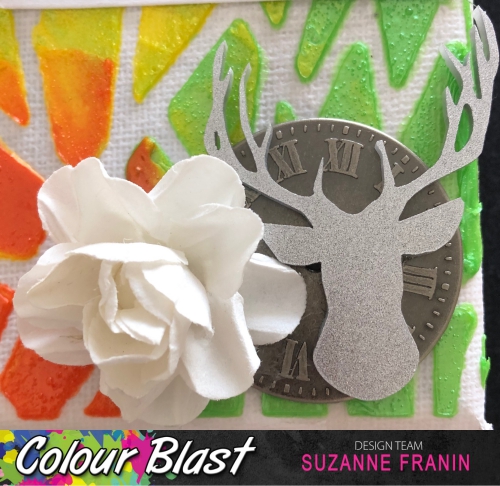


Here I used a Kaisercraft flower, a metal clock face from my stash and a Memory Maze Acrylic Deer Head


I used a Tim Holtz Transparency Globe an old Making Memories ribbon slide and a paper clay man from mum 


Thank you for visiting and I hope you come back soon x


Monday, 31 December 2018

Grateful Heart by Suzanne Franin

Happy New Year Everyone Suzanne here

I hope you're having a fun but safe New Years Eve

On today's BLOG for Colour Blast I created a canvas with lots of paper clay pieces stuck on 


I started off by painting the canvas with Heavy White Gesso


Then used some Helmar Premium Craft Glue to adhere all the paper clay pieces on (like a jigsaw) 
I then filled in some gaps with Art Stones and finished it off with another coat of Heavy White Gesso


Then I decided to make it colourful and I used the Colour Shimmer Dusts in - Paris, Peacock, Amber, Sunflower, Duke and Candy 
Flicking a little bit of dust before spraying water with each colour (trying not to make mud by getting the colours too mixed up)


Then I felt it needed some more shimmer so I mixed the Dorlands Wax with the Colour Embossing Powder -  Bling and used a  spatula knife to spread it around the canvas and into the little gaps 
I covered the heart all over as that's what stands out the most and I based my quote on


Thank you for visiting and I hope you have a very happy 2019 xx

Monday, 8 October 2018

I am Me by Suzanne Franin

Hey Everyone Suzanne here

This project for Colour Blast was made for a new friend for a reminder of where she has come from and where she has been in her life 

Make sure you visit the rest of the blog and discover what fabulous creations have been made here lately 


So I started of by painting everything with the Colour Blast White Gesso to give everything a nice even surface to work on
I then mixed in some Colour Mica Powder Espresso with some clear gesso too make a nice shimmery colour for the frame and some of the embellishments 
It's a shame the camera doesn't pick up the shimmer
Tip - Make sure to put the powder in first that way you won't get the dust floating up as you mix it together


Then on a few of my embellishments that I used the Colour Mica powder mix on I added Colour Embossing Powders - Bling and Sienna just a little sprinkle on them for some contrast


On the Memory Maze Ladies form with decorative wings I added the Bling so it would stand out and then used some Colour Artist Ink in Slipper which I also added to a few of the other embellishments to brighten up the piece


On the background of the frame I glued some material using the Helmar Super-Tac Glue it's a good strong glue and keeps things in place for ever 
I then too some Colour Artist Inks in Soot and Rust and added them to the background spraying water as I went until I was happy with the colours


Then the fun begins arranging everything I placed a sheer piece of fabric in the back under all the flowers to soften things 
I thought I'd use yellow flowers as it's such a happy colour and the quote is quite heavy and deep and then the little pink paper clay embellishments scattered I think add a bit of fun 


Thank you for visiting and I hope you will come back soon x


Monday, 10 September 2018

Trust by Suzanne Franin


Hey Everyone Suzanne here

My project was a gift for a friends birthday and this quote is perfect for her
I didn't want to do to much to the frame so I kept it simple and let the photo stand out


I used Colour Mica Powder Espresso with water over the frame 


Then went outside and sprayed a good coat of the Helmar Crystal Kote Fixative It's fantastic to stop the Colour Mica Powders from coming off without having to use it with another type of medium and this way you don't loose the gorgeous shimmer


On the background of the frame it had a fabulous texture so I used Some Colour Paste Blush just with a palette knife 
I didn't want it too thick so you can still see the texture
The Colour Paste Blush is so pretty


I had this flower in my stash (well I have lots of them) and it went perfect with everything 
I wanted to put it on the corner of the frame so I added a couple of piece of cardboard to the back of it


As you can see it needed the two pieces for the height


Then I ran some pearls through some glue to lay over the frame


I had some plain white leaves and wanted to add a bit of sparkle to it so I used some embossing liquid on the edges of the leaf then dipped it into the Colour Embossing Powder Snow White then heated it with my heat gun till it melted 
I had lots of sparkle everywhere but my leaf looked so pretty and added the pop of sparkle it needed on the frame


Here you can see the difference between the leaves


Well I hope you enjoyed my project


Thank you for visiting and I hope you will be back soon x