Showing posts with label frame. Show all posts

Monday, 28 January 2019

Fly by Suzanne Franin


Hey Everyone Suzanne here

Here's a little project I did using the Colour Blast Colour Pastes 

Make sure you visit the Colour Blast Blog and see all the awesome creations from the Design Team and look out for all the new products that are coming out
And don't forget we have a Colour Blast Kit Club make sure to check that out as well


I started by using the Heavy White Gesso on this timber frame giving it a good coat


I used the Colour Paste in Sunshine, Tangerine Dream and Blush trying to blend each one after the other (not that successfully but I think it still looks good) through this flourish stencil


After the paste was dry I used the string to wrap around the frame in every angle I could go 


I painted some paper clay leaves with some Colour Shimmer Cube Apple of Eye (are no longer available but you might find some online stores still stock them)


I just got this Colour Spray Carribean and it's so nice- it has a matte finish but it still pops 
I sprayed it onto this paper clay filigree 
I love the way it was depth it went into the grooves and stayed darker
I then stuck the quote onto it 


Added a few different flowers I think then end one is Prima and the other two are Little Birdie Crafts
You can see the paper clay leaves sticking out of the sides of the flowers  


The butterfly was a photo I found on the internet and just loved it I printed it out then fussy cut around all the white it had
I folded the wings up so it looks like it was flying


I then glued the butterfly to a metal ring that has flowers all the way around


I love this flower from Little Birdie with the Smile cabochon in the middle so I made the butterfly fly to that and used some metal leaves off to the side


Thank you for visiting and I hope you come back soon x

Monday, 8 October 2018

I am Me by Suzanne Franin

Hey Everyone Suzanne here

This project for Colour Blast was made for a new friend for a reminder of where she has come from and where she has been in her life 

Make sure you visit the rest of the blog and discover what fabulous creations have been made here lately 


So I started of by painting everything with the Colour Blast White Gesso to give everything a nice even surface to work on
I then mixed in some Colour Mica Powder Espresso with some clear gesso too make a nice shimmery colour for the frame and some of the embellishments 
It's a shame the camera doesn't pick up the shimmer
Tip - Make sure to put the powder in first that way you won't get the dust floating up as you mix it together


Then on a few of my embellishments that I used the Colour Mica powder mix on I added Colour Embossing Powders - Bling and Sienna just a little sprinkle on them for some contrast


On the Memory Maze Ladies form with decorative wings I added the Bling so it would stand out and then used some Colour Artist Ink in Slipper which I also added to a few of the other embellishments to brighten up the piece


On the background of the frame I glued some material using the Helmar Super-Tac Glue it's a good strong glue and keeps things in place for ever 
I then too some Colour Artist Inks in Soot and Rust and added them to the background spraying water as I went until I was happy with the colours


Then the fun begins arranging everything I placed a sheer piece of fabric in the back under all the flowers to soften things 
I thought I'd use yellow flowers as it's such a happy colour and the quote is quite heavy and deep and then the little pink paper clay embellishments scattered I think add a bit of fun 


Thank you for visiting and I hope you will come back soon x


Monday, 24 September 2018

Beautiful Moment by Suzanne Franin

Hey Everyone Suzanne here

This picture is of my daughter Natalii and her Godmother Kathy at her wedding it's such a beautiful photo of the two of them 
I made this as a gift for Kathy that's the reason for the colour 
She has copper in her kitchen and family room area and I love the colour so that helps

Make sure you check out the rest of the Blog and check out the creativity of the other Design Team members 
You can also type in one of the products you're interested in and all the projects that have used that product will come up so you will have lots of ideas to look at 

Colour Blast have Sienna in a few of their products including - Colour Paste, Colour Embossing Powder, Colour Shimmer Spray and the Colour Shimmer Cubes when they were available (hopefully they will be back again one day soon)


I happen to have the Sienna Colour Shimmer Cube
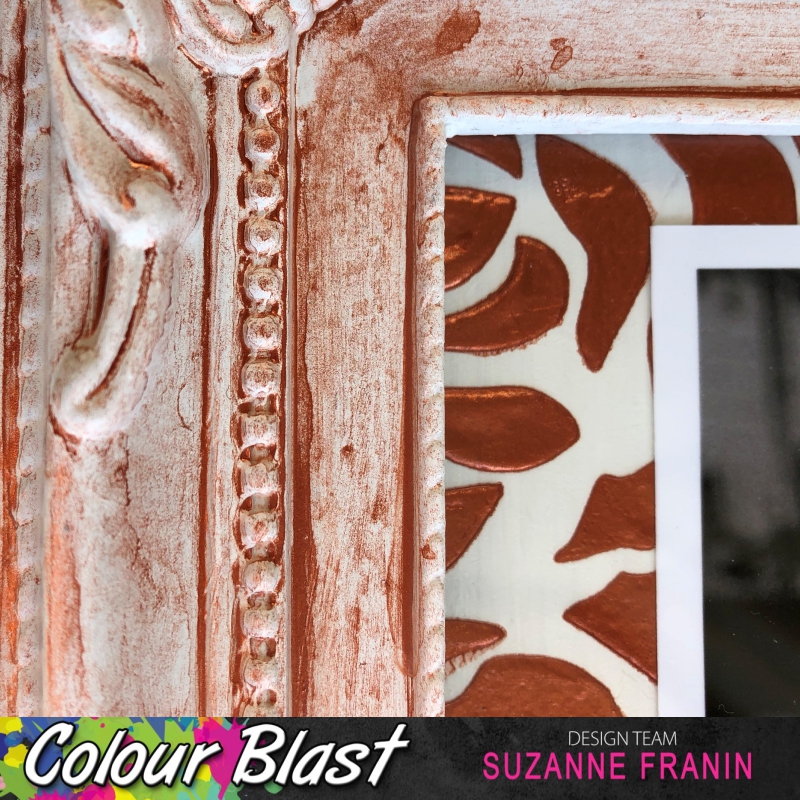
So I made it into a spray in my little water bottle and sprayed the frame randomly until I was happy with the effect and the amount of colour on it
I love how it's gone into the grooves of the frame and how much of a shimmer it has 
You will get the same shimmer with the Sienna Colour Shimmer Spray (I just don't have that yet) 


I used one of the new stencils with the Sienna Colour Paste in the top corner just for a bit of texture (and I really love how shimmery it is)


Then on a paper clay key hole I added some Sienna Colour Embossing Powder 
The powder didn't really like the clay, so it didn't come out as smooth as it normally does but I still like the texture and love the colour


I  painted on some embossing ink on to the top of the flowers with a brush and then dipped them in the Sienna Colour Embossing Powder


To give some added texture and interest to the flowers instead of just plain white ones


Well that's it from me I hope you liked this project and love the Sienna like I do 

Thank you for visiting and I hope you will come back soon x


Monday, 10 September 2018

Trust by Suzanne Franin


Hey Everyone Suzanne here

My project was a gift for a friends birthday and this quote is perfect for her
I didn't want to do to much to the frame so I kept it simple and let the photo stand out


I used Colour Mica Powder Espresso with water over the frame 


Then went outside and sprayed a good coat of the Helmar Crystal Kote Fixative It's fantastic to stop the Colour Mica Powders from coming off without having to use it with another type of medium and this way you don't loose the gorgeous shimmer


On the background of the frame it had a fabulous texture so I used Some Colour Paste Blush just with a palette knife 
I didn't want it too thick so you can still see the texture
The Colour Paste Blush is so pretty


I had this flower in my stash (well I have lots of them) and it went perfect with everything 
I wanted to put it on the corner of the frame so I added a couple of piece of cardboard to the back of it


As you can see it needed the two pieces for the height


Then I ran some pearls through some glue to lay over the frame


I had some plain white leaves and wanted to add a bit of sparkle to it so I used some embossing liquid on the edges of the leaf then dipped it into the Colour Embossing Powder Snow White then heated it with my heat gun till it melted 
I had lots of sparkle everywhere but my leaf looked so pretty and added the pop of sparkle it needed on the frame


Here you can see the difference between the leaves


Well I hope you enjoyed my project


Thank you for visiting and I hope you will be back soon x

Wednesday, 28 September 2016

Altered Frame by Tina Connolly

Hi everyone, I thought I'd share my altered frame with you today.  Now unfortunately my computer died so I lost all my progress shots, so I'll just describe what I did.  

I found an old frame and sanded it slightly.  I collected lots of charms, chipboard pieces, broken jewelley, old paint brushes, diecuts, and other found items, which I adhered to the frame using heavy gel medium.  I allowed it to dry completely before covering everything with black Gesso.  

I coloured the frame using Just Blue, Stormy Weather and Deep Water Colour Pastes.


White flowers were sprayed with Deep Water Colour Shimmer Spray and then smeared with Colour Paste and attached to the frame.  The raised edges of the diecuts and metal charms were highlighted using Bling Colour Paste.  Using a lighter colour on the high points creates the illusion of greater depth.


More diecuts were heat embossed using Deep Water Colour  Embossing Powder, then attached using heavy gel medium.


Thanks for visiting today, I hope I've inspired you to get creative.
Happy scrapping,
Tina xx