Showing posts with label boy. Show all posts

Tuesday, 19 February 2019

Sunkissed Summer Days by Kristy Abela

Hi everybody. 
I had so much fun with the pink grunge that I tried to do something similar, with a twist. I love this one as it has a real comic book feel to it, check it out! Lots of watery effects and Black & White + One.

 Here is the full layout!

To start with I used a large stamp and stamped half the page filling in gaps and using the part of the stamp that appealed to me the most. Those eyes!! I'm in love...  Make sure you use Archival ink for this step. If you don't you will have colour runs later. 

I had a stamping fail the first time I tried to create the background! As it goes in Mixed Media though... There are no mistakes, only Opportunities! Ephemera, I hear you say.. stay tuned!


Time for some colouring in!! I grabbed a handful of blues and greens. In the end I felt that the Green wasn't the look for this page and in settled on Colour Artist Inks - Calypso and  Colour Shimmer Dust in Peacock, Cobalt, Duke and Midnight. 
TIP: I made some misters - so much easier for me when working on my Glass craft mat.

 
Using Colour Blast Heavy Gesso in Black I coloured in some of my favorite Dusty Attic Chipboard!! 

TIP: Use a makeup sponge.. Perfect application!
 For the final product I used a little bit of Wax to highlight them. I wanted to keep the background neutral so it would give the Colour Blast Colour Shimmer Paste the focus... You will see that coming up.


I used three different shades of Colour Paste. I put Stormy Weather and Steel side by side on my palette to create some colour variation in the bricks. I used Colour Paste Dusty Charcoal for the numbers. 
I used a graduated hand when applying through my stencil for variation.
I love the way that the stamping came through in some areas.


Look at how cool this turned out!!
I added some extra stamping in an script and some checkers to bring the brickwork closer to the action. 
You can see that in the final image.


And what project is complete without Splatters!! I added some in an earthy tone. We were saturated with Blues and Blacks. I used my Colour Blast Colour Spray in Coffee.


 Here is a close up of the final layout with all the elements blended together. I used a pigment pen to highlight some of the features in the ephemera I created and DONE!!
 

Make sure that you check out the new release collection from Michelle Grant if you are a Grunge Fan!! 
Her February release is AMAZING!! Graffiti Grunge. 
If i have inspired you pop your project onto Facebook!  
Abela Artistry

Wednesday, 31 October 2018

Hey Pumpkin! Layout By Chrissi M

Hello Lovely's!
So I thought, being today is Oct 31st, I'd share a Halloween Layout with you. Now in Aus, Halloween isn't a big thing in a lot of areas, but we are lucky in our estate. Lots of costumes and lots of trick or treating in a safe place. Im lucky, when I noticed the date of my next post, I had just taken this awesome photo of my boys. There was a photo setup at our local shopping center and they couldn't wait to have their picture taken. So this is literally the most RECENT picture I have documented lol.
So I printed my photo, and got out my card stock. I had originally intended to just use white card stock, but I didn't want this layout to be like all my other mixed media layouts. I'm trying to mix up my mixed media lol. So I decided to use black and have the white as a focal point/mat behind my photo- with lots of Colour Blast Artist Inks. The bright Artist inks would pop beautifully off the black.


The colours I'm using are, Barley, Berry, Sunburnt and Soot. Quite halloweeny I think. I'm also starting with a wet page- wet on wet helps it to move freely and bleed together. So I have spritzed my page with water and then added drops my of colours straight to the page. I started with Barley and Sunburnt first.
After adding my colours, I spritzed with more water and than just moved my page around to move the ink. It gives a very free flowing, watercolour type of look. I kept adding more colour untill I was happy with the saturation.
Then it was time to add some of my darker colours. I added Soot Colour Artist Ink to my border- again, making sure I had some water down first so it would bleed and flow, and then to help the Soot blend into the Barley and Sunburnt, I added a few small spots of Berry to act as a transitional colour. Then I used the drooper from the Soot Artist Ink to throw some splatters on the page.

This is where my page took a turn, that at first I was not happy with. You may have heard me say that all art journal pieces go through a "Hot Mess" stage. A stage where it looks like, a hot mess lol. I felt that this layout did the same thing. The more I added, the more  I was unhappy lol. So I walked away and left it for the night, and came back to it this morning. When I came back to it, I was alot happier with it, and it just flowed together. It was a lot rougher, and 'Hot Messy' than I originally was going for, but than I realised it was a Halloween layout, and I could totally work with Hot Mess.
I wanted to add some texture to my background, so I got out my Colour Blast Colour Paste in Dusty Charcoal and one of the fabulous Colour Blast Stencils. This one came in my August Colour Blast Kit Club Kit. This is the A4 size 'That Way' Stencil designed by the lovely Michelle Grant exclusively for Colour Blast, and is available in the Colour Blast Store.
I'm using the Dusty Charcoal Colour Paste to add some stars to my background. I like that it is a subtle pop of texture, as you can see on the final piece, they aren't overly noticeable in the Charcoal colour. Take note, the colour of these pastes in the tub IS NOT the colour they will dry. I highly recommend swatching these out before using them. The colours are so vibrant and shimmery when dry and you will be surprised by the difference. 
To  finish off my layout, I matted my photo on some pattern paper from a Halloween collection, added cheesecloth behind it to add to the texture and feel of the layout, than added a few bits and pieces around. My background was my main focus for this page, and what I wanted to stand out the most, so my embellishing was pretty minimal. In the end, despite not liking where it was going to begin with, i love how this turned out. I feel like my background really did turn out perfect for this layout.

I hope you enjoyed my layout. Stop by soon for more awesome inspiration from the fab DT.
Chrissi xxx


Wednesday, 24 October 2018

"Happy Days" layout + process video by Sue Plumb


Hi everyone!
Sue Plumb here to share my latest design team project with you. Today I have a mixed media scrapbook layout that I created using Colour Artist Inks; Colour Paste; and a Colour Shimmer Brush Marker.


To create my page, I applied drops of Colour Artist Inks in Oasis, Calypso, Mermaid and Marine directly to my messy mat using the dropper. I then placed my cardstock on top to soak up the ink. I also added some splatters using a small brush.


Once I had the ink down on the background, I used 'Singin' the Blues' Colour Paste through a stencil in a few areas to add some subtle texture.


Next, I added some papery layers behind my photo. I used up some old Echo Park papers from my stash, along with some frayed gauze for texture. I also used some of the coordinating Echo Park stickers, and some puffy stickers from Cocoa Vanilla Studio.


Alongside my photo I added a Charms Creations heart embellishment, topped with a Cocoa Vanilla Studio flair button. I also added a couple of Cocoa Vanilla resin hearts to my page.
For my title, I used a Kinder Kreations wood veneer, which I coloured by painting it with 'Marine' Colour Artist Ink.


I used a fine tipped white paint pen to add some details to the title, before adding some shimmer with a Clear Colour Shimmer Brush Marker.


To finish off my page I added some final splatters using 'Marine' Colour Artist Ink and a small, stiff brush.

If you would like to see exactly how I put this page together, you can watch my process video on the Colour Blast YouTube channel here:


Until next time, happy scrapping!


Wednesday, 18 July 2018

" Awesome Adventure" by Sue Plumb


Hi everyone!
Sue Plumb here today to share my latest design team project with you. The mixed media scrapbook layout I created uses not only Colour Blast mediums, but also some of the brand new release products designed by Michelle Grant exclusively for Colour Blast - including stamps, stencils and metal dies. I also used items from the 'Boys Rule' collection from Cocoa Vanilla Studio.


I started this page with a sheet of Cocoa Vanilla patterned paper as my base; then mixed up some 'Duke' Colour Shimmer Dust with a little water and used a wide brush to apply it to my page. I also used a small, stiff bristle brush to add some splatters around my page.


Once the background was dry, I reached for the brand new 'Going My Way' stamp set. I used the long, distressed edge style stamp from the set to add some horizontal lines; then stamped some various sized stars around my page using Staz On ink.


After that, it was time to add a little texture to my layout. I used the new 'This Way' stencil and 'Deep Water' Colour Paste. I applied the paste by positioning my stencil, then used some washi tape to hold it in place while spreading the paste with a thin palette knife. I then removed the stencil and dried the paste off with a heat gun.


It was then time to start adding some papery layers. I used the new 'Going My Way' and 'Going My Way Frame' metal dies to cut some pieces from patterned paper, which I layered with some paper under and around my photos, along with some frayed gauze. (I was very impressed with how well these dies cut in my Big Shot, even the intricate parts cut beautifully.)


I then added my embellishments to my page. I used three die cut stars I had cut; along with some stickers, chipboard and die cut pieces from the 'Boys Rule' collection. I also added a Charms Creations star and layered a flair button over the top.
To finish my page, I added some splatters of 'Soot' Colour Artist Ink.


Here's a closer look at the finished page. 


I love how much depth the page has when you can clearly see the layers - Colour Shimmer Dust; stamping; stencilled Colour Paste; splattered ink; paper; and finally, embellishments.


I added the date and my handwritten journalling in the bottom corner of the page.


A couple of Cocoa Vanilla phrase stickers to the left of the photos.


Thanks for stopping by today so I could share this with you. I had so much fun creating this page with the new products designed by Michelle Grant. These are available to order in the Colour Blast store now, so make sure you check them out.
Until next time, happy scrapping!


Friday, 25 May 2018

"Smile" by Sue Plumb


Hi everyone!
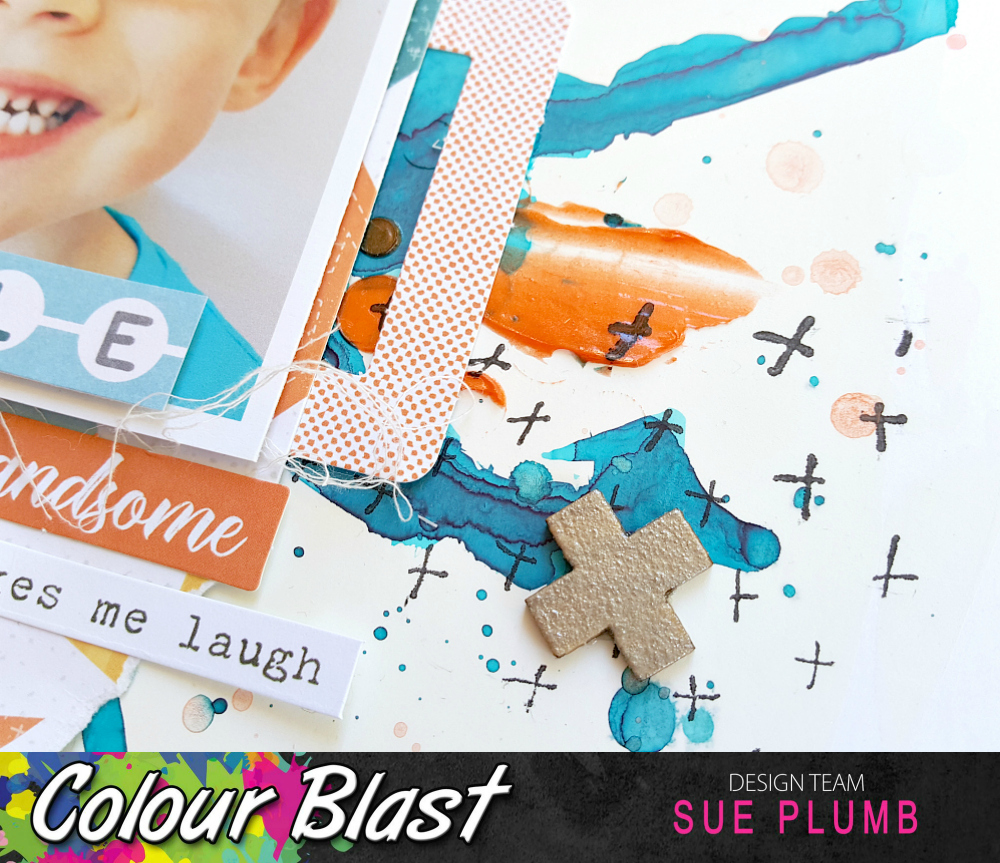
Sue Plumb here today with my latest design team project for you. Today I have a mixed media scrapbook layout to share that features Colour Artist Inks, Colour Paste, Colour Shimmer Spray and Colour Embossing Powder. I created this page to document when one of my boys lost his first tooth.


To create my page, I started by prepping my cardstock with some white heavy gesso, so that I could move the inks around when I applied them. 

I then applied some 'Oasis' Colour Artist Ink using a brush to spread it around; then tilted my page in different directions to get the ink to run. I also used the excess ink on my brush to add some splatters, before drying it off with a heat gun. I then repeated the process using 'Marine' Colour Artist Ink, layering it over the top of the 'Oasis'. Again I dried with a heat gun, as I wanted the look of the water lines.


The next step in my process was to add some texture using Colour Paste and a Flutterby Designs stencil. I used 'Tangareen Dream' Colour Paste, as this provided a complimentary colour contrast to the blue inks I had used. Once I had applied the paste, I used a heat gun to dry it off.


At this point I decided my page didn't have quite enough splatters, so I used 'Tangareen Dream' Colour Shimmer Spray to add some more. (I simply took the nozzle out of the bottle and flicked it about.)

After I had added the extra splatters, it was time to add some extra depth to my page with some stamping. I used a couple of stamps from Viva Las VegaStamps, which I stamped directly over the top of my dry paste. (You can see how well it works if you ensure the paste is completely dry.)


With my background complete, I set my page aside and turned my attention to my embellishments. I had some wood veneer pieces from Cocoa Vanilla Studio that I wanted to use, and I altered them using Colour Embossing Powder. I chose 'Steel' as it gives a great chrome-like appearance and is a good choice for boy pages.


With my embellishments prepared, it was now time to add some papery layers to my page. I used Cocoa Vanilla Studio papers and die cuts to create a layered mat for my photo.


I then added some frayed gauze before placing my photo on top; before sticking my title piece directly onto my photo using foam tape. Then it was simply a matter of adding my embellishments and some extra stamping around my page to finish it off. 


The small phrase stickers I used were also from Cocoa Vanilla Studio.


The fabulous heart embellishment I used to layer under my embossed arrow was from Charms Creations.


Thanks for stopping by today so I could share this with you. I hope I have inspired you to pull out some of your Colour Blast products and get messy too!
Until next time, happy scrapping!