Showing posts with label Memories Red Rubber Stamp Set. Show all posts

Saturday, 27 August 2022

Sunshine Altered Hoop by Sunila Mahajan

 Hello Bee Arty Lovelies,

Hope you're all doing well! Sunila here, and today I'm sharing a pictorial on altering an embroidery hoop. 

I enjoy  mixed media because it opens up plenty of opportunities to play with. Layers, elements, textures all come together beautifully in a single piece. The altered hoop makes for a great home decor piece as well as a gift for someone special.  

Here's a look at the hoop:


Let's begin creating it!


Step 1- I've chosen the Bee The Sunshine Collection for my Hoop. Fussy cut elements, pick out papers for the base and to die cut some elements. Paint the rim of the hoop with Bling Colour Paste. 


Step 2- Die cut elements for the hoop. The round frame makes for a great shaker element. Die cut it several times, adhere together for a thicker layer. Cut a circle on a transparent sheet and white cardstock to back it up for the shaker. I've used a piece from the collection with the quote to back my shaker. 


Step 3: On the base paper, stencil with colour pastes. 


Step 4: Add black stamping on the dried stenciled base.


Step 5- Adhere the hoop onto the base paper. Stamp on the rim of the hoop.


Step 6-  Glue the fussy cut elements, the die cut pieces and the focal shaker element to complete the composition. 


Hope you enjoyed this creation!

Hugs,

Sunila


Supplies used:

Bee The Sunshine Collection

Colour Paste- Bling, Rosewood

Stencil- Stardust

Stamp- Memories

Die- String Leaves


Sunday, 10 April 2022

Everything is possible, tag by Sunila Mahajan

 Hello Lovelies,


Sunila here and I'm back with a quick pictorial for you all. Today I'm creating a mixed media style tag. 

This tag is a nature inspired one, and so my colour palette is yellow and shades of green.


Here's a look at the tag:


Step 1: Gesso a white tag


Step 2: Add texture paste through a stencil. Dry it. Place back the stencil and add colour blast powder and mist with water.


Step 3: Colour a few die cuts using inks and powders for layering.


Step 4: Add black stamping using background stamps.


Step 5: Layer all the elements- die cuts, thread, moulded elements and add a sentiment. 


Here's a look at a few close ups:


Supplies used:

Stencil- Laced

Die- Linked In,  Fine Feathers, Desire

Colour Blast Mica Powder- Sage, Sunshine, Olive Groove

Artist Colour ink- Citrus

Rubber Stamps- Memories


Hope you enjoyed this!

Hugs,

Sunila

Monday, 20 September 2021

Change is beautiful by Linda Pearson


Hi there Bee Arters!  For this entry I have included lots of die cut elements along with a beautiful butterfly embossed image that glistens from the amazing Colour Blast inks and mica powders.  Unfortunately photos don't show just how gorgeous these products can look.  I hope you give the Bee Arty Mica Powders a try, they are a very versatile product.

White Cardstock 350gsm
Gesso
Craft Powder Spoon
Archival Ink Pad Jet Black
Versamark Stamp pad translucent
Colour artist inks
Mica powder –
Serendipity clear stamp set
Flowers Metal Die
Frame Metal Die
black and white stripe paper (offcut strips)  – Electric Dreams Mini Collection designed by Tanya Froud and Elisa Ablett
Butterfly Effect metal die
Memories red rubber stamp set - Love and Grace designed by Michelle Grant Designs
 
Black and white paint pens
Black Archival Ink Pad
Paint colours used: Dina Wakely Carnation, Ocean, Lemon, Lime and black
Black cardstock


Gesso, White - cover journal page with 2 coats of gesso.  N.B. the colour on this page is left over paint from another page.  Dry off.


Roughly and loosely draw out ‘cross like’ lines with small amounts of paint (pink and blue) and small paint brush.  Could add some white to add more depth of colour. 

Add organic lines using small amounts of black paint and credit card or palette knife through the paint.  Add some black ‘splotches’ on several spots on the cross and to top and bottom edges with a small brush (loose strokes). Add some watery paint (Lime and Lemon) loosely along the painted areas.  Dry off.

Using the Memories red rubber stamp set and black archival ink stamp randomly around the painted sections, leaving as much white space as possible.

Add splatters of purple paint, lime and lemon.


Tear small strips of black and white stripe paper, then adhere small strips along the painted cross sections across the page.  Dry off.


Close up images showing detailing of the painted sections and stamping.  With a white paint pen add dots to the black ‘splotches’ of paint and blending in with the paper off cuts.


In a paint well add the Colour artist inks (Grass and Citrus), add a couple of scoops of (cool mint and sunshine) Mica powder  mix thoroughly.  

Emboss (Versamark Stamp pad translucent) the butterfly (Serendipity clear stamp set) onto White Cardstock 350gsm, sprinkle Royalty Embossing powder then set with heat gun. 

Use a small paint brush to carefully add the two artist ink mixes to colour the butterfly.


Spread left over Colour artist inks a sheet of White Cardstock 350gsm.  Drip some of the green ink on the page.   Allow to dry.

Prepare the elements for detailing page. 

Run the coloured cardstock through a die cut machine cutting several shapes (Butterfly Effect metal die.

Run the (Flowers Metal Die and Frame Metal Die).

Add some detailing to the leaves, butterflies and flowers with coloured paint pen.


Adhere all the elements to the page, draw a border around the edge of the page to complete.

I hope you find some inspiration from this journal page and look forward to another blog soon.  Add the sentiment to the page with black paint pen.


Cheers from Linda Pearson

linda@yourcreativepalette.com.au


Sunday, 21 March 2021

Be Fearless- Art Journal Page by Aditi Mahajan

 Hello,

My name is Aditi, and I live in India. This is my first post, as a creative team member of Bee Arty! I specialise in mixed media and I enjoy making video tutorials! I'm looking forward to inspiring you'll with my style of art. 


Today I decided to create a mixed media art journal page. Journaling to me is pure play and relaxation. It also gives me the freedom to try out any new product. 


Here's a look at the page


I've used a Jane Davenport Journal here. I did not prime my page because I wanted to experiment with the Colour Blast Mica Powders. So I misted my page with water and sprinkled Sunshine, Sage and Polar.
I let the water mister do the trick without using a paintbrush. I love the effect and the shimmer of the powders. 


Next, I used the Script rubber stamp and randomly stamped it with black ink. I then used the honey comb stamp and stamped it using the same colour on the background randomly.


Next, I used the Colour Blast Colour Paste Cool Mint through a stencil to add vibrance and texture onto my page.


With my background ready, I now needed some elements to create a focal point. I decided to use the die cuts and coloured them with the same mica powders. I adhered them onto my page using foam tape for dimension. I also added some sequins. To complete it, I cut out a word from the Fearless, Free & Brave Collection and adhered it to the page.


Here are a few close ups of the completed page


Supplies used:

Colour Blast Metal Dies- Bird Talk and Butterfly Effect

Hope you've enjoyed this creation!
Happy Crafting!


Wednesday, 25 November 2020

Inhale Confidence Exhale Doubt by Ros Aggett-Madley

Hi, back with another art journal page.


Today I have used the Kind Heart Stamp for the focal point of my page.
I first stamped this, then sprayed over a light cover of water.  
Colour Artist Ink in Calypso, Lime, Mermaid and Citrus, and Bubblegum Colour Spray has been dropped into the water.  I let this pool for a bit and then mopped up the excess with paper towel.


After heat drying I went around the outline of the stamp with a black pen and added white to some of the gaps in the stamp.
A mask has been made with some paper towel to allow some stamping with the text from the Memories Stamp Set.  I filled in any missed gaps with some messy writing.


The title is from a Scrap FX rice paper sheet.


Hope you've all been inspired 💙


Friday, 5 June 2020

Mix Match by Tracey Campbell

Hello and welcome, it is my turn on the blog today and I am sharing a layout I created by mixing and matching a few of the Bee Arty ranges together. For this layout there is a lot of controlled tearing, this means to tear images from a range of patterned papers, do it slowly so you don’t accidentally tear the image. If you do have a mishap just stop tearing and try and tear around it – it can be glued back together when you adhere the image to the background paper
From Effie pattern paper in the Love and Grace range, tear out the foliage images.
Control tear around the flowers, twigs and bee images from the Portia pattern paper in Love and Grace range.
Tear around the flowers and leaves from the Heart cut apart sheet in the Love and Grace range.
Adhere with glue the foliage, bees and flowers to Muse pattern paper from the Arty Farty Range, roughly in this formation.
This is the arrangement I did when I glued them down onto the base page.
Once the glue is dry use a sand block or a fine grain piece of sand paper and sand the edges of where the torn paper meets the base pattern paper.
Using the Heavy White Gesso dry brush over the paper. For the newbies, dry brushing is when you use a dry brush and only lightly dip the top of the bristles into the Gesso and apply a little bit at a time to giving you many streaks, an opaque look and texture to the page.
This is how my final white dry brushing turned out.
Next add colour back to the page by continuing to dry brush, I have added three different colours, the next three photos show what colours and how I made them. Mix Saffron Colour Spray with Heavy White Gesso and then dry brush it onto the background in random areas. Tip: Mixing the Colour Blast Colours with Heavy White Gesso dilutes them down.
Mix Duke Colour Shimmer Dust with Heavy White Gesso and then dry brush it onto the background in roughly the same areas as the diluted Saffron, but do not completly cover all of the Saffron colour you want all three colours to be seen.
Mix Olive Green Colour Mica Powder with Heavy White Gesso then dry brush onto the background. This will give nice shimmery look to your base. Apply randomly over the base paper.
While the Heavy White Gesso is still wet place the Laced stencil over it and wipe off the coloured gesso with a baby wipe. Move the stencil around on the page to take off more gesso in random areas.
This is a photo of how it looks once the gesso is wiped off.
Using Script stamp from the Memories stamp set and some brown ink randomly stamp the script image over the page.
Next use the Magic stamp and some red ink stamp the image onto the background, in the rough area where you will place the photo. HINT: Don’t ink all of the image and use your fingers to randomly press down the stamp, this creates a more ad-hoc image and not a full stamped image.
Add some stamped foliage on the page by using the leaves stamp from the Floral Delights 1 stamp set and some blue ink. Set aside to dry.
Once the ink is dry use the packaging technique to add some Coffee Colour Spray to the back ground. For newbies the packaging technique is when you take some plastic (from old packaging) and spay some colour spray onto it and press it down over the paper – it creates random splotches of colour.
Here is how my background is looking at this stage. You can see the placement of the stamps and Colour Spray.
Mat a 6x4 inch landscape photo with Beloved patterned paper from Vampyre Rose range with a 5ml boarder. Distress the edge with a paper distressing tool or a sharp pair of scissors. Next double mat the photo with white wood look from the Elmore patterned paper in the Love and Grace range, distress the edges.
 
 Add splatters to the background with the straw from the Coffee Colour Spray.
Add the title by using the Live Life stencil from the Love and Grace range and spread through Leather Colour Paste with a palette knife. Repeat this so that you have three titles running down the page. See final image for the positioning.
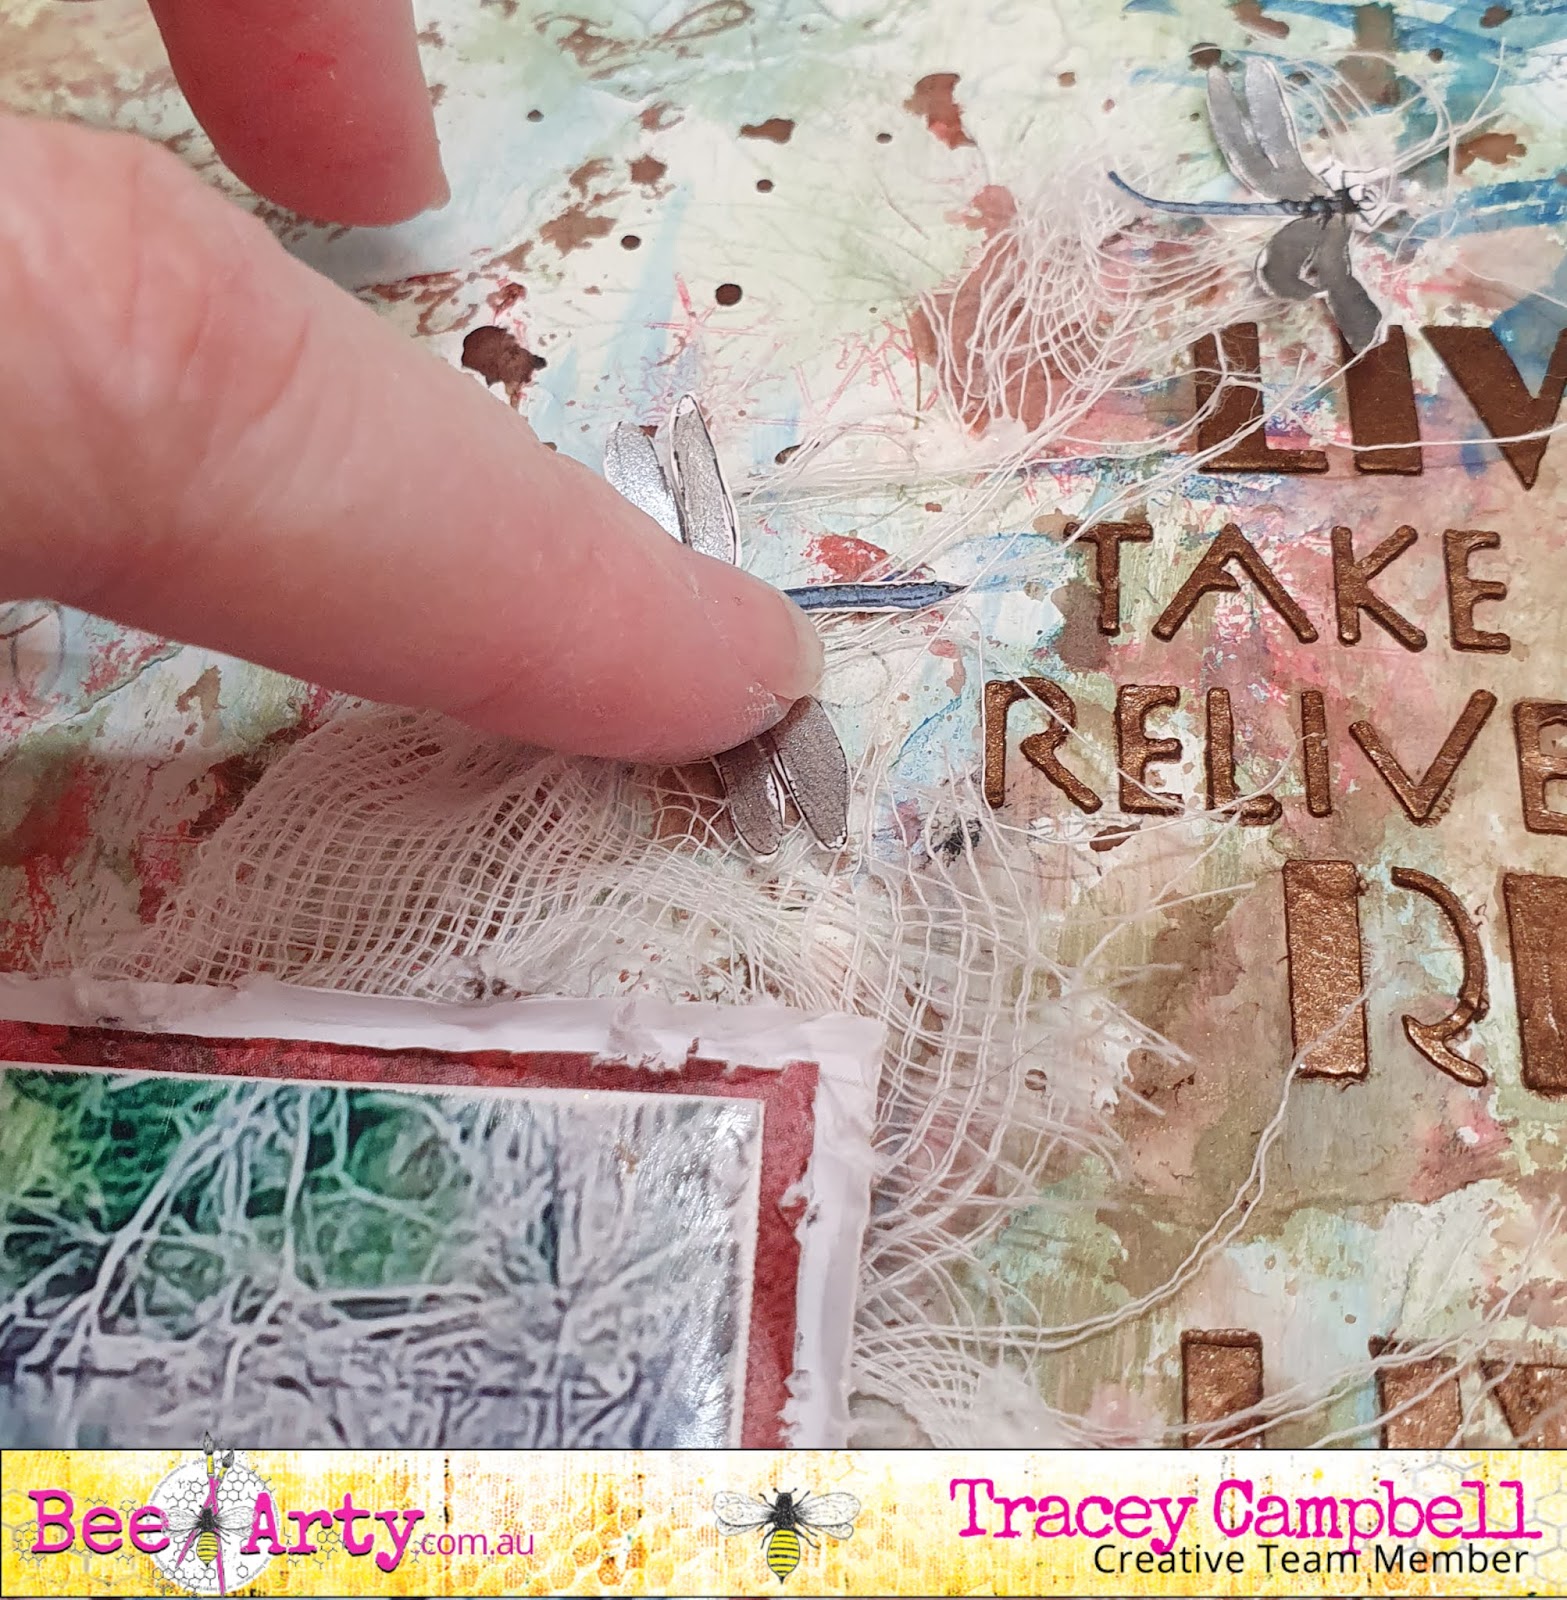
Using the Ultramarine Watercolour from the Colour Blast Pan Watercolour set from the Inspired collection, the Steel Shimmer Pot Watercolour and a water brush  paint the five dragonflies on the Bliss cut a part sheet from Life's a Beach range. Once dry fussy cut them out.
Use your finger to spread a layer of Leather Colour Shimmer Spray on to the journalling spot from the Bliss cut apart sheet from the Life's a Beach range. Tip: I used my finger as it give it a light layer and it speeds up the drying process. Once dry fussy cut out the shape and use a black marker to write some journalling about your photo.
Adhere the mated photo to the background, see final layout for the positioning. Adhere some gauze at the top right and bottom left of the photos. Adhere the journalling spot over the gauze positioned under the bottom left hand side of the photo. Glue the dragonflies on and for the final touch add some green bling  diagonally across the page, running from top right to bottom left.Tip: Placing photos and embellishment on your layout in diagonals helps to create movement as you eye moved over the flow of the layout.
Hopefully I have inspired you to pull out some unused papers from any range that you have left and look at how you can change them slightly and use up your stash. 

Take care and keep scrapping.