Friday, 30 November 2018

Love by Ros Madley

Hello everyone am back again with another layout to share.


For my page I started by mixing some Colour Shimmer Dust in Peacock with some modelling paste.

I've used an old plastic card to scrape this though a stencil.  Just underneath the pattern I have made some lines of coloured paste with the edge of the same card and sat this aside to dry.


I have made a few mini tags by mixing some Colour Shimmer Dust in Paris with water and using this to paint a piece of manilla card.
The card has then been cut into 5 small tags, a hole punched and some twine added.


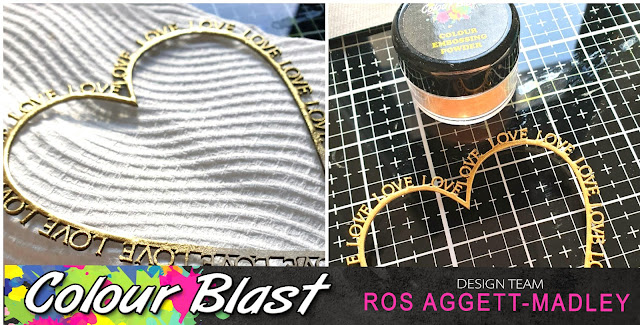
The chipboard heart that is in the centre of my page has been heat embossed with Colour Embossing Powder Bling. Again, like always, 3 layers of embossing powder to get a nice even coating.


I have used a Colour Gold Shimmer Brush Marker to make some gold splats on my layout.


Finished off with a few white flowers.


Hope you've been inspired.

Thursday, 29 November 2018

Let Your Dreams Take Flight by Suzy Loudon

Hello. Today's page I am dedicating my page to a friends very talented beautiful young daughter. She has won many first places in her young dance career.


To begin my layout I sprayed some white flowers with Punch & Bling Colour Shimmer Spray then left to dry.


While my Shimmer Spray was out I sprayed some lace with the Punch.


I embossed my title with Bling Embossing Powder. I did two coats to make it nice & thick.


My chipboards I started by painting with Heavy White Gesso.
I then embossed them with Bling Colour Embossing Powder. After heating it but before it set I quickly sprinkled Punch Colour Embossing Powder onto some areas. Then heat setting.


Here's a close up of my circle chipboards.


At this point I matted my photo with some paper & began assembling. I added some glitter & beads, some cheese cloth & flower stems for embellishments.
I then used the Clear Colour Shimmer Brush Marker on my white flowers.


I glued down some tiny chipboard letters before painting with my Gold Colour Shimmer Brush Marker.


And I was done.
Here's a few close ups.


Thanks for taking the time to look.
xxx Suzy


Wednesday, 28 November 2018

Magic Adventure Layout- Chrissi M


Hello Lovelies,
Welcome back to the blog. Today I really wanted to play with the gesso resist technique again. I have had this layout idea in my head ever since I saw these photos.

 I knew I wanted to use the star stencil from the August "Going my way" collection in my backround. I seem to have lost my photos of this step, but the technique is easy- you apply white gesso through your chosen stencil BEFORE applying your colour and let it dry.


Now time to add colour. I'm using Colour Shimmer dust in Duke. I sprinkled the powder directly onto my page and then sprayed with water. I love how they activate and flow.

Once I was happy with the coverage of my colour, I dried with my heat gun. As you can see, that gesso resists the colour and leaves a gorgeous pattern behind from the stencil.
Of course I had to add some splatters to the page. Good old Road Base colour spray for that as always.

Then it was time to add my photos. I had 3 photos I loved from this adventure, and I couldn't choose. So I decided to use all 3. Now multi photo layouts aren't usually my thing, but I made it work by making 2 of them smaller and fitting them all together. I added some cheese cloth behind my photos as a mat and to add texture, and I matted the whole layout on black cardstock for contrast.
For my title, I went with a thicker title, but I didn't like the white. It didnt pop enough. So I got out my Marine Artist Ink and added it to a spritzer bottle and coloured my title.
I added some Charms embellishments, I love that the stars were in 2 different sizes, and then added my journaling before calling it done. I love adding handwritten journaling to the white space on my layouts. I hope you enjoyed the layout, and got some ideas to try out in your own projects.
Chrissi xxx


Tuesday, 27 November 2018

Vision by Michelle Henderson

Hi Colour Blast fans!

I had fun making this really quick Art Journal page, using lots of Colour Blast Australia products...I find that when I get in a rut with scrapbooking, this always fires things up again 😀

Here's a sneaky wee pic


I had just received some awesome Visible Image stamps and stencils, and I couldn't wait to use them..so I started this page with one of the stencils, along with a couple of other ones I've had for a while.


I had already pre-gessoed my journal (which is an old reference book), and used the Tim Holtz stencils along with modelling paste around the edges of my page.


Once the paste was dry, I sprayed it with water, then started dropping little bits of Colour Shimmer Dust in Sunflower, Paris, Passion, Lush, Peacock, and Cobalt. It needed a little more water sprayed and I moved the page around to make it flow. My fave patch is where the Sunflower was next to Passion 😍


Once that part was dry, I used the Visible Image stencil and Colour Paste in Dusty Charcoal on the left hand page, then wiped it, flipped it and re-did it on the right hand page.


I was almost tempted to leave it at this...


But then I got out my White Heavy Gesso and double-coated inside the eyes.


And then I used Colour Artist Ink in Calypso and Marine for the irises.


I added some stamping, and some Shimmer Cube in Bling - but that wasn't enough, so I drybrushed some Colour Paste in Bling over the highlights too - look at that sparkle!!


Finally I added a quote from Pinterest that I love, and here's the finished page 😃


Thanks for visiting - I hope I've inspired you to go have a play 😀


Monday, 26 November 2018

"BFF Birthday Party" by Charmane Koch

Happy Monday Everyone!

Today I wanted to share with you this layout I have created using a "rainbow" of Colour Blast Colour Pastes with a splash of Gold using the Colour Shimmer Brush Gold Marker...


Firstly I used White Gesso and Circle Stencil. I then heat dried it with a heat gun.


Then with a spatula I scraped each colour one at a time from top to bottom of the page, cleaning the spatula between each colour...


While that is drying I coloured Wood veneer Hearts and chipboard words using the Colour Blast Gold Shimmer Brush Marker...


Once everything had dried I positioned all of the elements that I wanted on my page... I thought the Gold/Yellow was perfect contrast with the rest of the other rainbow colours. Then with the black title, splats and sequin star it really makes it all stand out!


Here are some closeups to show the Shine and Shimmer...


This page is definitely a "Colour Blast"! I love how it turned out, and hope that I've inspired you to get out the rainbow colours!

Thanks for popping by!

XO Charm


Thanks for popping by!

XO Charm