Showing posts with label foliage stencil. Show all posts

Monday, 28 March 2022

The flowers and the butterfly - natures true love affair… by Linda Pearson


For today's blog I let my imagination take me to a place of fantasy and beauty.  Using the Flux and Foliage stencils to create some fantasy flowers to attract its winged lover.  The Bee Arty stencils provide a wonderful avenue for challenging your creative mind to produce wonder journal pages or photo layouts.  Enjoy the process.


Colour Spray  – Bubblegum, Caribbean Colourblast colour sprays

Gesso – Bee Arty heavy primer 250ml  white

Flux A6 stencil

Cascading leaves A5 stencil

Butterfly A4 stencil

Sparkles 12”x12” cardstock paper (Fireworks collection)

Mica powder –  sunflower, cobalt, lollipop Colourblast mica powder

Catalyst silicone mini blades tool

Dina Wakley Acrylic paint - (Lemon, Orchid, Syrup, Green, Olive, White, Orchid, Magenta, Fuschia)

Modge Podge Dimensional Magic

Nuvo Crystal Drops white

Silver Rhinestones

Moulding Paste (texture paste)

Makeup sponges, Paint brushes,

Silicone Spreader Tool


Apply 2 coats of Gesso.  Dry off.


First background layer -  2-3 green colours into paste through the Cascading leaves A5 stencil over the entire page by tapping the paste with a silicone sponge.  Can add some white Gesso to lighten the green paint.


Second background layer – Apply a second spread of green colours through the   Cascading leaves A5 stencil – this time turn the stencil on angles over the entire page again.  Dry off.


Third background layer – For this layer apply Gesso through the Cascading leaves A5 stencil again changing the direction of the stencil to cover some of the gaps in the previous layers.  Dry off.


        Flowers – Create 3 flowers on left hand side of page. 

Using the Flux A6 stencil to create abstract flowers, mix quantities of  DW orchid (light shade), Magenta (medium shade) and Fushcia (dark shade) into the moulding paste.  Pounce the light shade through the stencil using a makeup sponge.  Repeat this process using the medium shade then the darker shade in turn to add depth to the petals.  Dry off between each pass.


Stamens – Mix some DW lemon paint into a small amount of moulding paste.  Swipe a good amount of paint through the berry shapes on the Foliage A4 stencil to resemble flower stamens.  Add one stamen to the centre of each flower.  Dry off.

Use a stipple brush to tap some textured lemon paste into the centre of each flower.


Add white dots around the stamens and on some of the petals using the Nuvo crystal drops.


Add silver rhinestones to the stamens and on some of the smaller petals using dimensional magic.  Use a paint pen to highlight around the textured shapes.


Add spatters of paint in DW fuschia and olive over the entire paint (not flowers).  Dry off.
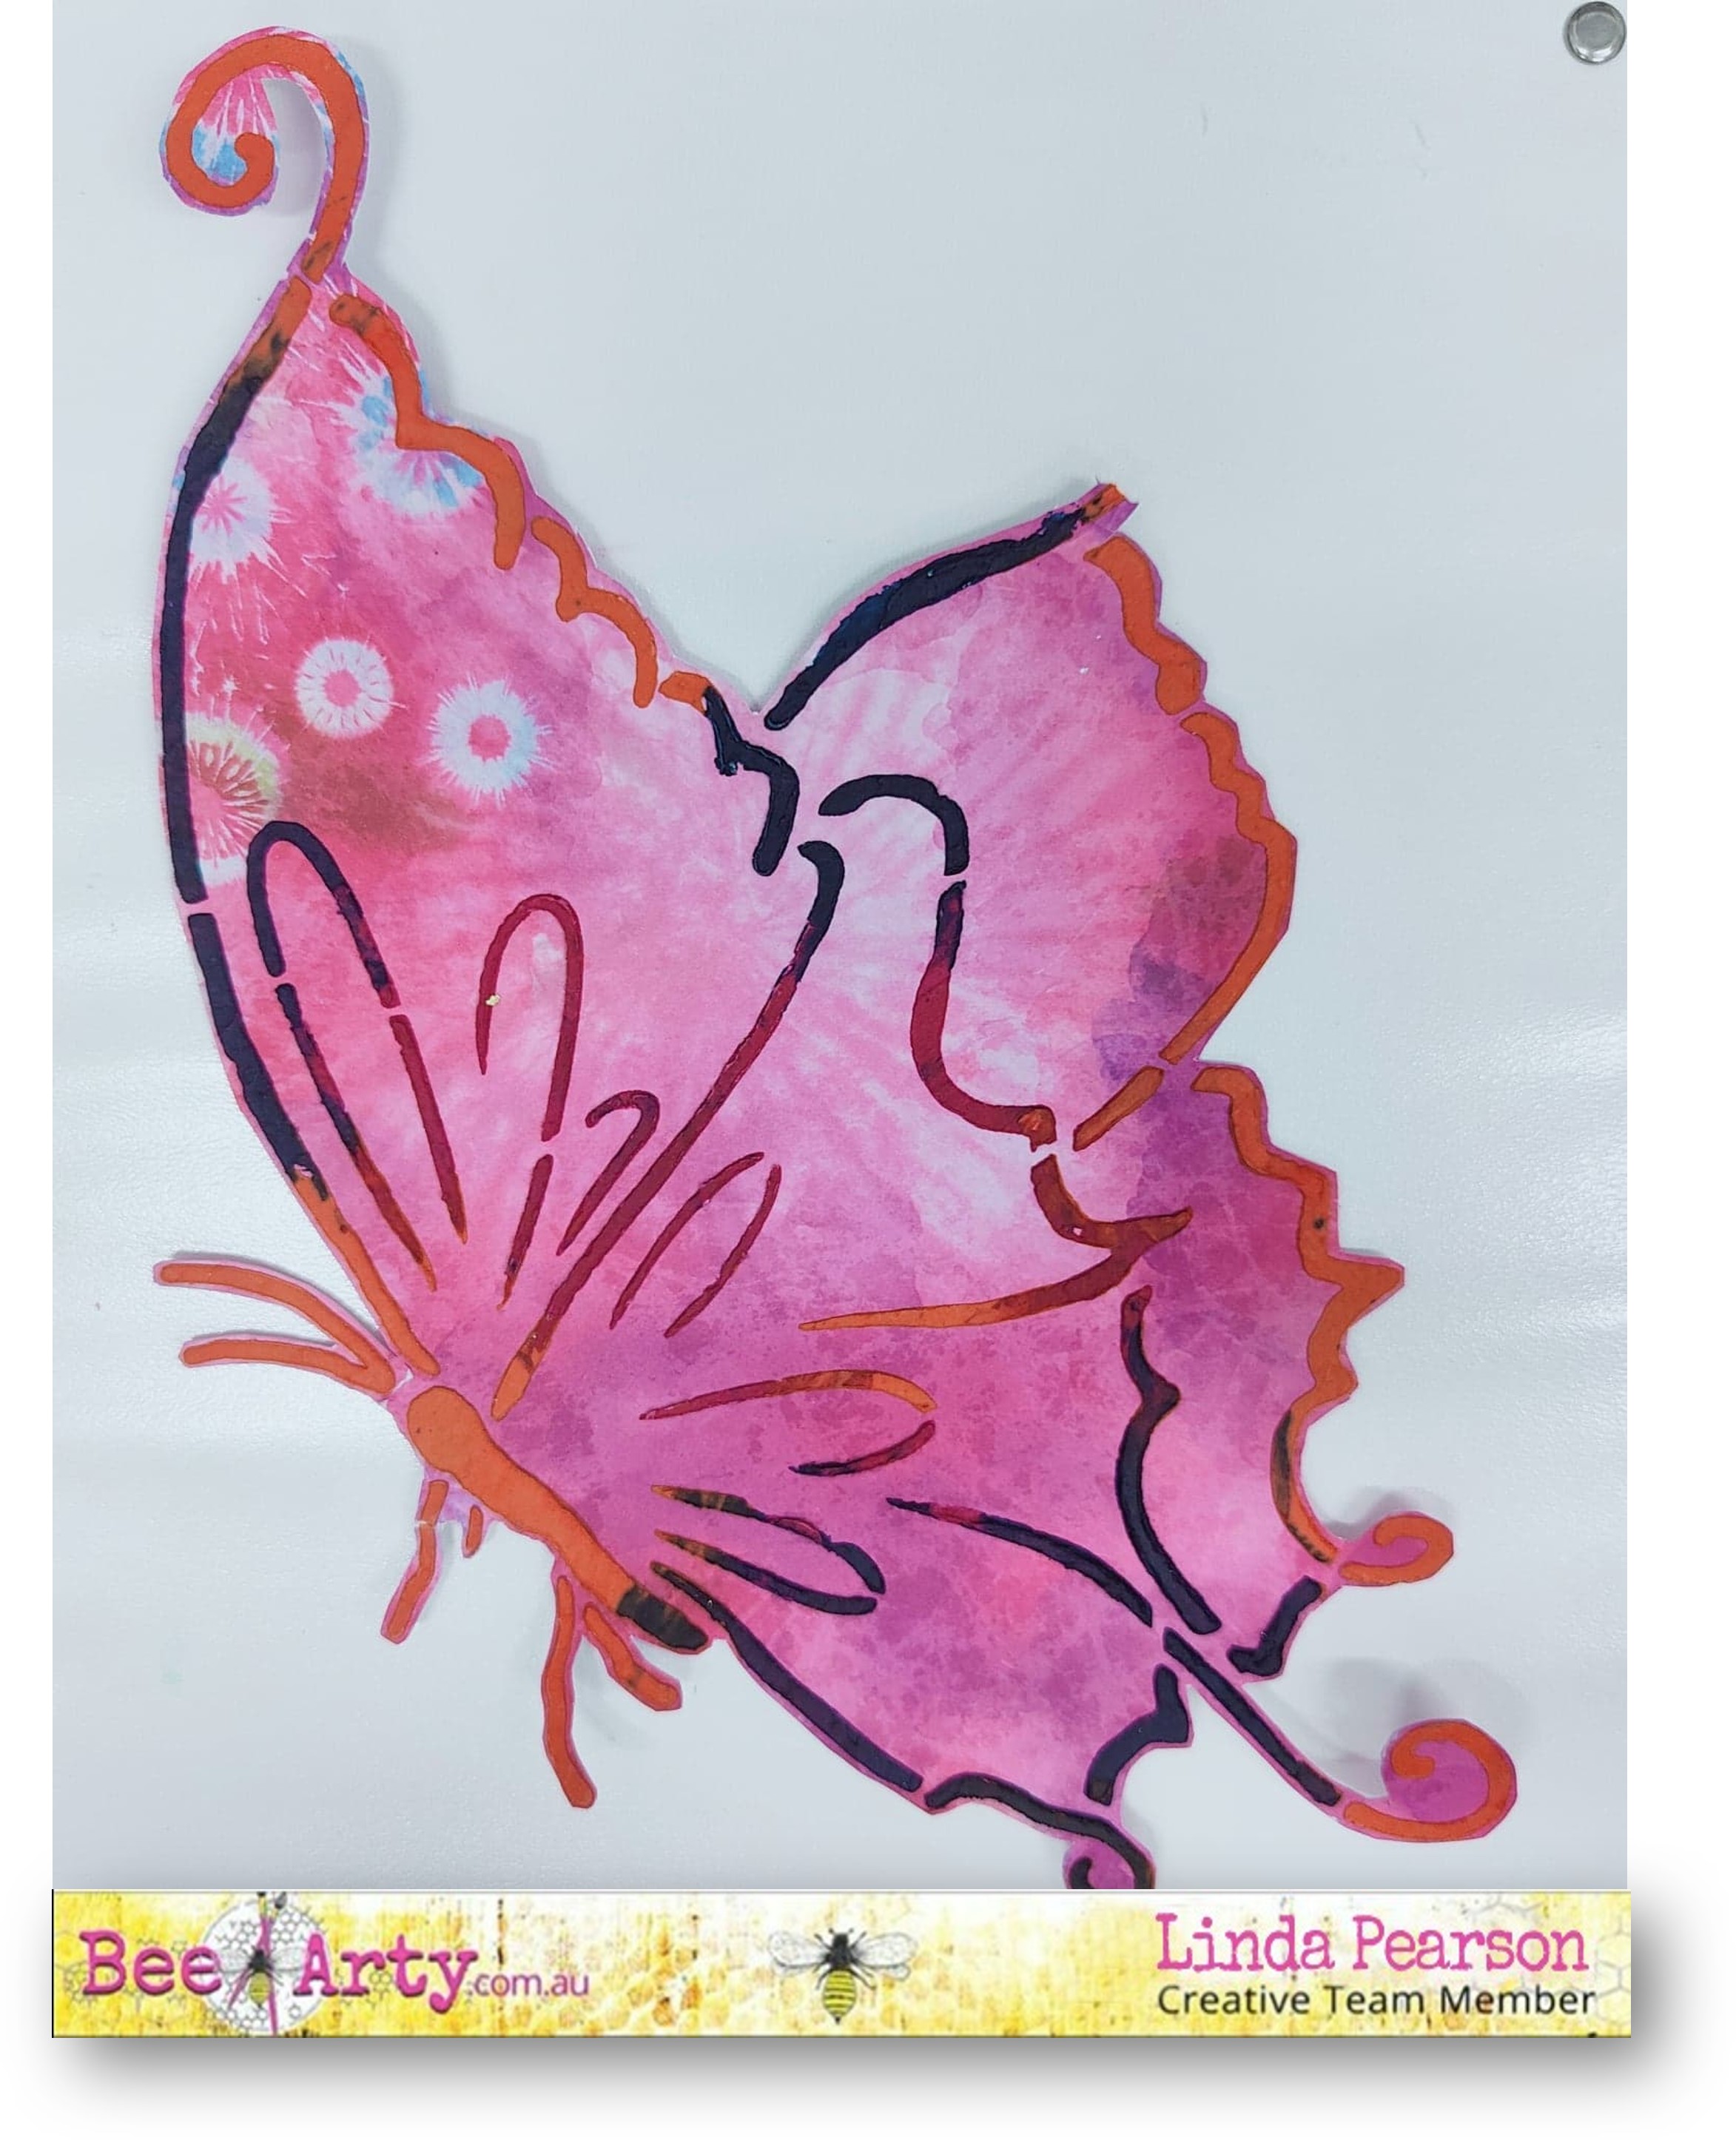


Butterfly – Use a sheet of Sparkles 12”x12” cardstock paper as a coloured base to add Butterfly A4 stencil. Mix small quantities of moulding paste, adding Mica powder –  sunflower, cobalt and lollipop.  Spread the 3 colours through the Butterfly A4 stencil.  Allow to dry. 

Spray some Colour Spray in bubblegum and Caribbean to the butterfly shape, spray with water to spread (Note:  some of the colour in the moulding paste outline will move also).  Cut out the shape from the paper when completely dry.


Add dimensional magic and silver rhinestones over the textured shape to add shine and dimension.


Adhere the butterfly to the right-hand side of the page using mounting tape. 

Add silver rhinestones to the butterfly with dimensional magic adhesive.

  Outline the butterfly with fine black paint pen.

Add the sentiment to the page and border to the page with paint pen.


Thank you for stopping by and hope this project has triggered your imagination to create your own fantasy page.

Bye for now from Linda

linda@yourcreativepalette.com.au


Saturday, 19 June 2021

The Frog Princess by Tracey Campbell

Hello everyone. Tracey Campbell here with you today with a fun layout using some of the awesome Find Paradise range designed by Fiona Paltridge. I have been struggling a bit trying to scrap this photo of my youngest daughter Paige dressed in a fairy outfit superimposed near this cute green tree frog, but couldn't find the perfect range until I got a hold of Find Paradise. So of course it was the very first layout I had to create with it.

For this layout I used the "B side" of the Entangled Pattern Paper, White Cardstock, Vellum, Foliage Stencil, Colour Paste in Apple of my Eye, Peach, Watermelon and Cool Mint, Unwind Stamp Set and Embossing Powder in Bling

Using the Foliage stencil, the Colour Pastes and a paint palette knife spread the colour paste through the stencil on to a piece of white cardstock. Note: as it is a large A4 stencil I anchored it down with some washi tape to avoid it moving.

Working fast, I spread the four different colours through the stencil. 

I was going to use the image the stencil creates as it is on my layout.....but inspiration took a turn. 

While the Colour Paste dried I used some clear embossing ink and Bling Embossing Powder to stamp the flowers from the Unwind Stamp Set on to some vellum. 

Using the lowest temperature on my heat gun I activated the Bling Embossing Powder. I did this very cautiously as I was not sure how the vellum would go with the heat - I had mental pictures of it curling or burning, but using the lowest temperature it worked. 

Next I fussy cut the flowers out.

I had an image in my head of all the fussy cut elements spilling down the left hand side of the photo so I committed and fussy cut all the foliage out too.  

Now that I had cut everything out I started building up the left side of the layout, trying to replicate the image I had in my head. I started with the larger images.


Then added the smaller elements. I used a range of glue and three dimensional tape to adhere and build height in the foliage clusters. 


When I was happy with the foliage I matted the photo with some vellum for a softer touch and positioned it to the right of the cluster.


Using some Thicker I created a title then added a few glitter hearts to finish off. 


It wasn't quite the image I had in my head, but I am happy with how it turned out - a fun cute page fit for a Frog Princess.


I hope that I have given you a bit of inspiration to pull out a large A4 stencil and have a play to see how you can use the image to create a layout.

Happy creating until I see you again.

Hugs
Tracey 


Tuesday, 24 November 2020

Christmas Cards - With Karyn Schultz!

  Hi Bee Arty Lovelies!

It's Karyn here and today I have some Christmas cards to share with you made using lots of amazing products from Bee Arty! I have also used non-Christmasy supplies to create the cards. I'm always looking for different ways to use my supplies to extend their use and I'm really happy with how these turned out.
 
 
For this first set of 5 cards I've used stencils and metal dies from the Find Paradise Collection. You can also see a video of how I created this set of cards here.
 
For each of the cards I created a background on heavy duty 350gsm white cardstock. I also used the same cardstock to create the card base. I used Kraft cardstock as a mat.
 
For the first card I used the Foliage A4 stencil and Bling Colour Paste to create a "tree-like" image. I just applied the paste through the berry part of the stencil to achieve this. I then added a sentiment using a word stamp, versamark ink and Bling Colour Embossing Powder.
 
 
 For the next card I used the Foliage A4 stencil and Bling Colour Paste to create a different "tree-like" image. I just applied the paste through leaf part of the stencil to achieve this. I then added a sentiment using a word stamp, versamark ink and Bling Colour Embossing Powder.
 
 
For the next 3 cards I used the the Leaves of Paradise metal die set with Kraft cardstock to create 3 "tree-like" images to add to the card fronts. I then added a sentiment using a word stamp, versamark ink and Bling Colour Embossing Powder. I then added pearls to embellish the trees. Lastly I used a clear Shimmer Pen to make the trees sparkle.


 For this next card I used the Kind Heart stamp to provide the focal point for the card. This mandalla looked so Christmasy to me.
 
 
I started by stamping the Kind Heart stamp with versamark then using the Taupe embossing powder from the Elegant Rose embossing powder bundle. I then added an embossed sentiment, gold thread and some rhinestones for sparkle.


Thanks so much for stopping by

Crafty Hugs xx