Showing posts with label Inspired Collection. Show all posts

Saturday, 20 February 2021

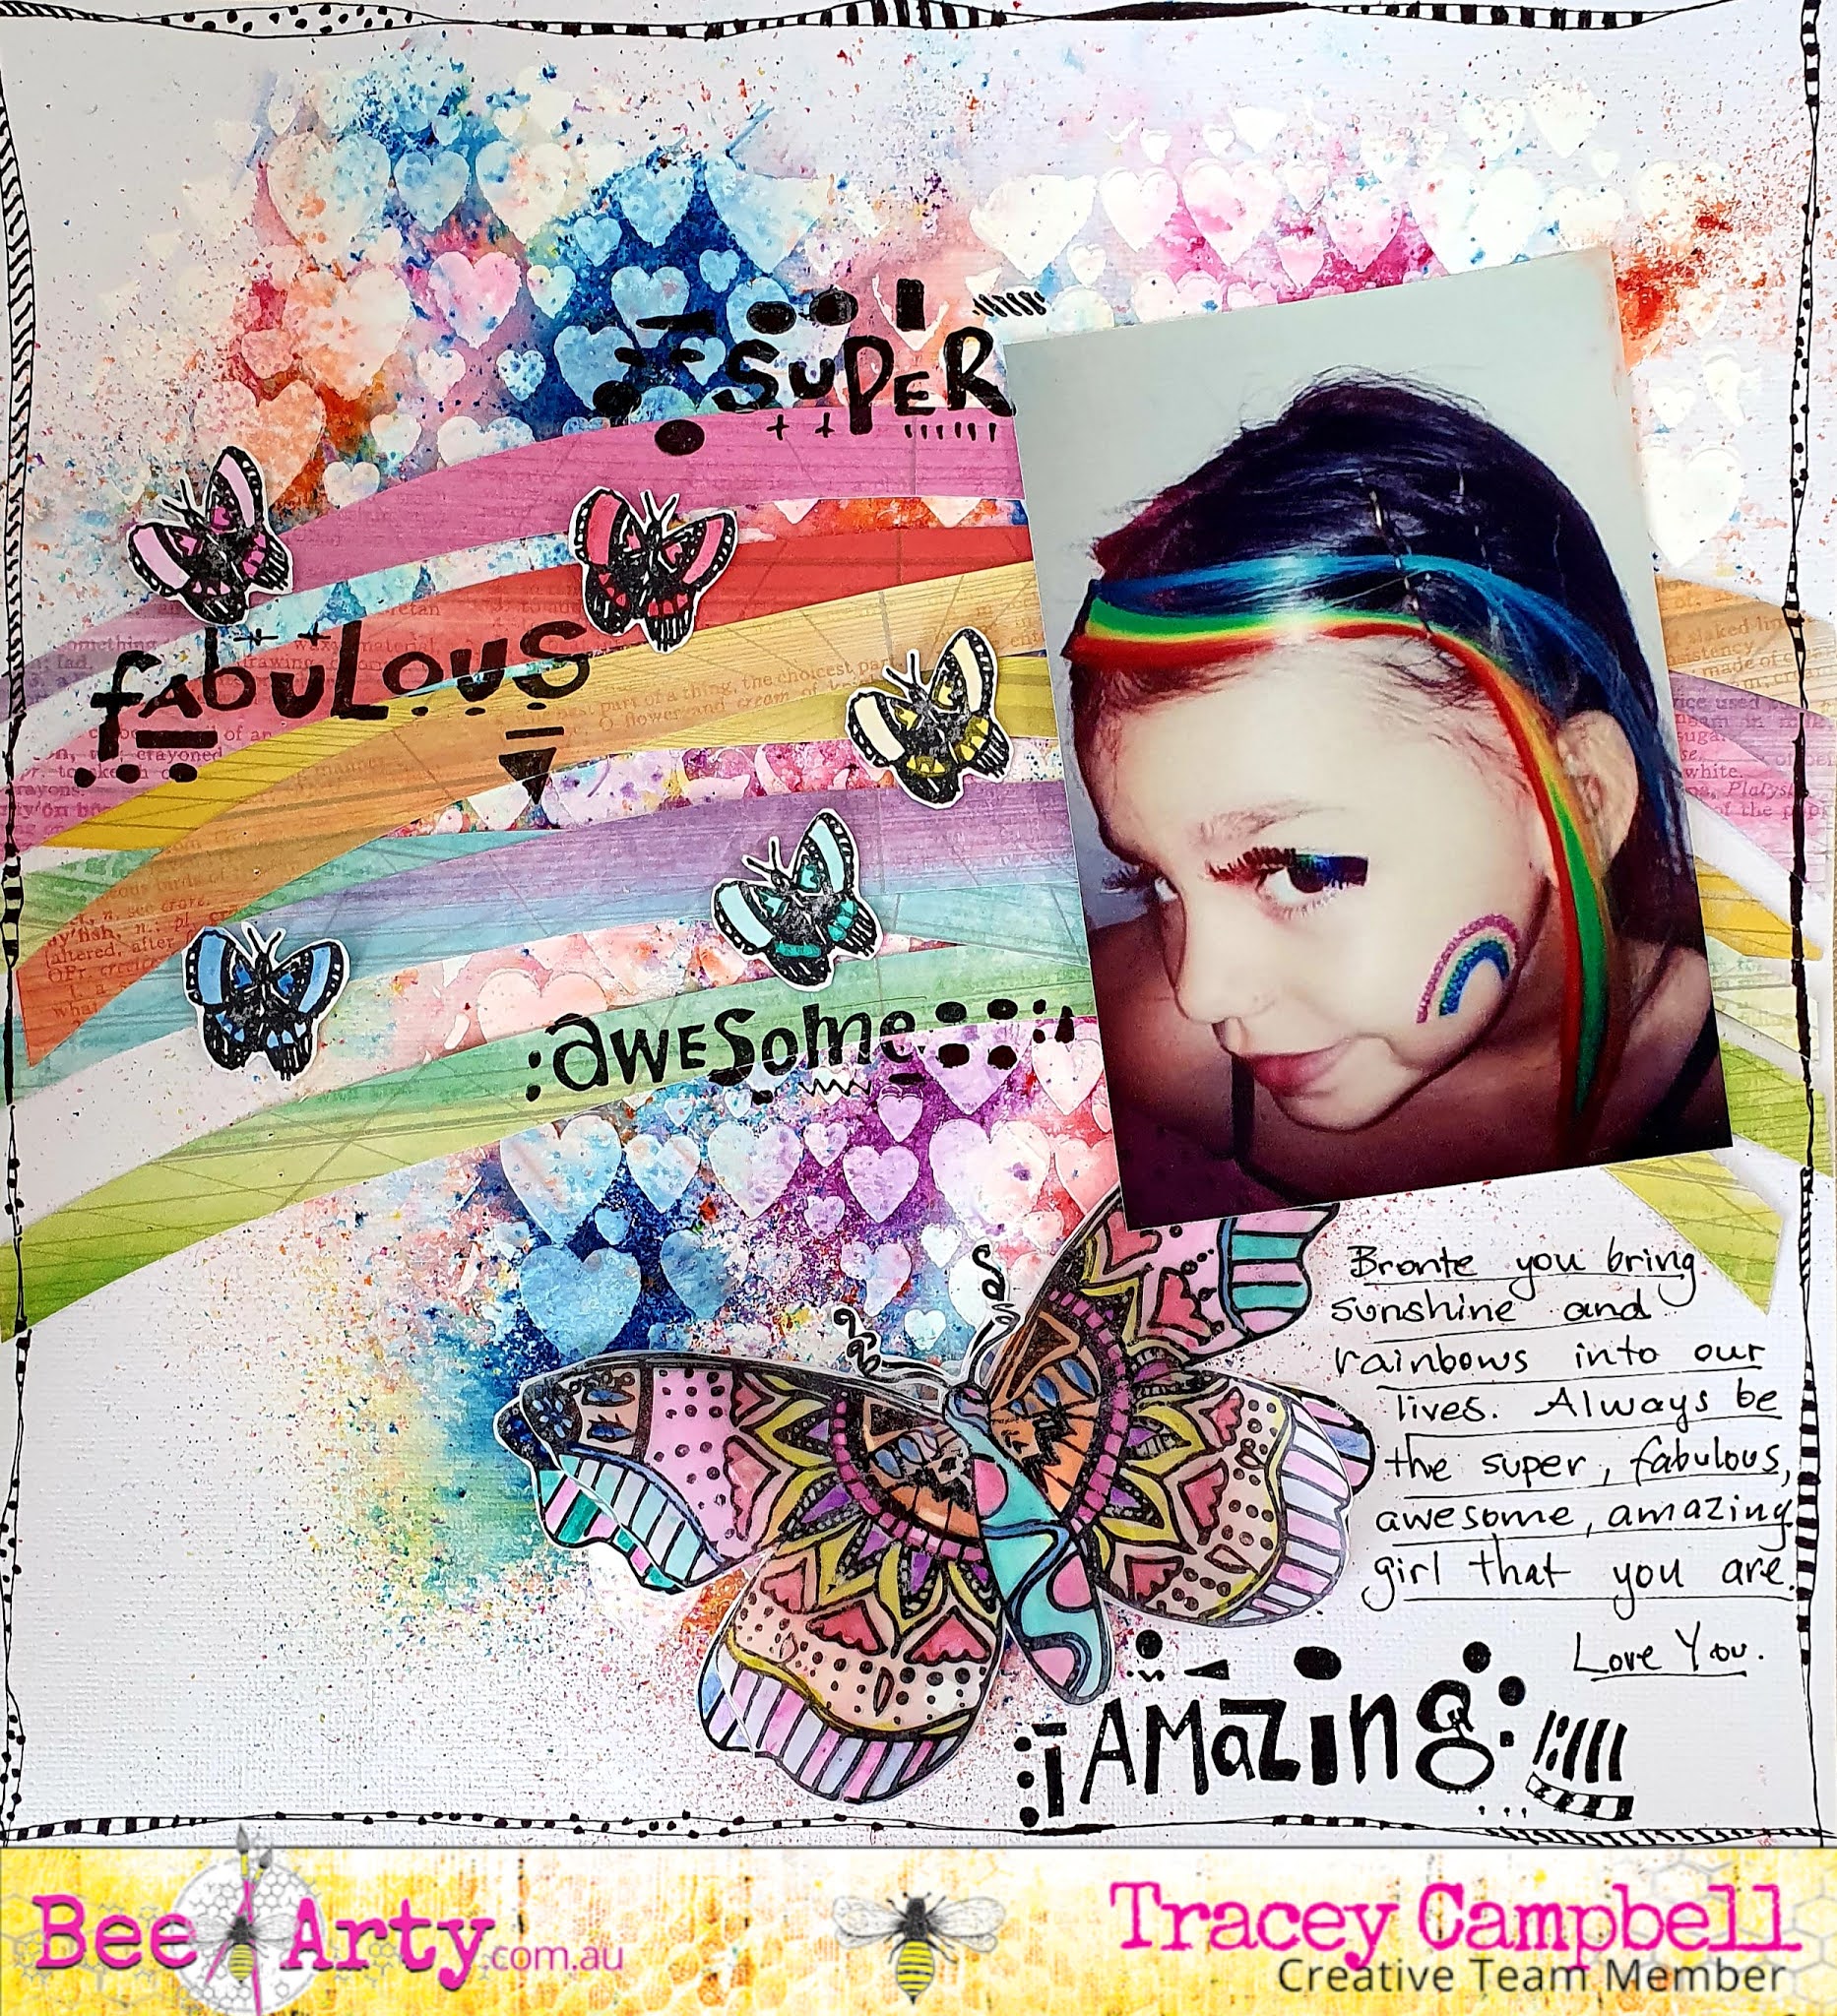
Super, Fabulous, Awesome, Amazing by Tracey Campbell

Hi Bee Arty fans. Tracey Campbell here today with a colourful rainbow Creative Team share highlighting the magical Shimmer Dusts. I'm going to let you in on a little secret of mine..... the Shimmer Dusts are my all time favourite Colour Blast by Bee Arty Product ever!!! Yes ever. I mean where else can a little dust sprinkled onto a project create such vibrant shimmery colours and as an extra bonus.... a tiny pot last such a long time.  

My layout today is of my oldest Daughter when they had a"Circus" theme at school and had to go in dress-ups. Bronte being Bronte just couldn't go as a clown, she had to be something different a "Rainbow Acrobat".   

Here is a list of all the products that I have used to:

Bee Arty Products:

Stamps: Cool Words set, Serendipity, the butterfly from City Lights.

Paper: Artist from the Arty Farty collection

Colour Shimmer Dust: Sunflower, Duke, Amber, Lollipop, Candy, Peacock and Passion

Heavy White Gesso

Stencil: Devotion

Inspired Collection Pan Watercolour set


Other materials:

White cardstock

Black Stazon ink

Black marker pen

3 Dimensional tape

Glue

Velum 

Scissors 

Lead pencil

Paint pallet Knife 

To create by back ground I started by using the Devotion stencil with some Heavy White Gesso, I  used a Paint Pallet knife to spread the gesso through the hearts pattern of the stencil and onto a 12x12 sheet of cardstock.
In the photo below you can see how I spread the gesso through the stencil in a thick "T" shape. Put aside to dry.
While the gesso was drying I cut some arches, roughly 1 cm in thickness from the Artist pattern paper in the Arty Farty collection. 
Making sure that the arches stretched across the whole patterned paper and at least one of each colour.
Using some Stazon black ink stamp the Serendipity butterfly onto some white cardstock and then repeat and stamp the image onto some vellum. Next stamp five small butterflies from the City Lights stamp set.
Using the Inspired Collection Pan Watercolour set and a water paint brush paint all five small and the two large butterflies. TIP: Only use a small amount of water on the vellum butterfly and it will curl and buckle if too much water is applied. 
Once the Heavy White Gesso is dry lightly sprinkle the Colour Shimmer Dust over the hearts. I have used seven different colours, Sunflower, Duke, Amber, Lollipop, Candy, Peacock and Passion. I actually sprinkled all seven colours onto the page making sure not to over lap them too much as I didn't want it turning into a "hot mess" nor mix colours too much. Then I sprinkled a little water onto the background and activate the Colour Shimmer Dust. 
I must admit, watching the colours magically appear and move together is one of the reason I love this product. It makes my heart happy. 
Before the water dried I took a roll of paper towel and rolled it over the top of the activated Colour Shimmer Dust. TIP: Not sure why this works but it does - rolling the paper towel stops the colours from running or smudging together, if you place a piece of paper towel over the top of the Activated Colour Spray it smudges!  
Here is the background. I love the rainbow patches of bright colour and how the hearts show through. 
Now I put it all together by layering the arches across the page, roughly in the centre of the page but more towards the top to create a rainbow. I used white glue to adhere them to the page. Adhere the velum stamped butterfly image to the white cardstock butterfly to create a double butterfly. The photo was next, I placed it on the right side of the layout and tucked the large butterfly underneath the bottom left hand corner. 
Lastly pop the smaller butterflies across the rainbow as if they are randomly flying in all directions. 
Here you can see the position of the elements as they come together.
Next I used Stazon black ink to stamp the words form the Cool Words stamp set across the page.
Here you can see where I have positioned the words; Super, Fabulous, Awesome and Amazing on the page.
To finish off I doodled a funky boarder around the edge of the cardstock and did a bit of journaling with a black marker. 
I really love how fun this was to create and how bright and funky it turned out. 
I hope I have inspired you to try using a few different Colour Shimmer Dust colours at the same time. It can be a bit scary giving it a go but the result is awesome. 

Hugs
Tracey


Tuesday, 29 October 2019

An Amazing Day by Michelle Henderson

Hi All!

I have a new page today for you that fits into the new challenge using cool colours - have you played along yet? It has now been extended until November 10th.


I started by using a cut file as a stencil all over a page, and then applied White Heavy Gesso through it on to another page.

 
I love the texture that this creates once its dry 💓

I took out 4 of my favourite Colour Shimmer Dust in Paris, Lush, Peacock and Passion, then sprayed the gessoed page very lightly with water then sprinkled a little of the powders here and there.


I touched it up here and there with a brush and the same colours that I had mixed on a messy mat. I had a little colour left over so waste not want not 😉


At this stage, I felt that it would be too much to use the full page as a background, so I cut up some leaf clusters and singles and used them as a design element.

I created shadowing under the leaves with the Water Colour Inspired collection.


The title was embossed with Colour Embossing Powder in Deep Water.


Finally I added my photos and a few bits and pieces from one of my favourite Cocoa Vanilla collections. I also used the tag 💜


I hope you like it as much as I do!


Friday, 11 October 2019

Picture Perfect by Michelle Henderson

Hi team!

I have a new page for you again today with the Inspired collection watercolours and Colour Artist Inks.


I started off with  a Paige Evans cut file in a starburst pattern that I wanted to hand stitch. I used the Inspired collection watercolours to do a wash of Sunshine over the sunbeams, then Mustard, Carrot and a touch of Scarlet on the sun itself. I also used Ultramarine on the bottom third of the page.


I decided it wasn't quite strong enough, so I highlighted the same areas with Citrus, Spice and Sunburnt Colour Artist Inks, plus Calypso on the sea.


I had a second cut file that I wanted to back, so I offset it, and then went back to my watercolours 😁


While everything was drying I stitched the background...time to add the photo and embellies and done!


I'm so happy with this one - I hope you like it too 💖

Thanks for joining me here!


Friday, 27 September 2019

Dog Gone Cute by Michelle Henderson

Hi my scrapping friends!

I have a new page for you today, here's a little sneak...


I started off with a wash of watercolours from the Inspired collection - I used Peach and Umber.


I was after a dark coppery red to stencil, so I mixed up some Colour Paste in Sienna, along with some Lollipop Colour Shimmer Dust. Perfect!


I grabbed my Colour Artist Ink in Walnut, and thinned it down to stamp with it.


 I added my photos along with some punched out circles from specialty papers and copper sheeting which has been in my stash since forever 😆 I also added some Tim Holtz dogs that I used the watercolours to colour.


I love how this came out 💓


Friday, 16 August 2019

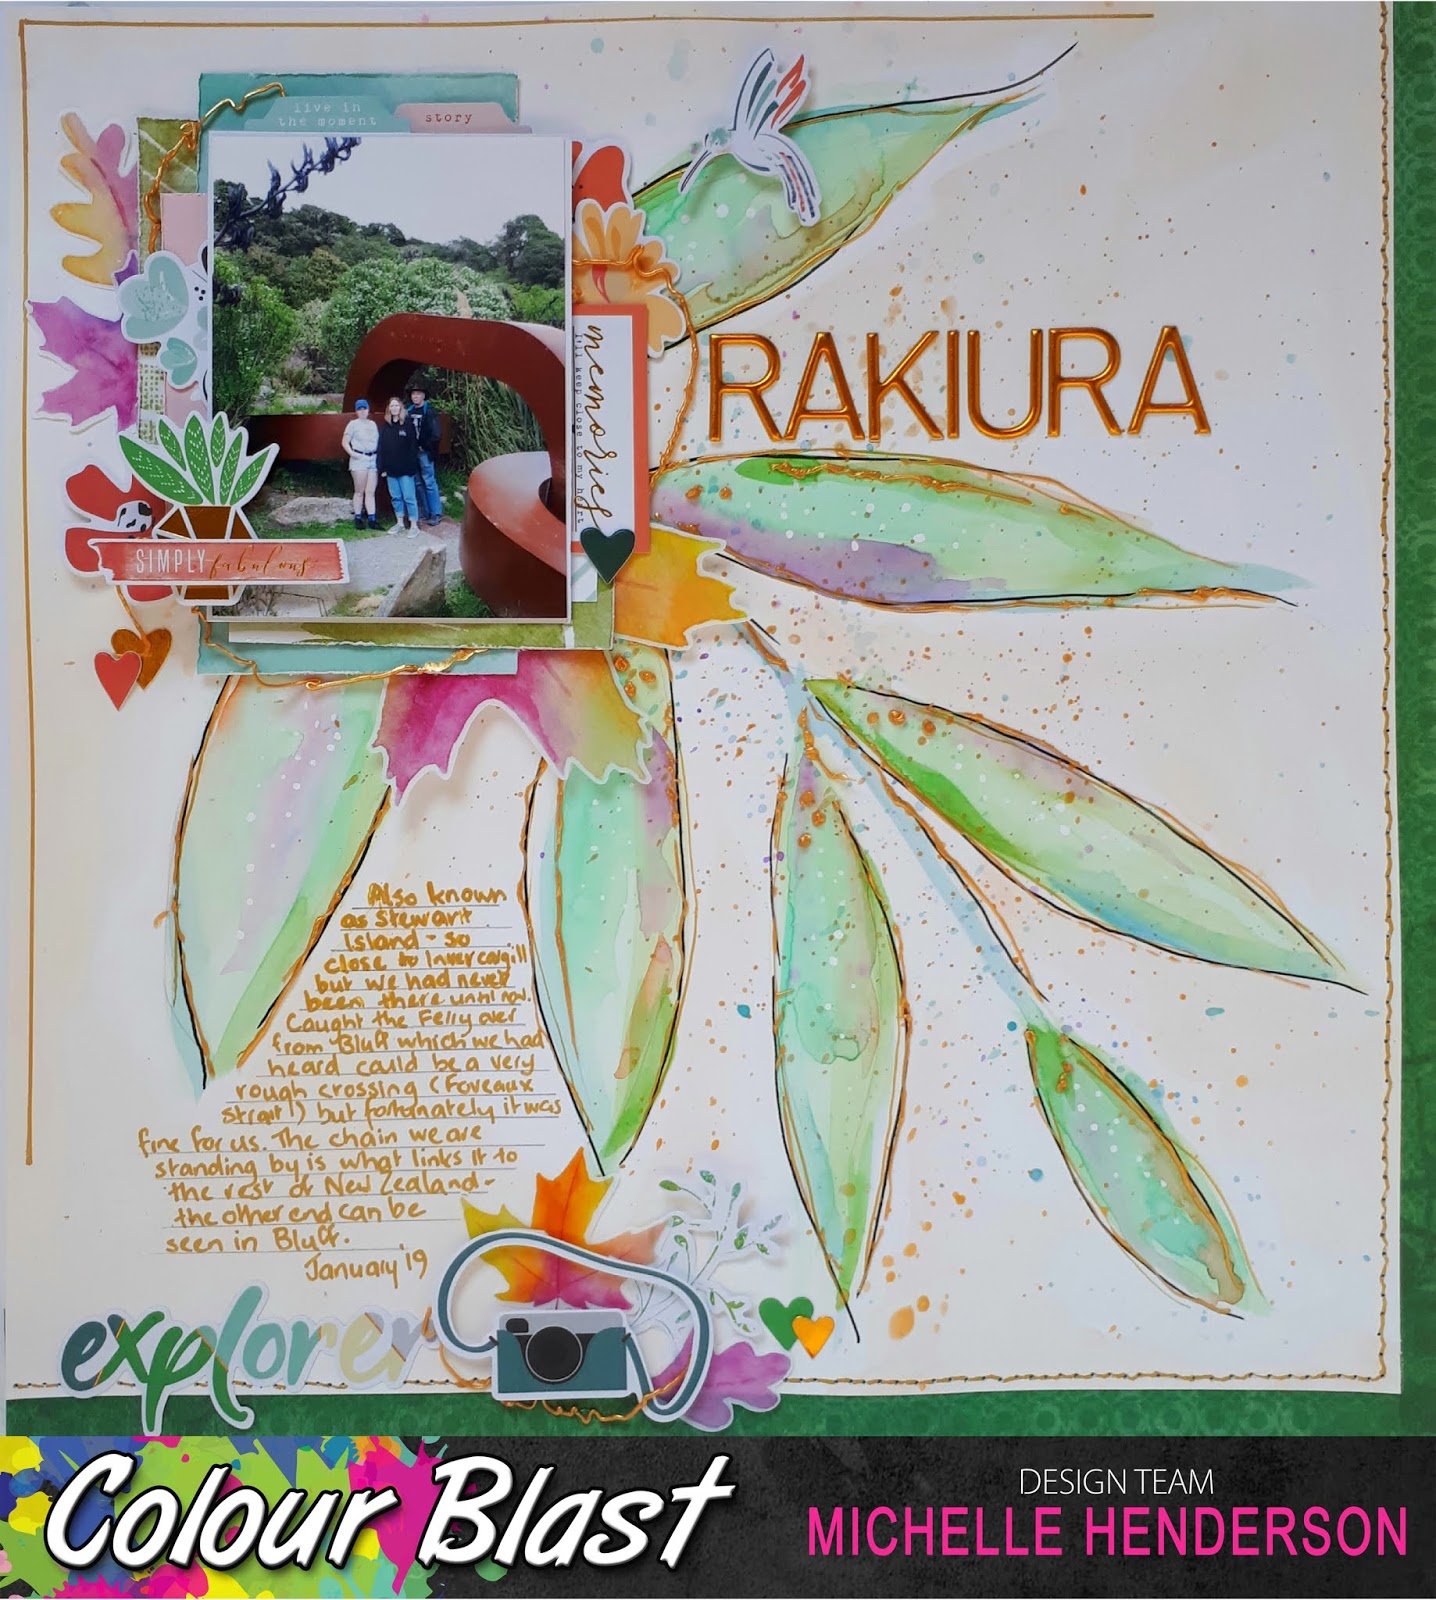
Rakiura by Michelle Henderson

Happy Friday again friends - counting down to the weekend!!

Today I have somewhat of a cross of an art journal and scrapbook page for you.


I was going to be using ephemera from the Pinkfresh Studios Be You collection, so I took one of the leaves that features and drew it lightly on my page with pencil.
Love the new watercolours, so I used these to colour the leaves, starting with a mix of Seafoam and Pear, then highlighting with Carrot, Grape, and Ultramarine. For the stem I used Umber and Ultramarine . I added some splatters of each of course too 😀


Once it was dry, I added some more highlights with Green from the Shimmery Bright palette.


I lightly went over everywhere else with , from the watercolour set.. I wasn't trying to be neat, and there are some patchy areas. I re-spattered, then also added some Yellow Gold from the Shimmery Gold Watercolour Pan Set.


To do the outlines I used both gold and black Posca pens. Then I took some Colour Paste in Bling, filled a syringe and roughly went over the pen outline. I LOOOOVE this look, it makes me think of Moorcroft china and lead lights. I still had some left in the syringe, so I squeezed it out onto a messy mat and left it to dry.


Once the paste had all set I put together my photo, layers and embellies. I decided to trim some off the edge and added a darker border on 2 sides.
I glued it all down, and twined the extra Colour Paste "string" around the edges.


Have fun creating this weekend!


Friday, 26 July 2019

Dishing the Dirt by Michelle Henderson

Hi folks!
I was so happy to get my hands on the new watercolour sets this week! 

I just took them for a light test drive this time 😀

To start, I used White Heavy Gesso through a stencil. I dried it off to puff it up a little. 


Then I used a nice soft brush and the watercolours Carrot, Fuchsia, Ultramarine and Grape to apply a thin coat over the areas that would come out from behind my photo and cut file. I did this a couple of times to build up depth of colour. I also spattered a little of each colour.


I put my cut file on then, and decided to splash some of the Light Gold from the Shimmery Gold Watercolour Pan set also. Love the variations in golds in this set!


I added my photo, some stitching and a title and Voila!


Such fun to try, you're going to see me using these heaps (although I'm sure my other faithfuls will still be showing up too!!)