Showing posts with label Walnut. Show all posts

Friday, 27 September 2019

Dog Gone Cute by Michelle Henderson

Hi my scrapping friends!

I have a new page for you today, here's a little sneak...


I started off with a wash of watercolours from the Inspired collection - I used Peach and Umber.


I was after a dark coppery red to stencil, so I mixed up some Colour Paste in Sienna, along with some Lollipop Colour Shimmer Dust. Perfect!


I grabbed my Colour Artist Ink in Walnut, and thinned it down to stamp with it.


 I added my photos along with some punched out circles from specialty papers and copper sheeting which has been in my stash since forever 😆 I also added some Tim Holtz dogs that I used the watercolours to colour.


I love how this came out 💓


Friday, 24 May 2019

Together on Furlough by Michelle Henderson

I'm back again today with a more "traditional" vintage layout this time, using the wonderful Limited Edition paper range designed by Michelle Grant.

A sneaky sneak...


I started with some stamping ink and my platform, stamping along the top edge of my page with the Unpredictable stamp and the Original paper.


 I then used the Enough stencil and Heavy White Gesso to stencil some cogs here and there in a vaguely vertical area, either side of the pattern.


Time to add colour - I used Colour Shimmer Dust in Lush , which I sprinkled on after spraying with water...


I thinned some Colour Artist Ink in Walnut down into a mister, and then sprayed through the same stencil in a couple of areas, and splattered a bit of both colours here and there. I also used the Colour Shimmer Brush Marker in Gold for some splatter - loving that sparkle 😍


I used the watered down Walnut to edge my diecut clock, and undiluted Walnut on the chipboard, which I also edged with the Gold marker.


I also mixed some Colour Mica Powder in Olive Grove and Espresso into clear gel, and used it to alter some metal cogs.


I realised I hadn't taken all the photos I meant to, so here's exactly what I used...


And here's how it ended up - 


See you next time!


Thursday, 7 February 2019

Discover by Suzy Loudon

Hi everyone. I hope everyone is doing well. 
I'm back to share another layout.


To begin my layout I used Heavy White Gesso spreading it though a stencil.


Using Walnut  Colour Artist Ink I put some on my craft mat. Then using scrunched up plastic I transferred the ink onto my page.


I repeated this process using Grass  Colour Artist Ink.


Using Marine  Colour Artist Ink I splattered it over the inked area. A little hard to see as it's quite subtle.
I forgot to take a photo but at this point i splattered some water onto the ink to give water splotches.


I embossed over some metal elements using Leather Colour Embossing Powder.


I also embossed some more metals using Envy Colour Embossing Powder.


I also embossed with Leather onto some corrugated board.


I embossed my title with Stormy Weather Colour Embossing Powder.


I embossed my chipboard with Leather but before it set I quickly sprinkled Envy onto it & then heat set.


I sprayed some cheesecloth with Coffee Colour Spray then dried it with a heat gun.


Then the same spraying with Rainforest Colour Spray.


Using my finger I dabbed Stormy Weather Colour Paste on some chipboard.


Using my finger I ran Heavy White Gesso around my photo.


I put all my elements together & glued everything down. I added some art stones then when the glue was dry I dripped some Walnut  Colour Artist Ink over the stones.


And then I was done.
Here's a few close ups.


Thanks for looking.
XXX Suzy


Tuesday, 4 December 2018

Right Now by Kristy Abela

Hi friends, here's a new inspiration for you using Colour Blast Australia products. This photo was taken At Scenic World - Katoomba. We took all the boys on an adventure. Shortly after this it poured and we all got soaked!!
 Here are some closer looks...


 To create this layout I have a process by where I create my focal point first. For this one I found some papers and created a matt.


 I found some Fab Dusty Attic Chipboard from my new Design Team kit and added some crackle paste. While it was still wet I added Colour Artist Ink in Walnut to colour the paste, not to sit on top of it. I then added a touch of Art Alchemy wax to highlight the crackle.


 Using Colour Paste in Leather I used a stencil to create some embellishments. I deliberately over heated the paste to get a lovely texture on the moths. I also added some Colour Embossing Powder in Stormy Sky to the title. When I layed it out I decided that it was too dark and them put a layer of Sunshine on instead. The black base gave the Colour Embossing Powder a complete golden shimmer.


 Once I was comfortable with where my embellishments and focal point were going to go I marked out in pencil and removed them to work on my background. For this process I coloured some Colour Blast Heavy Gesso White with Colour Artist Ink, Barley and used my pallet knife to apply. Once I had enough I added Colour Artist Ink in Lime to the remaining mixture to vary the shade and add a another layer. Once this was dry I added some splatters with Colour Artist Ink - Walnut... Why not - It was still sitting there.

 At that point I realised I had a Grungy effect to the layout now and then added some stamping with Archival Ink to add to that feel. I stuck down the Picture and embellishments and then used my Colour Shimmer Brush Marker to add a bit of sparkle to my flowers.
Hope you enjoyed the process... Check into Colour Blast Creative Corner and see what the other girls are up too...  

Ciao for Now
Kristy Abela

Thursday, 15 November 2018

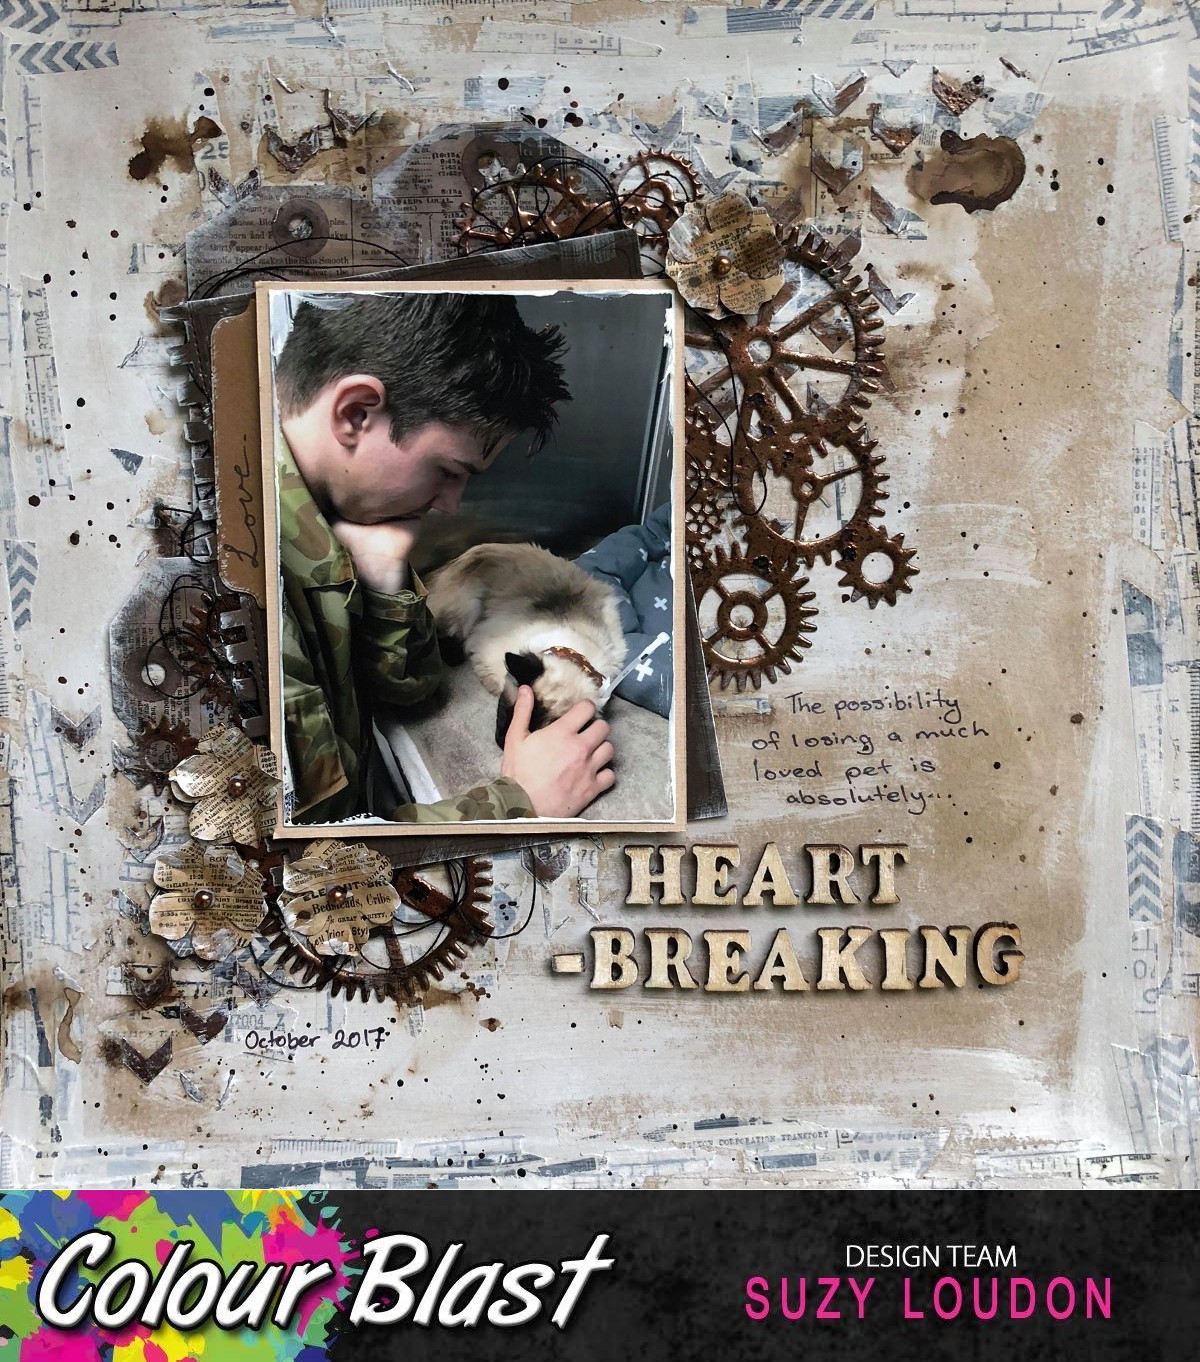
Heartbreaking by Suzy Loudon

Hi everyone. As I sat down to think of a layout, I had to first de-clutter my desk a bit. One thing I had was my box of washie tapes. So I decided to do a layout using them. It took a little thinking but I was happy with the end result.


To begin with I grabbed my washie tapes. I tore lengths then tore them in half before sticking them down around my cardstock and through the inside around where I planned for my photo to be.


I added some Leather Colour Paste through a stencil.


I dry brushed Heavy White Gesso all over, thicker in some areas. Then using a nappy wipe I wiled some of the Gesso off the Leather Colour Paste.


I unscrewed my Coffee Colour Spray & used the end to drop some colour around. Then using my water spray I gave each blob a spray moving the colour around & drying with a heat gun.


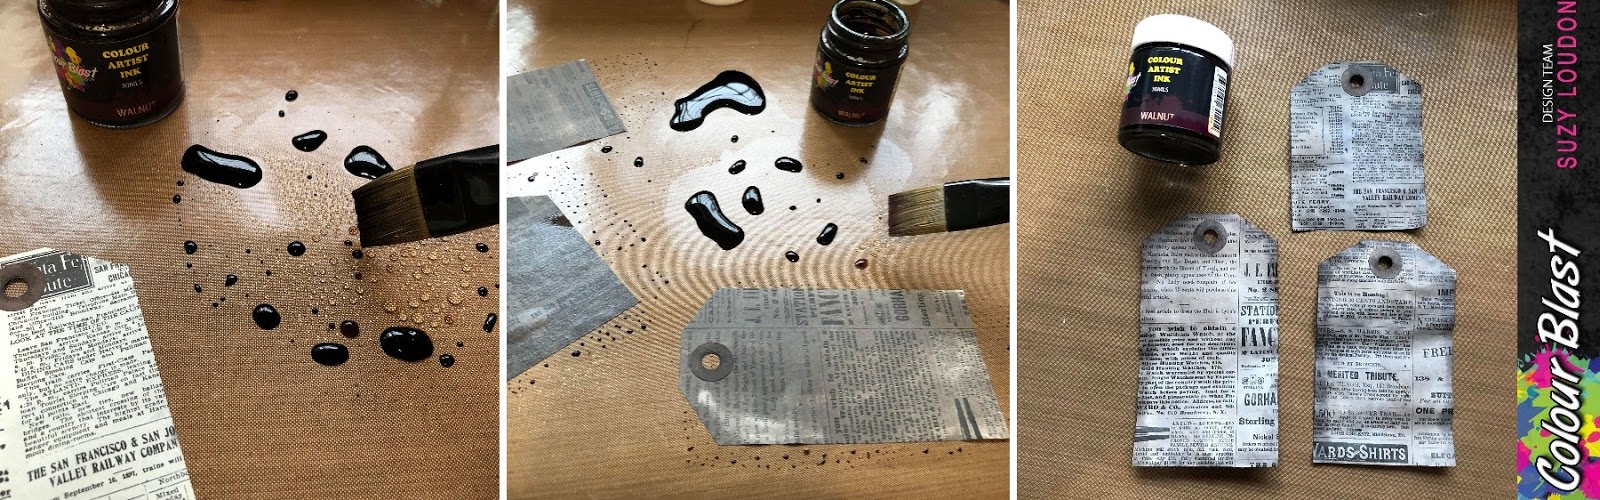
I coloured some tags I made by adding a few drops of Walnut Artist Ink onto my craft mat then adding water. I varied the shading by adding a little more water as I went.


I embossed my chipboard by first covering it with Leather Colour Embossing Powder. Then after heat activating adding Sienna Colour Embossing Powder to some areas.


I then gave it some splatters with Coffee Colour Spray.


I matted my photo then dry brushed it with Heavy White Gesso.


Covering my photo I splattered Coffee Colour Spray around.


I punched out some flowers using the same paper as my tags. I then gave them a light wash with watered down Coffee Colour Spray.


I dry brushed the Gesso around my flowers, tags, chipboard & title to finish it off.


Thanks for stopping by.
xxx Suzy