Monday, 28 June 2021

Remember by Charmane Koch

 Happy Monday Everyone! I hope it is anyway, in this craziness we call LIFE these days!

Hoping you are all well & able to cope with all the restrictions we all have and it isn't too confusing???? 

Anyway, I am here to bring you some INSPIRATION... this time using the BRAND SPANKING NEW "Embrace Change" Collection designed by the lovely Fiona Partridge!


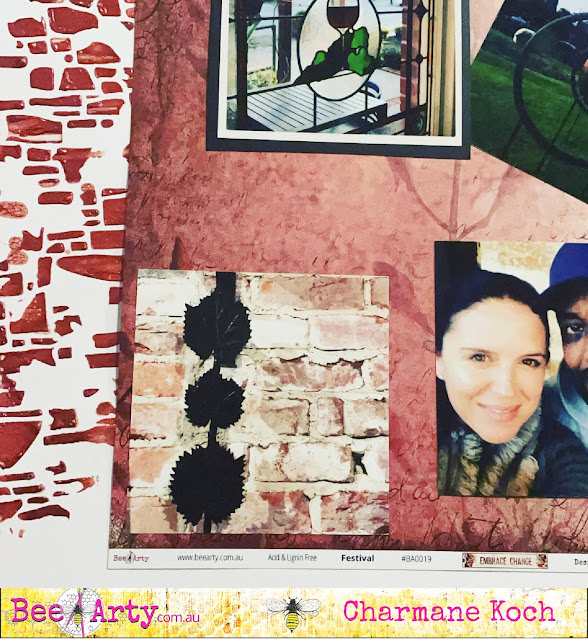
I started off with using the Pavement Stencil, however, from the Destination Anywhere range, as it totally matched the photos I was using. The Embrace Change "Festival" & "Change" papers were the perfect colours to use though.

I matted all 4 photos I had using the "Change" paper. Then distressed the edges, and with Leather Mica Powder watered down I coloured the edges.

I used the gorgeous NEW Rosewood Colour Paste - this colours is just magnificent! I scraped it through the stencil onto the "Change" paper, a little at the top left of the paper, then on the bottom right.


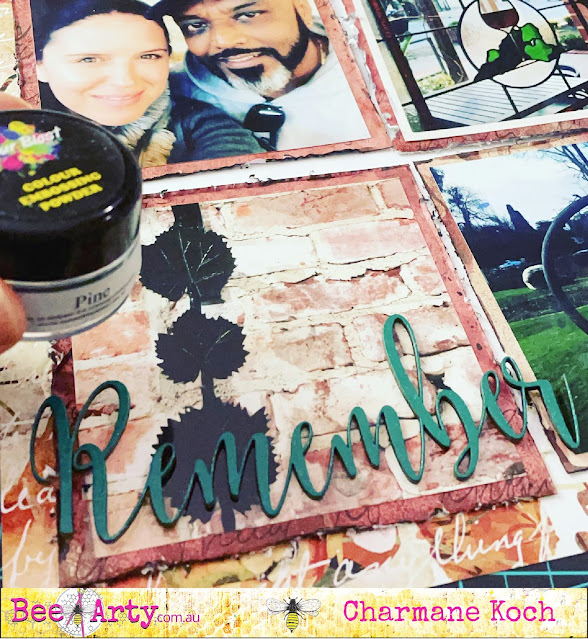
I coloured the String Leaves Die Cut  & "Remember" wood veneer title using the Pine Embossing Powder  {in the Northern Lights Embossing Bundle} & Versamark Watermark Ink.


I also decided to use the "Change" paper to create a one of a kind Charms Creations Heart... of course this means it matches perfectly with the whole layout!


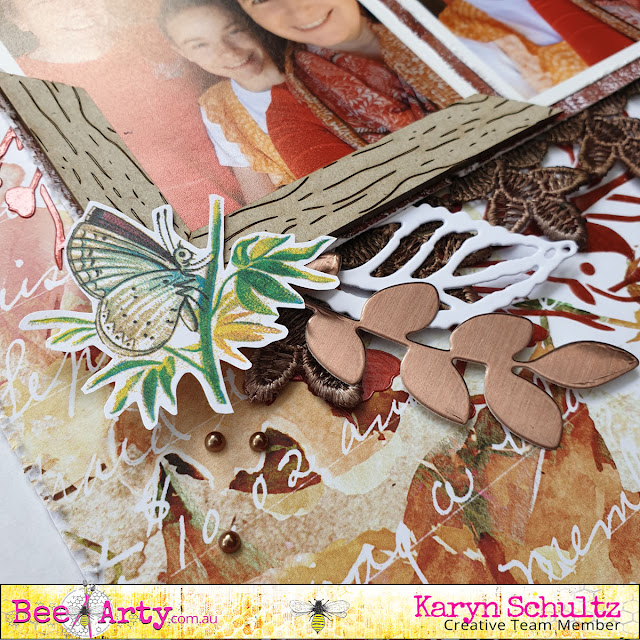
And after fussy cutting 3 of the gorgeous butterflies from the Embrace Change Collection, I stuck these on my layout to finish it off... 


They finished off the page nicely!


I am sure you love this collection as much as I do! It's just beautiful! If you haven't ordered it already NOW is the time! You can ORDER IT HERE!


Thanks for stopping by!

XO Charm


Sunday, 27 June 2021

Embrace Change Sneak Peek III - With Karyn Schultz!

 Hi Bee Arty Lovelies!

It's Karyn here and today I have a final Sneak Peek of one of my creations that will feature in the upcoming  Bee Arty "Embrace Change" kit. This sneak is from a set of two Birthday Cards.
 
 
 Embrace Change has a floral/Australian colour palette with versatile elements, and is designed by the talented Fiona Paltridge. You will love this collection - the stamps, stencils and dies are not to be missed! You can subscribe to the kit here. Kits come with a paper pack, stencils, metal dies, stamp sets, embellishments and full colour kit instructions.
 

Thanks so much for stopping by

Crafty Hugs xx


Friday, 25 June 2021

Fly by Tracey Campbell

 Do you ever get papers with a lot of lovely journaling blocks and tags on them and never know what to do with them so end up not using them at all? For example the Elegant Tags Paper from the Spread Your Wings Collection. I do, all the time. I love the look of them and have plans to use them on layouts, but just never do. So I thought why not challenge myself to create a layout using as many tags and journal blocks from the page as possible. 

The materials that I have used are:

Papers from the following collections; Spread Your Wings: Elegant Tags, No Regrets and Word Play, Bohemian Bliss: Free Vibe

6 Product Information Strips from any of the Bee Arty ranges that go together.

Scripted Stencil

Colour Paste in Envy and Punch

Colour Shimmer Cubes in Envy, Snow and Punch

Paper Flowers

Using a palette knife randomly scrap some Punch Colour Paste down the right hand side of the No Regrets patterned paper. Let it dry.

Spread some Envy Colour Paste through the Scripted Stencil with a palette knife. Apply it so that it over laps the Blush Colour Paste. 

Here is what the Colour Paste looks like on the whole 12x12 piece of No Regrets.

While waiting for the Colour Paste to dry fussy cut the feathers from the Free Vibe paper and the tags from the Elegant Tags paper.

Use a distressing tool to distress both edges of the six product strips. 

Adhere the products strips down the right hand edge of the No Regrets paper.

Activate the Colour Shimmer cubes with a spray of water and then paint the feathers with the Envy and Punch. When dry coat them with the Snow Shimmer Cube. Leave to dry.

Use the fussy cut tags to create a photo mat around at 6x4 inch portrait photo.

In the photo below you can see how I cut and placed the tags to create the mat. 

Adhere the photo and the mat to the back ground paper - position it over the Colour Paste. Adhere the feathers around the photo - see the final layout for positioning. Fussy cut the title "Your Wings Already Exist all You Have to do is Fly" and adhere them down the side of the tag mat and across the feathers.

Adhere a few paper flowers to finish off.


Here is the finished layout. 

I hope that I have given you a few ideas to pull out those tags and use them to create something wonderful.

Hug

Tracey


Thursday, 24 June 2021

Embrace Change Sneak Peek II - With Karyn Schultz!

  Hi Bee Arty Lovelies!

It's Karyn here and today I have another Sneak Peek of one of my creations that will feature in the upcoming  Bee Arty "Embrace Change" kit. These sneaks are from a double page scrapbook layout titled "Magical Moments".


 Embrace Change has a floral/Australian colour palette with versatile elements, and is designed by the talented Fiona Paltridge. You will love this collection - the stamps, stencils and dies are not to be missed! You can subscribe to the kit here. Kits come with a paper pack, stencils, metal dies, stamp sets, embellishments and full colour kit instructions.
 

Thanks so much for stopping by

Crafty Hugs xx


Monday, 21 June 2021

A Colourful Life! by Linda Pearson


Hi Bee Arters ... today I am sharing a ‘by chance’ page I created recently.  Working on another project I had a quantity of .. colourblast colour paste left over so applied the paste through the Beautiful mess stencil in my kraft paper journal.

Bee Arty Products used:

-   Beautiful mess – stencil from the Arty Farty collection designed by Michelle Grant

-   Colourblast Colour paste - Rose Petal

-   Colourblast Colour artist inks – slipper, barley, marine, calypso, grass

-   Colourblast Shimmer dust  – duke (added to grass ink with water to make a spray)

-   Craft Powder Spoon

Kraft paper journal
Water spray
Black watercolour pencil
Acrylic gloss spray – white
Pipette


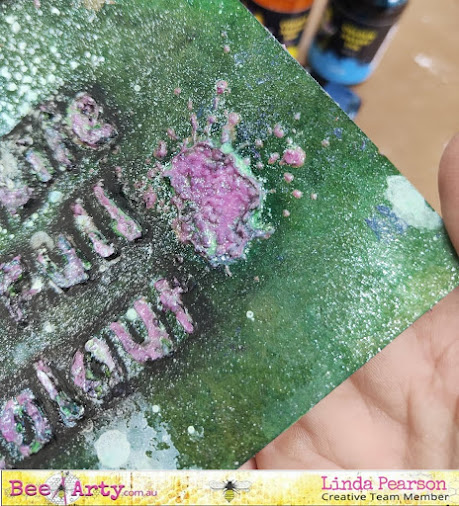
Later after the paste had dried, I decided to add some ink colours to the page.  Firstly, I sprayed the Kraft paper with water then added some drops of the Colour artist inks (slipper, barley, marine, calypso), drying off each colour in turn.  I used a paint brush to spread the ink over the surface.  I mixed grass Colour artist inks with water and some Shimmer dust duke to make a shimmer mix with a pipette over the page.

The colours dried a little darker due to the Kraft paper.

I added some Acrylic Gloss spray paint lightly over the page.  Using the black pencil, I outlined the wording to highlight then added water to the pencil to blend the pencil and anchor the text.


Thank you, it was a pleasure sharing this simple page with you and look forward to seeing you next time!


Linda Pearson

https://www.yourcreativepalette.com.au

Sunday, 20 June 2021

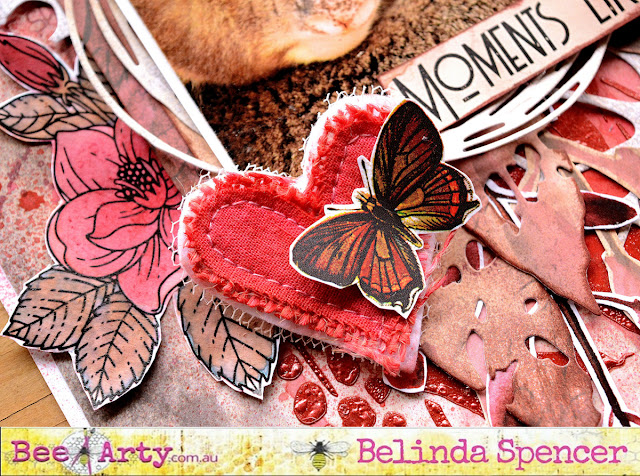
Moments Like These by Belinda Spencer

 Hello Bee Arty fans!

It's Belinda with you today to share my latest layout for Bee Arty featuring the stunning NEW Embrace Change Collection by Fiona Paltridge.


I started this layout by cropping a sheet of patterned paper from the Embrace Change collection and adding it to some of the fabulous 350gsm white cardstock. I spritzed on some Love Colour Spray, spritzed with a little water and played around with it, letting it drip down the page, until I was happy with the coverage. I dried it off with a heat gun.


Next I used the brand new Rosewood Colour Paste with the Cascading Leaves A5 Stencil from the Embrace Change collection and then dried with the heat gun again letting the paste bubble a little for extra texture.


I added some stamping using Ranger Archival Ink  and the Say It and Watermark Stamps


Next I added my paper layers cropped from patterned papers in the Embrace Change Collection along with die cuts using the Web, Old Leaves and String Wreath Dies. I added some fussy cut leaves and flowers that I coloured using Life of Colour Watercolour Pens and Aged Mahogany Distress Ink.


Finally I added my title and remaining embellishments.


Products used:
EMBRACE CHANGE Collection:
- Cascading Leaves A5 Stencil
- Change patterned paper
- Collection Bonus patterned paper
- Falling patterned paper
- Festival patterned paper
- Poetry patterned paper
- Say It Stamp

DIES:
- Old Leaves

COLOUR BLAST:
- Colour Paste Rosewood


Thanks so much for stopping by the blog today. I hope you are inspired to have a play with your Bee Arty stash too.

Cheers
Belinda


Saturday, 19 June 2021

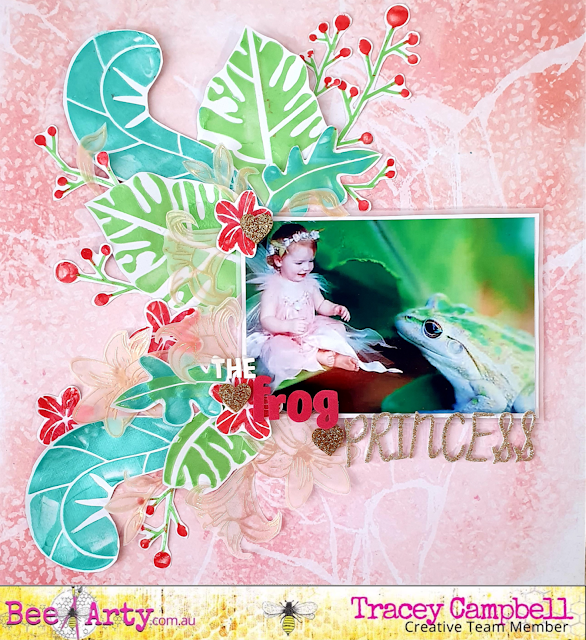
The Frog Princess by Tracey Campbell

Hello everyone. Tracey Campbell here with you today with a fun layout using some of the awesome Find Paradise range designed by Fiona Paltridge. I have been struggling a bit trying to scrap this photo of my youngest daughter Paige dressed in a fairy outfit superimposed near this cute green tree frog, but couldn't find the perfect range until I got a hold of Find Paradise. So of course it was the very first layout I had to create with it.

For this layout I used the "B side" of the Entangled Pattern Paper, White Cardstock, Vellum, Foliage Stencil, Colour Paste in Apple of my Eye, Peach, Watermelon and Cool Mint, Unwind Stamp Set and Embossing Powder in Bling
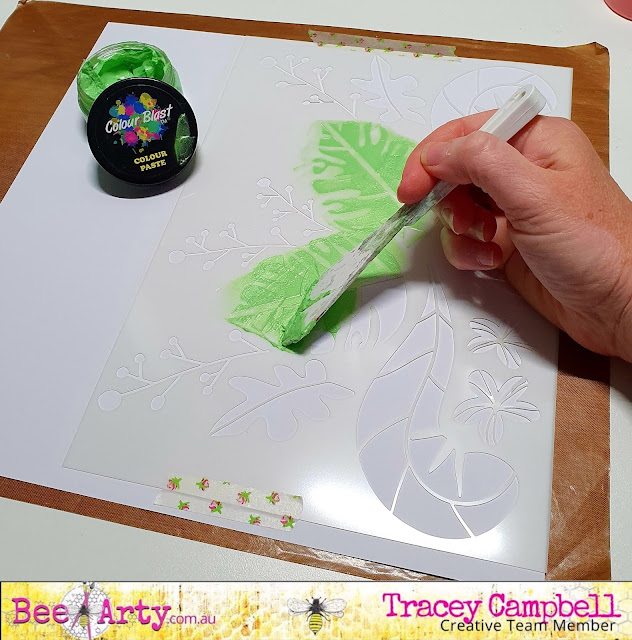
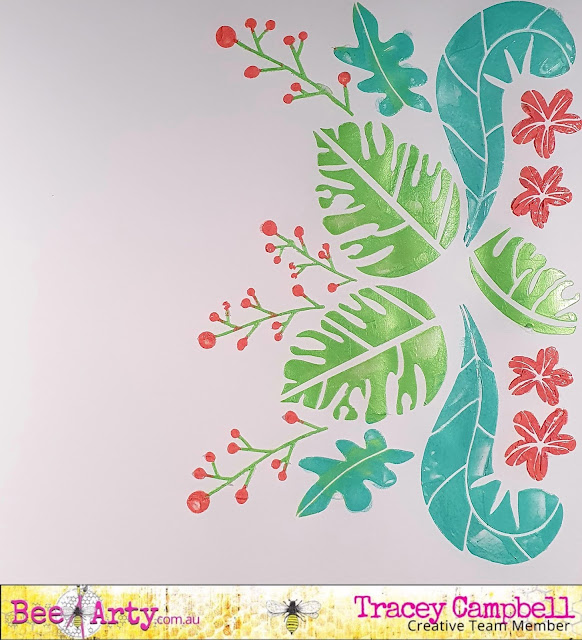
Using the Foliage stencil, the Colour Pastes and a paint palette knife spread the colour paste through the stencil on to a piece of white cardstock. Note: as it is a large A4 stencil I anchored it down with some washi tape to avoid it moving.
Working fast, I spread the four different colours through the stencil. 
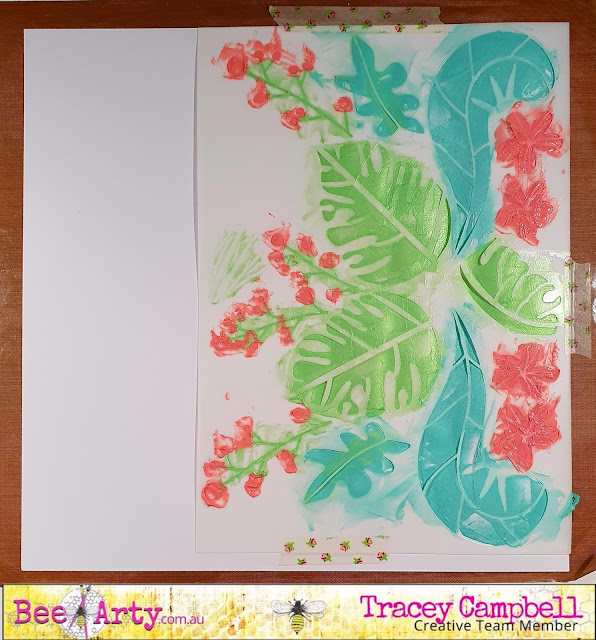
I was going to use the image the stencil creates as it is on my layout.....but inspiration took a turn. 
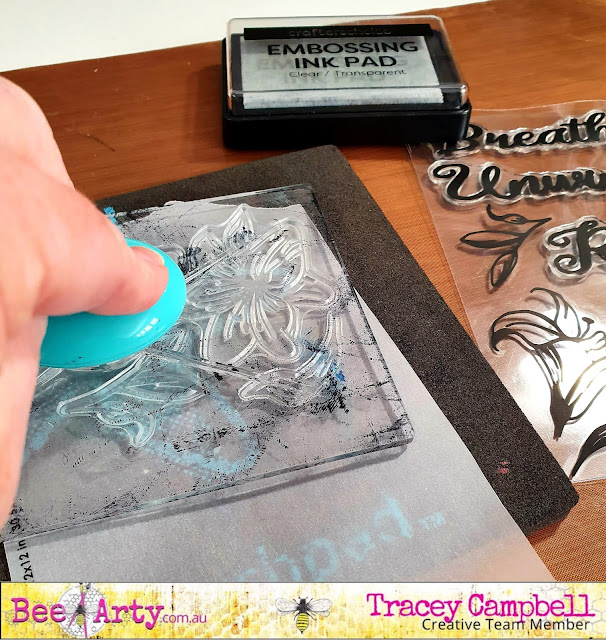
While the Colour Paste dried I used some clear embossing ink and Bling Embossing Powder to stamp the flowers from the Unwind Stamp Set on to some vellum. 
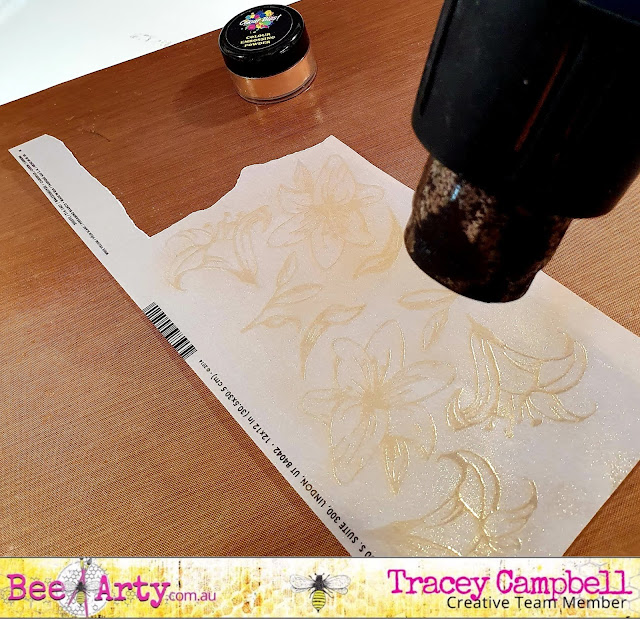
Using the lowest temperature on my heat gun I activated the Bling Embossing Powder. I did this very cautiously as I was not sure how the vellum would go with the heat - I had mental pictures of it curling or burning, but using the lowest temperature it worked. 
Next I fussy cut the flowers out.
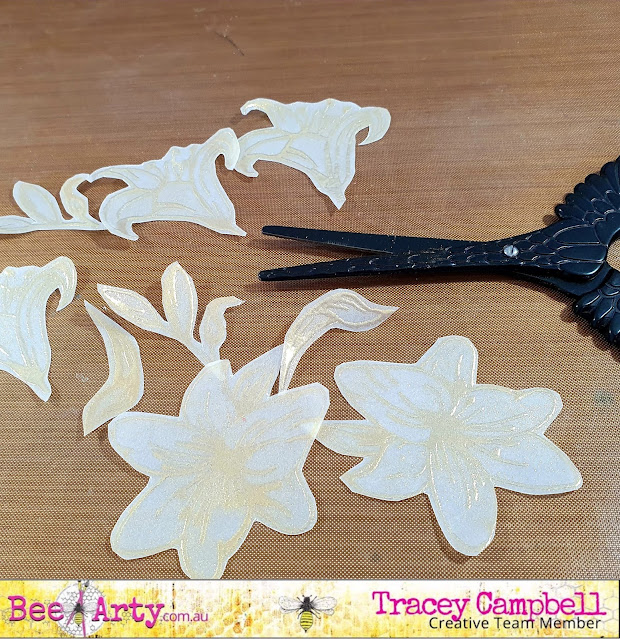
I had an image in my head of all the fussy cut elements spilling down the left hand side of the photo so I committed and fussy cut all the foliage out too.  
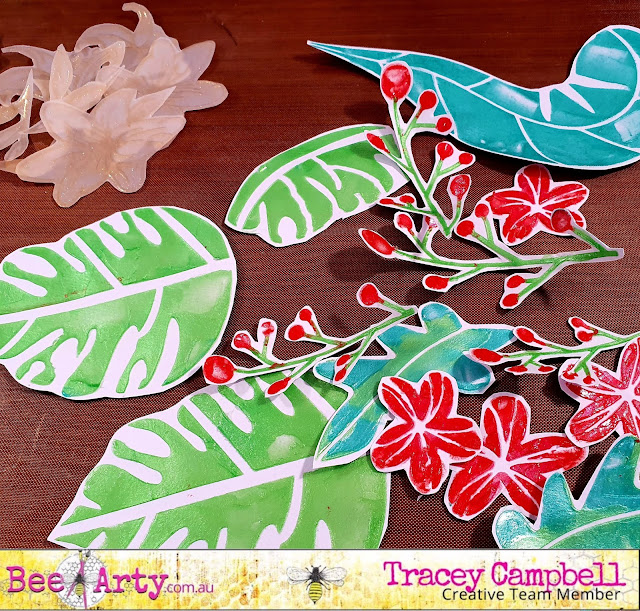
Now that I had cut everything out I started building up the left side of the layout, trying to replicate the image I had in my head. I started with the larger images.


Then added the smaller elements. I used a range of glue and three dimensional tape to adhere and build height in the foliage clusters. 


When I was happy with the foliage I matted the photo with some vellum for a softer touch and positioned it to the right of the cluster.


Using some Thicker I created a title then added a few glitter hearts to finish off. 


It wasn't quite the image I had in my head, but I am happy with how it turned out - a fun cute page fit for a Frog Princess.


I hope that I have given you a bit of inspiration to pull out a large A4 stencil and have a play to see how you can use the image to create a layout.

Happy creating until I see you again.

Hugs
Tracey