Showing posts with label life of colour pens. Show all posts

Monday, 5 December 2022

"Paint your own Reality" by Charmane Koch

Happy Monday Everyone!

Today I wanted to share with you a Mixed Media layout based on the Van Gogh Exhibition that we went to last year!


The girls just loved the Exhibition, it was definitely such a fabulous unique experience!


It was actually quite fun to put together... I started off by using Crackle Paste and a spatula to create the "Starry Night" imagery trying to replicate the Van Gogh artwork...


Once the Crackle paste dried I layered the yellow and blue Mica Powder colours....


I used Bling, Sunshine, Just Blue, Polar & Deep Water Mica Powders....


I kept layering the colours until I was happy... & just love the texture the Crackle Paste created.


I also used the Life Of Colour White Pen to create the "lighting strings" and then glued a few clear sequins to create the "lights. I also dabbed the Bling Mica Powder to create lights too.


Thanks so much for popping by and checking it out!

Happy Creating,


xo Charmane

Monday, 4 July 2022

Thoughts and Actions by Linda Pearson


Today I present an art journal page utilising some Bee Arty products from a past collection, Time Flies designed by Michelle Grant Designs.


Time Flies paper collection
Life of colour Pens 12 pack – skin tones
Life of colour Pens 12 pack – classic
Scripted - A5 Stencil – Bee Arty
Texture paste and palette knife
Chain and bird - One of a kind cling rubber stamp set
White Cardstock – Bee Arty
Craft Powder Spoon
Archival Ink Pad Jet Black
Versamark Stamp pad translucent
Art Glitter Designer Adhesive
Shimmer dust – Tan, Peacock, Wine
Embossing powder – Steel
Globe metal die
Pipettes
 
Own stash products used:
Grid stamp (own stash)
Double sided tape
Mounting Tape
Muslin
Distress oxide or Archival Ink pad in Ground Expresso
Blending Tool
Foil sheet in mocha
 
 
Colour in the girl’s face from the Time 12x12 scrapbook paper using Life of colour Pens 12 pack – skin tones and Life of colour Pens 12 pack – classic pens.


Fussy cut around the edge of head shape.


Apply texture paste through the Scripted - A5 Stencil – Bee Arty with a palette knife around several areas of the page.  Dry off completely.


Prepare the Shimmer dust – Tan, Peacock, Wine in a palette by adding water with a Pipettes.  Using a large round brush firstly, dip into the Tan colour, brush along the top of page then spritz with water to shift the colour down the page.  Dry off.  Repeat this step with Peacock shimmer dust, spritz with water then dry off.  Again repeat using the wine shimmer dust, spritz then dry off.  Be careful with this step as there is a lot of water on the page and may weaken the structure of paper until dry.


Distress the textured stencil areas with distress oxide or archival ink pad in ground expresso using a blending tool to darken these areas.
 
 
Prepare the die cuts by running the Globe metal die through the machine with foil card. 
Stamping onto the White Cardstock – Bee Arty,
the bird from the One of a Kind cling stamp with Versamark Stamp pad translucent, sprinkle with Embossing powder – Steel.  Heat seal the powder to set.


Collect embellishments to continue –
·       Die cut cogs
·       Assortment Metal cogs pack
·       Cardstock coloured with leftover Peacock, Tan and Wine washes (distressed edges)
·       Muslin
·       Bird stamp coloured with Shimmer dust – Tan, Peacock, Wine


Add lots of background/ghost stamping with the Grid stamp and black archival ink. 
Add random background / border marks using the chain from the One of a kind stamp around the page.


Arrange the coloured cardstock onto as per the above image. Secure to page with double sided tape.  N.B.  be sure to leave the edges of the cardstock free so other elements (metal cogs) can be slotted in under the card.


Lay the muslin over the cardstock, adhere the muslin over the cardstock with gel matt medium (being careful as the shimmer dust colours will shift slightly once rewet).


Arrange the die cut metal cogs and real metal cogs around the page (cut the ‘globe’ away from the cog cluster). 
Also place the bird in position then add metal cogs on and around as desired. 


Add foam tape behind the face to lift off the page.
Adhere all these elements to the page.


Add sentiment/quote to the page using foam tape.


Thank you for stopping by and happy creating!
 

Linda Pearson 
https://www.yourcreativepalette.com.au 

Sunday, 6 March 2022

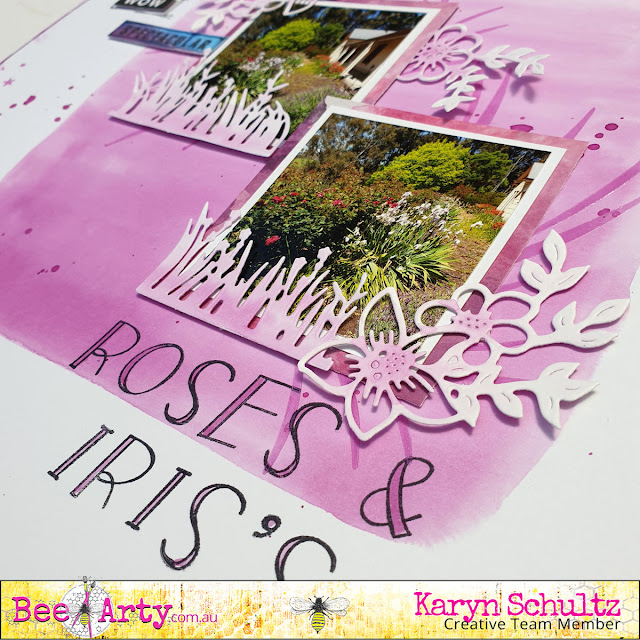
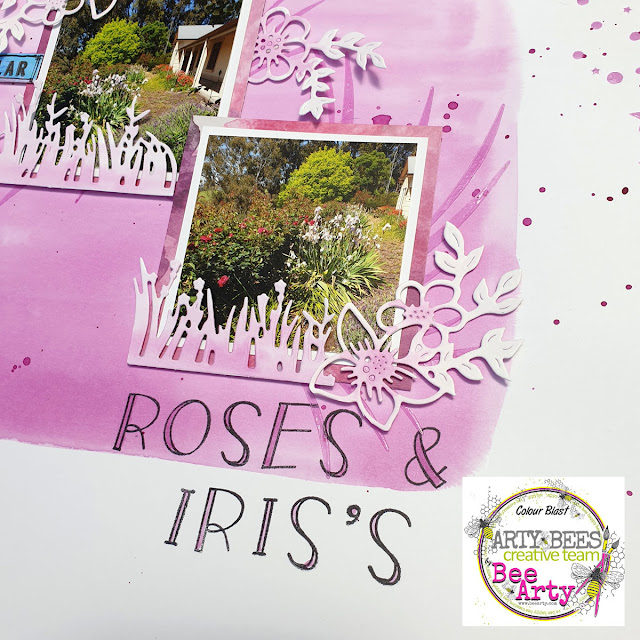
Roses and Iris's - With Karyn Schultz!

 Hi Bee Arty Lovelies!

It's Karyn here and today I have a scrapbook page to share with you made using products from the new Fireworks collection from Bee Arty. 
 
   
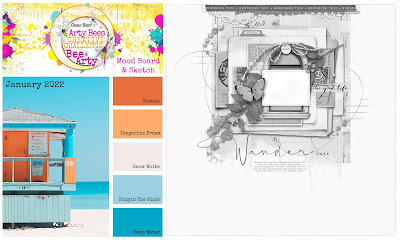
I was inspired by the colours of the February mood-sketch challenge. 
 
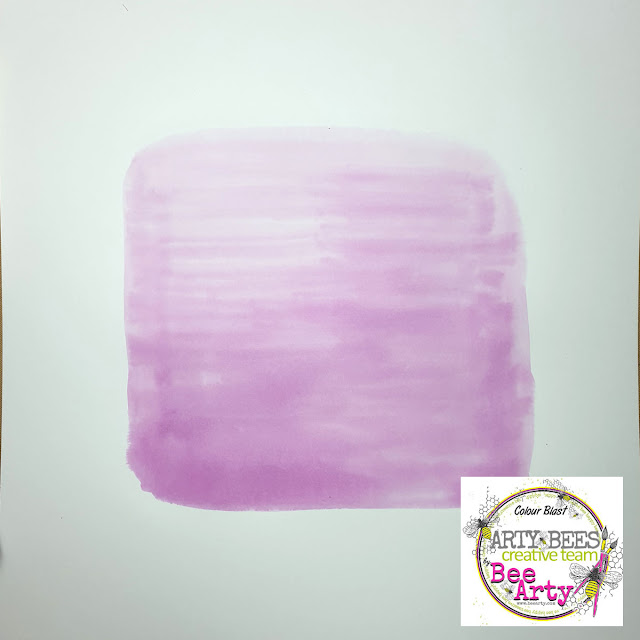
I created a background on 350gsm Heavy White Cardstock by painting an 18cmx18cm square using Grape Colour Spray mixed with water in a paint palate and a large flat brush. I've created an ombre effect being darker at the bottom and lighter at the top. 
 

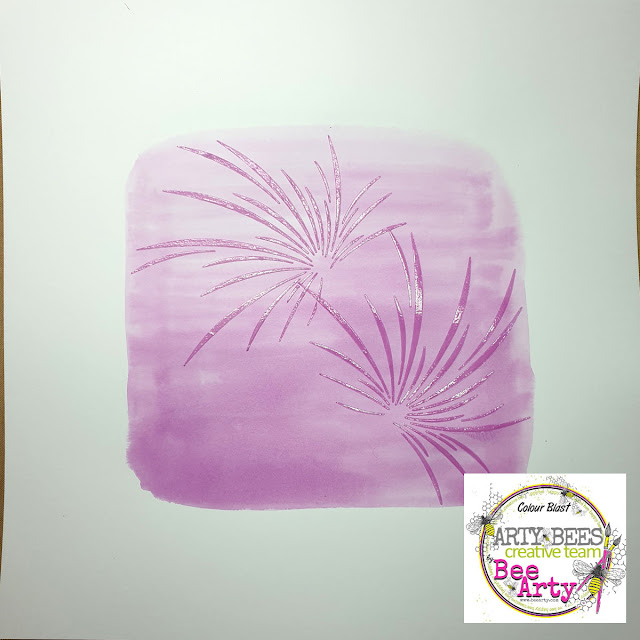
I mixed 4-6 drops of Grape Colour Spray with 1-2 tablespoons of heavy gloss gel then used a palate knife to apply through the Fireworks stencil from the Fireworks collection.  
 

I applied more of the Grape / gloss gel through the star section of the Fireworks stencil in the top right and bottom left sides of the page.   

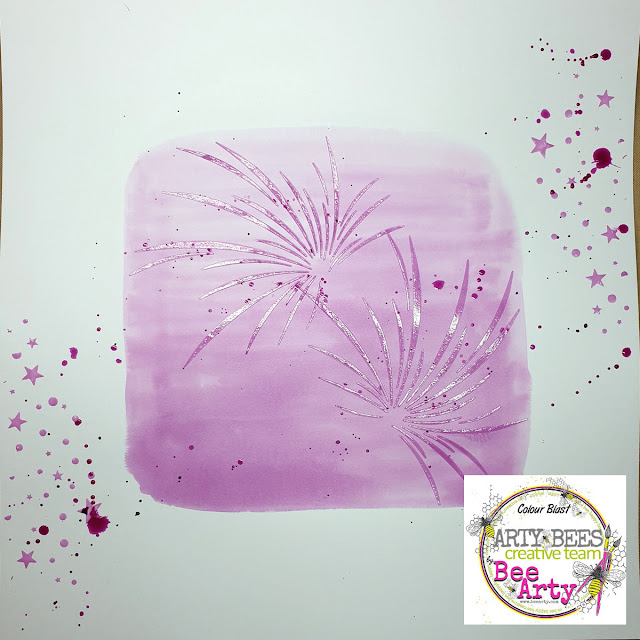
Once dry I added splatters of Grape Colour Spray.
 
 
 Here is my completed page.
 
 
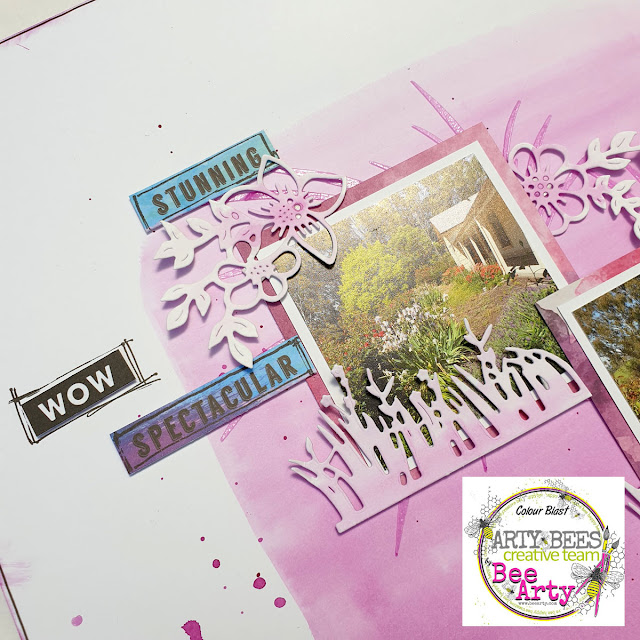
 My photos are 7cmx7cm including a white border. I've matted these with 8cmx8cm Sparkles paper from the Fireworks collection then adhered to the page. I've used diecuts from the grass die from the Forest Favourites metal die set and the Sweet Floral metal die. All die cuts are created using 250gsm white cardstock and are painted using the Grape Colour Spray.
 
 
I've used words cut from the Colourful paper from the Fireworks collection and alpha stamps from the Uppercase stamp set. Lastly I've outlined my page using a fine black Life of Colour paint pen.


Thanks so much for stopping by

Crafty Hugs xx


Sunday, 23 January 2022

The Best Memories - With Karyn Schultz!

 Hi Bee Arty Lovelies!

It's Karyn here and today I have a scrapbook page to share with you made using the Road Trip collection from Bee Arty.
 
 
I'm playing along with the January mood-sketch challenge. We would love for you to join in with this challenge and be in the running to win a Bee Arty online voucher. You have until January 30th and you need to upload your challenge here (please follow challenge rules). 
 

I have been inspired by the colours of the moodboard and also the sketch (turned on the side).
 
I used a painting with plastic technique to add Oasis, Calypso and Mermaid Colour Artist ink to some 350gsm Heavy White Cardstock, then I added splatters of each colour.
 
I used the City Nights A6 stencil from the Road Trip collection and Deep Water Colour Paste to add dimension to the page.  

 
I added stamping using the Mapped stamp and the Making Tracks stamp set from the Road Trip collection, and Black Archival ink.  
 
 
 Here is my completed page.
 
 
 I've used a sheet of Road paper and cut matts for my photo using different designs on the front and back of this paper. My photo is 9cmx12cm printed with a white border. I've added 5 different patterned paper layers, some book paper, a kraft tag, and torn cardboard layers.   
 
 
 I've fussy cut elements from the Spy paper as well as leaves from the Road Trip Collection Cover paper. The words are cut from the Vacay paper, also from the Road Trip Collection.  
 
 
 Lastly I've added some orange enamel dots and outlined my page using a fine black Life of Colour paint pen.


Thanks so much for stopping by

Crafty Hugs xx


Sunday, 14 November 2021

Spend Your Life Laughing - With Bee Arty!

 Hi Bee Arty Lovelies!

It's Karyn here and today I have a scrapbook page to share with you made using the Electric Dreams collection from Bee Arty. I love how bright and vibrant the colours in this collection are, and they go perfectly with the new Neon mica powders!
 
 
I started with a sheet of heavyweight 350gsm white cardstock. I used a painting with plastic technique to apply yellow neon, pink neon and orange neon Mica Powders across the page under where my photo would be placed and along the left edge. Then I splattered each of these neon Mica Powders across the page.
 
 
Next I used the Distance Stencil with orange neon Mica Powder  mixed with heavy gloss gel. This stencil is one of my favs.

 
Lastly I added some stamping using black ink and the Making tracks stamp set 
 
 
Here is my completed page.  

 
 I've cut paper strips and word elements from the Electric Dreams paper pack. I've also added some diecuts using the Geo Direction metal die and 250gsm white cardstock.
 
 
 I drew around the edge of my page using a thin black Life Of Colour pen. Lastly I added some neon sequins, enamel shapes and a Charms Creations chevron embellishment.


Thanks so much for stopping by

Crafty Hugs xx