Showing posts with label Colour Shimmer Cubes.. Show all posts

Monday, 21 August 2017

Colour Shimmer Cube Storage & Watercolour Wonder by Selena Stevens

I have noticed a lot of talk about how to store the Colour Shimmer Cubes, so today I will show you how I store mine.  And at the end I will show you an art journal page I did with them.

This is a link to a time lapse video of when I put the Colour Shimmer Cube Storage together.  Or click below


Lets begin...


I had a tin that contained tissues that was the perfect size for the storage of my Colour Shimmer Cubes.


I placed sticky velcro dots on the underside of the Colour Shimmer Cubes (Sunshine, Blush, Apple of My Eye, Rose Petal, Lovely Lilac, Sienna, Dusty Charcoal and Blush).  These were then stuck to the tin.


Watercolour paper was cut to size and a grid drawn onto it corresponding with the number of colour Shimmer Cubes.  The colour was painted onto the watercolour so that at a quick glance it is easy to see and sometimes colours dry lighter.  This was also stuck on to the underside of the lid with sticky velcro dots.


Don't forget that the Colour Shimmer Cubes are best stored with their lids off so that they can dry out.

Now onto my art journal page...

Here is a link to a time-lapse video of this page. Or click below


I am going to predominantly be using the Colour Shimmer Cubes to create an art journal page today.


To begin remove the top layer of the tissue with the design.  These tissues were gifted to me from a friend, the brand is Santoro.  It is glued onto my Strathmore Mixed Media Soft Cover Art Journal page with Matte Medium, ensuring that all of the air bubbles are removed with an old credit card.


Aqua Primer is applied over the dried tissue paper in a thin layer.  As the photo shows above, the tissue can still be seen through the medium and it has become textured in places.  Not only does this primer add texture but it also helps with priming the page for watercolour use.


I extended the dress to the bottom of the page and using a paintbrush I wet the area with a brush.  Colour Shimmer Cubes (Sunshine, Blush, Rose Petal and Lovely Lilac) were added randomly to the dress by using a paintbrush and flicks, allow the colour to spread into each other to cover the white area.   While this area is wet a stencil (Brand unknown) was applied until the area is dried.  Lift it off to have the pattern of the stencil left.
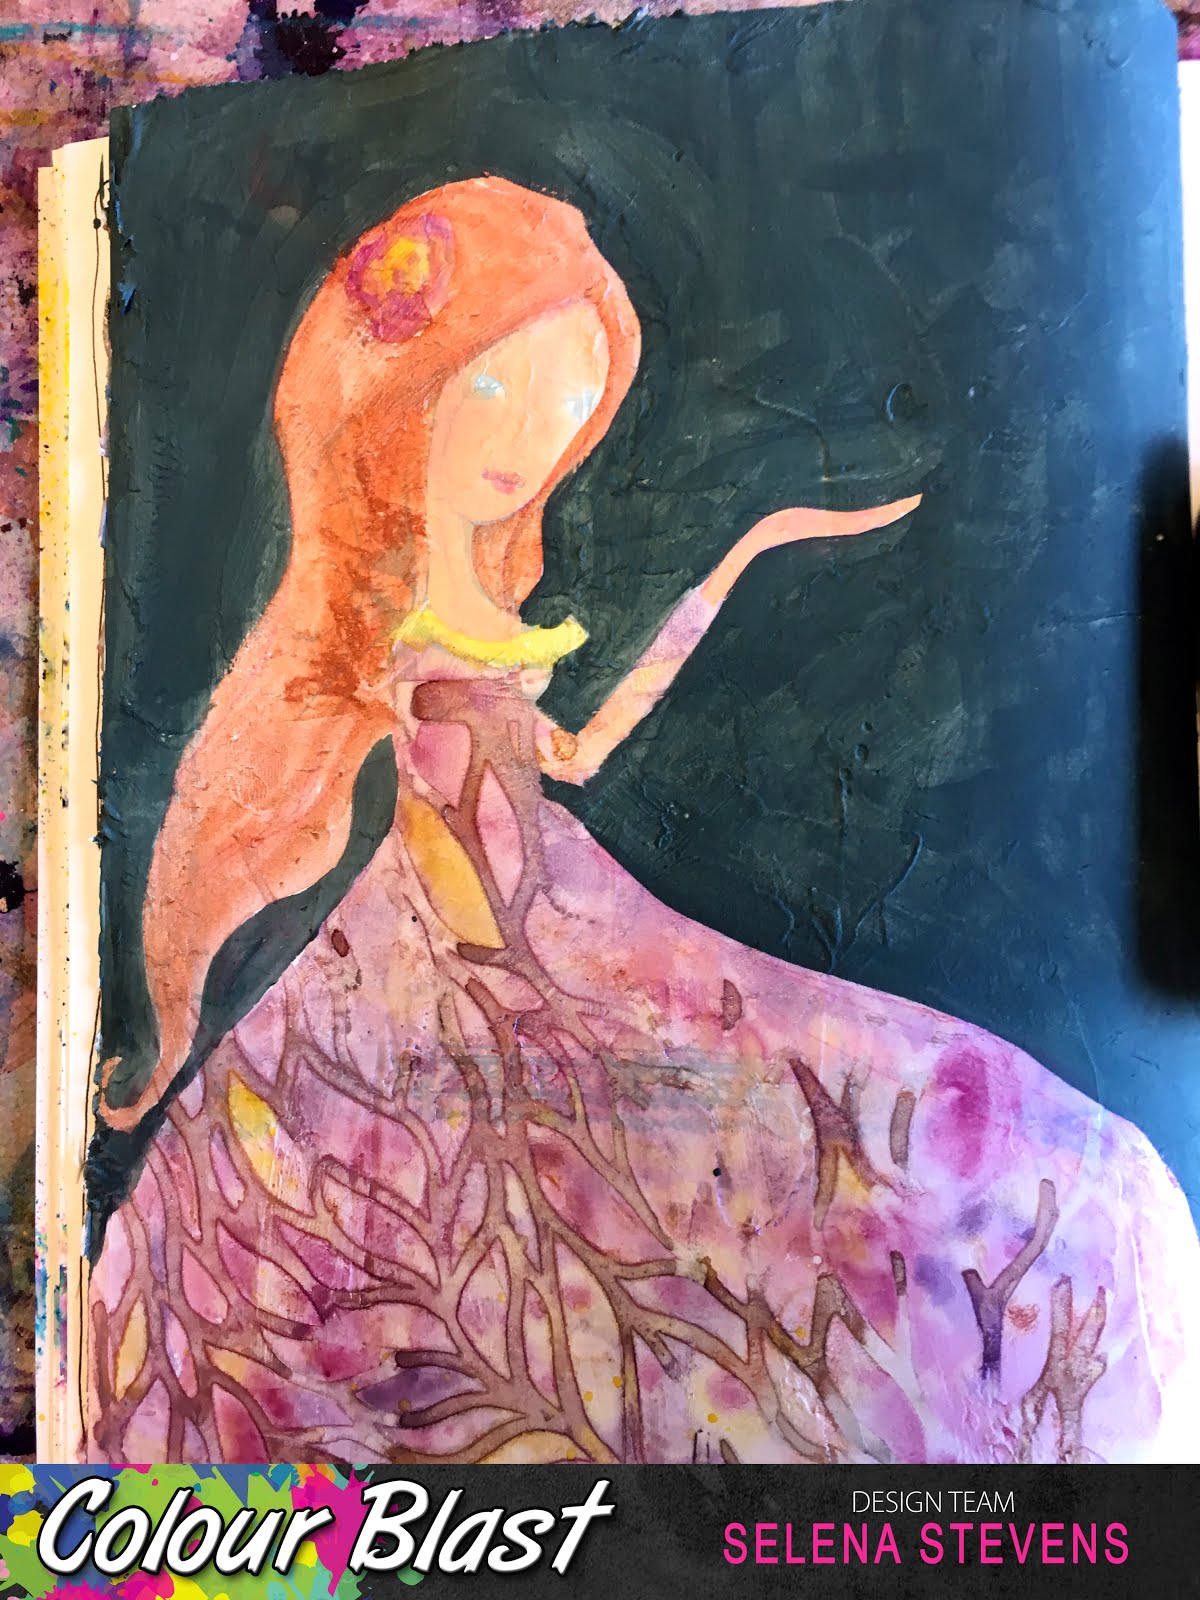
 

Colour Shimmer Cubes were used to add colour in the flower, the same colours as the dress were used and Sienna was used to colour her hair.  I do love the Colour Shimmer Cube Sienna colour – it’s so deep and rich!  While the Colour Shimmer Cubes are drying, Ceramcoat Acrylic Paint (Santa’s Flesh) was added to the girls face and hand.  Ceramcoat Acrylic Paint (Dark Victorian Teal) was painted onto the background.


The girls eye colour was added with Colour Shimmer Cubes (Apple of My eye).  I painted a heart above her hand with Ceramcoat Acrylic Paint (Hydrangea Pink).  Shading was added to the girl with Prismacolour coloured pencils (Dark Purple, Chestnut, Scarlet Lake, Cream).  Details and highlights were added with a Uniball Insight black pen and a Posca white paint pen.  


I also went back to the dress and added another layer of Colour shimmer Cube in the same colours as previously and a stencil to get the effect that was described above.


I hope you enjoyed this and I would love to see what you create with these ideas.

Happy creating
Selena

Follow me at:
Facebook:  Selena Stevens Art
Instagram:  selenajstevens
Youtube:  Selena Stevens Art


Sunday, 6 August 2017

Colour Blast String Flowers by Tracey Campbell

Hello everyone I am so glad to be back for another term here on the Colour Blast Design Team - these all Australian made products are so versatile and such a great product that it makes it easy to be inspired by them.... I still have so much to share so I am ecstatic to be here.  
For my post this week I have been playing in my art journal creating string flowers, it is such a fun technique and pretty addictive that it hard to stop. Each flower turns out completely different then the last. I am going to share just four that I have created, or else this post would be far too long. :)
Rainbow Rose and Sugar Sweet Rose
Fairy Dancer Rose and Bleeding Rose
Step One: Cut about 80 cm of twine/string and feed it into a bottle of Roadbase Colour Spray, making sure that it all gets soaked except for about an inch that you will need to hold on to.
Set Two: Pull the sting out of the Roadbase Colour Spray and start to lay it on loops onto the top of your page.
 Step Three: Lay all the sting in loops and then the non-inked end place so that it is falling towards the bottom of the loops.
 Step Four: Place the opposite page or another sheet of paper over the top of the loops and gently press down. Grab the non-inked end and pull it out from the paper sheets, pull it towards yourself, making sure that it remains in contact with the papers. I have lifted the paper here a bit so that you can see what I am doing.
 Once all the string has been pulled out take off the top sheet of paper or open the journal up. You will have two images - one a mirror image of the other.
 Using Roadbase Colour Spray and a paint brush add a few more details to your flower. 
 Next I used the straw of the Roadbase Colour Spray to flick some splatters around, as I was after a mess look.
 Here you can see that the flower on the left I added more details to it. I was experimenting to see which I like the best at this stage. With the flower on the right I only added the leaves. This is the time to individualise your flowers and to get them to look how you want them.
 Now for the colour I used the wonderful little pots of colour - Our newest products to Colour Blast the Colour Shimmer Cubes. If you have not heard of these they are a shimmer water colour cake, they are to die for!!!
 Simply activate the Colour Shimmer Cube with some water and paint onto you flower. For this flower I wanted a really messy rainbow look so I applied lots of water and lots of colour, which I let run down the page. The colours that I used for my rainbow flower were Lipstick, Royalty, Deep Water and Sunshine. The leaves and stem were Apple of my Eye and Envy.
 Next I used the straw from the bottles of Sapphire and Saffron Colour Spray and splattered across the page. I didn't protect the flower when I was doing this so I went back and mopped up some of the splatters from where they fell on the flower and leaves.
 For the other image of the flower I wanted a pink/red rose so I painted the rose with some of the many tones of pink/red Colour Shimmer Cubes that are available
 - I used Blush, Punch, Rose Petal, Lipstick and Fire Engine. Then the green tones for the leaves - Apple of My Eye and Envy.
 For the third flower I wanted to create the colour first to see what would happen. I simply sprayed a page with a variety of reds and green Colour Sprays, in a rough shape that represents where the flower would be. I used Rainforest, Sunset, Bubblegum and Love Colour Spray
 Then I repeated steps One to Four from above.
 I think that I moved the string around too much whilst I was pulling it out for this flower as the stem is very thick. Next I used a black pen and drew in the leaves to finish it off.
 For the image on the opposite page I could see a figure in the flower so I decided to see if I could outline the image a bit to bring her out.
 Using a black pen I drew on the Roadbase Colour Spray.
 Not the most prettiest dancing fairy I have seen but she was in the image waiting to bee seen.
 So as you can see each time you do this string art technique it turns out differently. Then by adding some colour it turns in o a unique image.
Please let me know which one you like the best. Thanks for stopping by, I hope that you will join our Facebook group Colour Blast Creative Corner and share your string art flowers with us, I would really love to see your unique flower.
Hugs
Tracey