Showing posts with label Grateful Heart Collection. Show all posts

Thursday, 13 July 2023

Coffee Love by Charmane Koch

 I don't know about you but I NEED my Coffee! 

My layout I am sharing with you today is of a couple of coffees Ash & I had at a cute Coffee Shop in the Central Market in South Australia after an overnight stay at the Hilton!

I just loved the coffee table/bench that we were sitting at - with the old newspapers! Love the quirkiness of it... but must of all LOVE the coffee! {and probably needed it after a big night too haha}

I used mostly Grateful Heart goodies mixed in with a few other Bee Arty goodies which I will list here for you!


I started off with Kraft Cardstock as the base. I did cut out a square from it so that I could matte me photo. I did this with a Black Cardstock piece as well, which I trimmed slightly to use as a matte for the Grateful Heart Paper that I used for the background of my layout - love the woodgrain paper! You can get the full Grateful Heart paper pack for only $20! It's such a timeless pack!

But why not get the Stencils, Dies & Stamps that go with the papers? I have used these all many times for different projects! The BUSY BEES are only $70!


I trimmed about 1 cm off each side of the Faith paper and distressed the edges, I stuck this to the Black Cardstock followed by the Kraft.


I tore the Hope paper to give a rough edge, distressed and curled the paper over to expose the other side slightly. I fussy cut part of the leftover paper to tuck behind the ripped cardboard & my photo matte.


I cut out from Kraft & White Cardstock a number of floral/leafy dies - Sweet Floral, Aussie Leaves & the love from the Flower Talk set - this I used for part of my title...


I then added flowers & wood veneers & bits from my stash...


Of course a Charms Creations Book Page Heart was a perfect match...


I also cut out a Butterfly from one of the Butterfly Cut Aparts -  so many to choose from!


And a Flair from the Assorted Flairs from Bee Arty.


This layout was one of my favourites at the Charms Creations At Home Retreat I organised - it was a Scraplift of a Tina Steinborner layout! It just came together so easily - don't you just love it when that happens?

Here's the Dies I used: 


Sweet Floral - CURRENTLY ONLY $10!
Aussie Leaves - a DEFINITE must have!
Flower Talk - perfect for titles! Another must have to your Die Collection!

Thanks for popping by! I hope I've inspired you with this GORGEOUS Paper Collection!


XO Charm

Sunday, 9 July 2023

I love You July Monthly Challenge - Rikki G

  Good morning how are you? I am here today to share with this months NEW BEE ARTY Challenge, now remember you can either do the colour portion, the sketch portion or a combination of both.


So heres my take on this month challenge..... 


Heres a process video so you can follow along:


Grateful Heart - Paper Collection Pack


Till next time have a creative day.


Saturday, 2 April 2022

Happy times, by Amanda Hartmann

Dear Bee Arty fans!

Do you have favourite past collections that you still love? And you go back to them time and time again?

Today I use up more of my Grateful Heart collection. I love the blues, whites and apricots of this collection and particularly enjoy fussy cutting the amazing florals.

To create this page:


  • Started with:

Grateful Heart - Papers

  • Added detail with:

Sweet Flower - A6 Stencil

using: Colour Paste - Snow White

  • And finished with splatters:

Mica Powder - Singing the Blues

Colour Shimmer Dust - Navy


Here is the full page and some close ups! 


Thanks for looking today!

What is your favourite past collection?

Amanda


Saturday, 12 February 2022

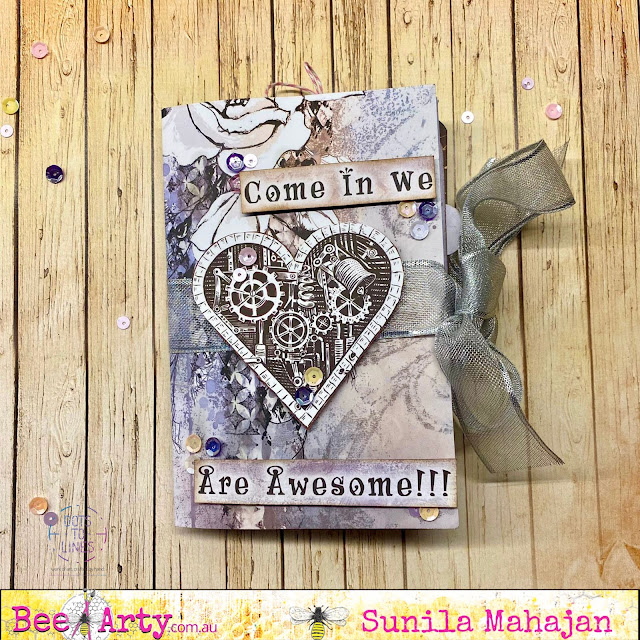
One Page Album by Sunila

 Hello Bee Arty Lovelies,


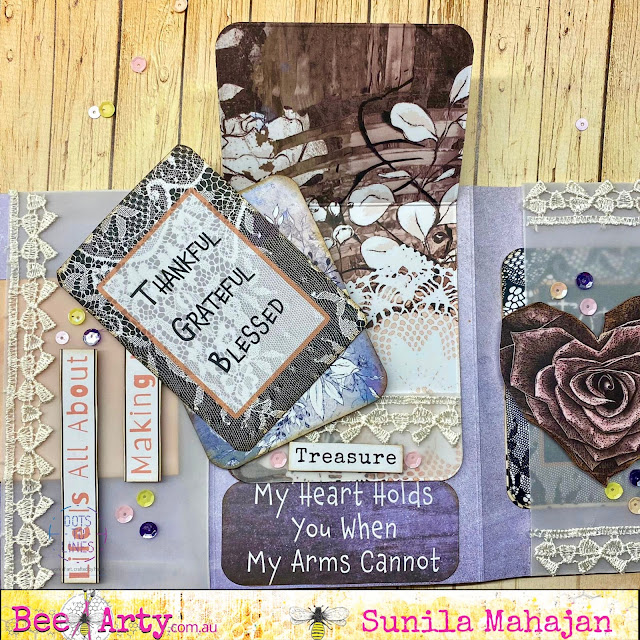
Hope you are all doing well! I'm back on the blog and this time I'm creating a One Page Mini Album. With Valentine's around the corner, I thought this would be a perfect creation to hold mini photos and make for a perfect gift. 

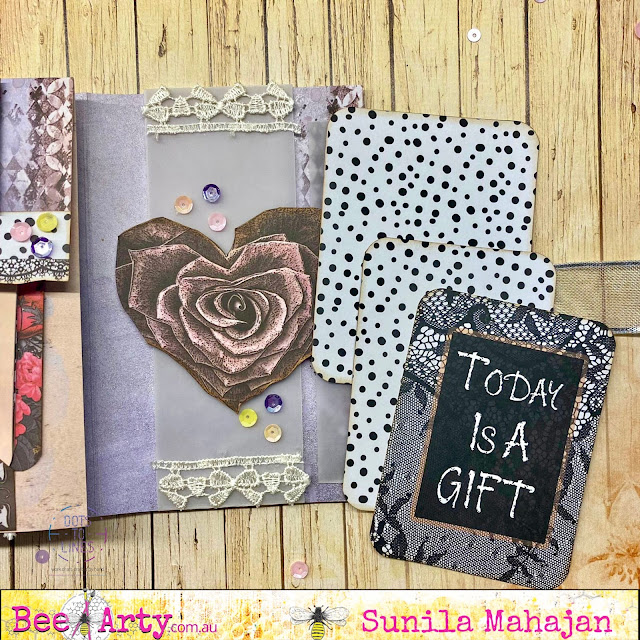
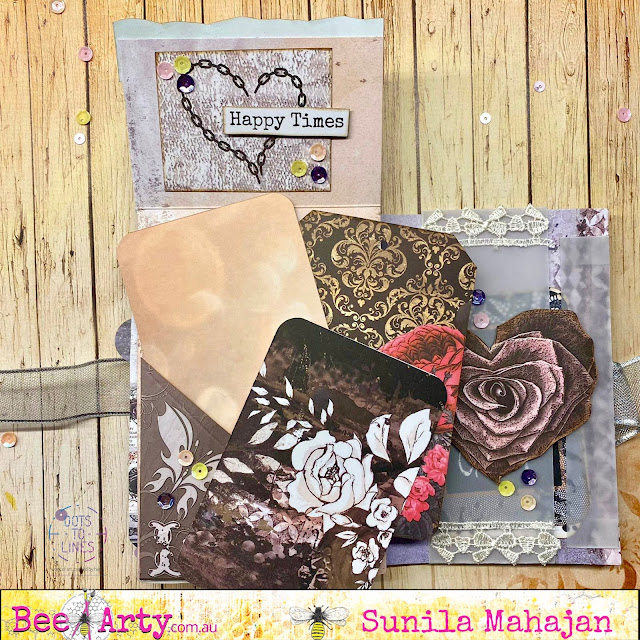
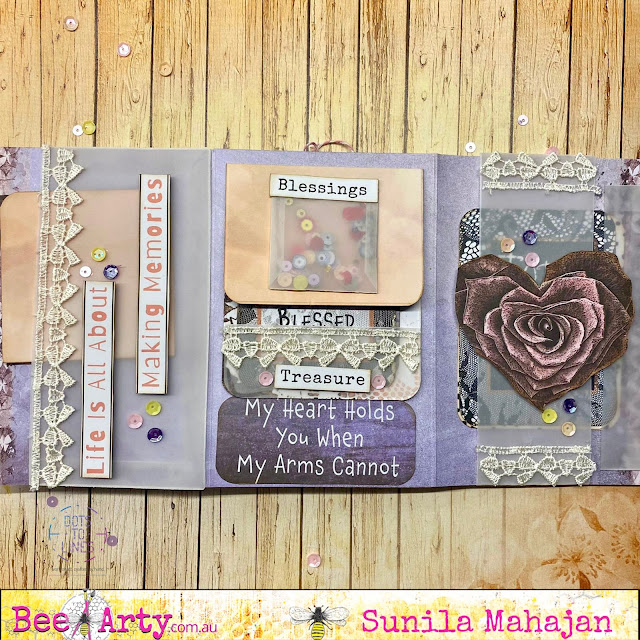
Before we see how to create this, here's a look at it. 


I'm sharing the basic steps of creating the book. Decorating it and adding elements is a personal preference and also depends on the collection one is using.

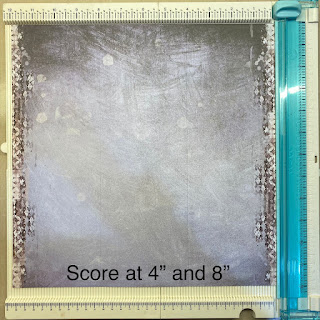
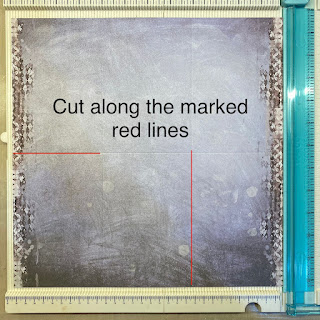
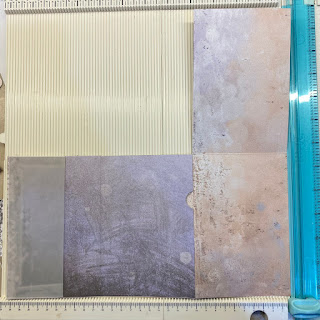
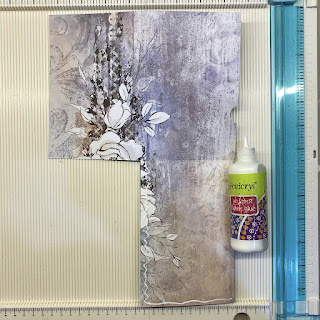
Step 1: Start with a 12" paper and score as indicated. 


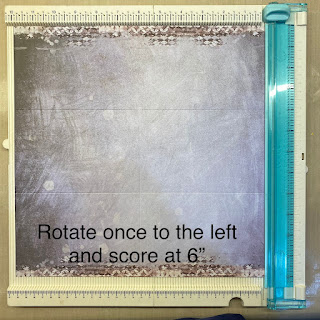
Step 2: Rotate the paper and score.


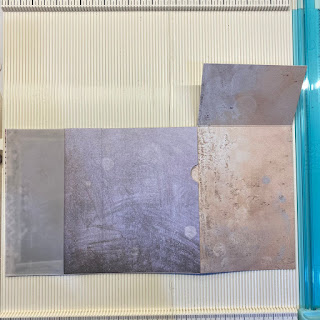
Step 3: Cut as indicated in the picture.


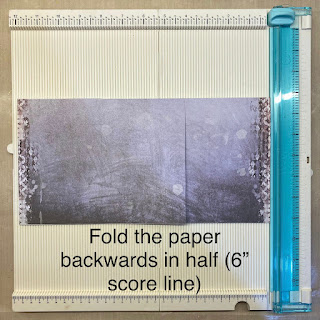
Step 4: Fold half, backwards.


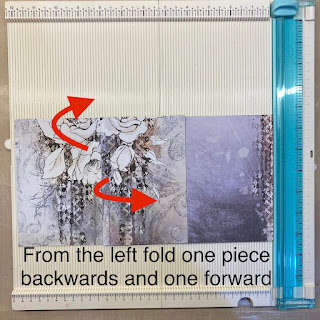
Step 5: From the left fold one piece on top and one piece at the bottom to start closing the book.


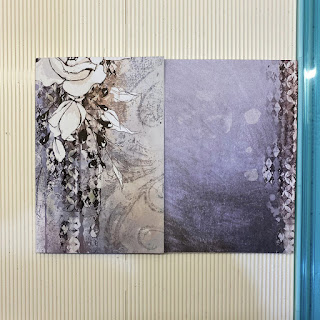
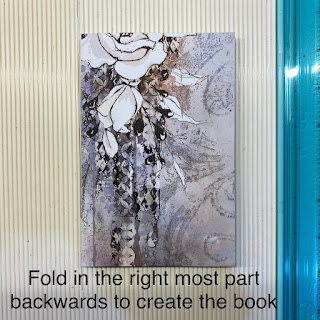
Step 6: Fold the remaining part on the right backwards.


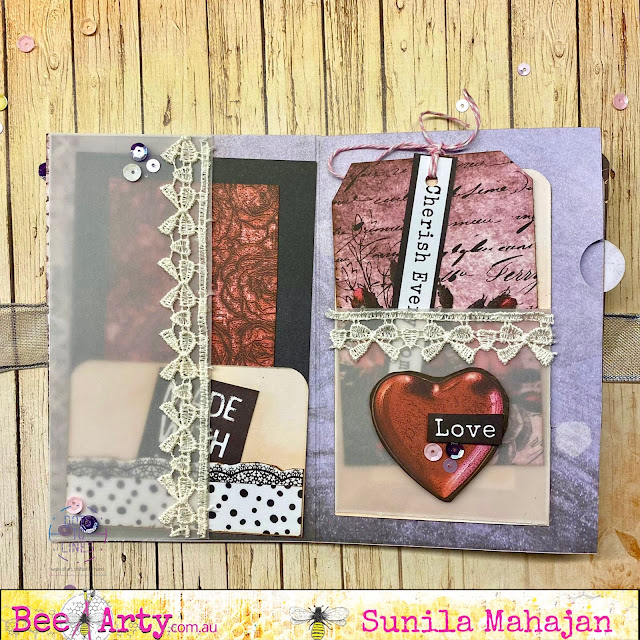
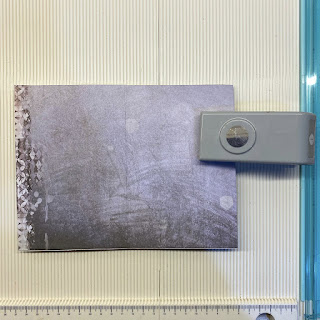
Here are a few pictures, of how to add some tabs and pockets using a punch and vellum. 


Glue the flap to create pockets.


With this the base is ready. Here are some photos of how I decorated it.


Supplies used:
I've used left over papers from Grateful Heart and Vampyre Rose


Hope you enjoyed!
Hugs,
Sunila


Monday, 24 January 2022

To The Moon And Back by Tracey Campbell

 Hello it is Tracey Campbell back for 2022 sharing my latest creations and hopefully inspiring you to pull out the absolutely awesome Bee Art Collections and Colour Blast Products. 

For my first Blog Post for 2022 I wanted to share a layout that I created mixing and matching a few different Bee Arty Collections. I must admit that one of my favourite things about the collections is that you can use your left over scraps from multiple collections together to create wonderful new layouts.

To The Moon and Back

Bee Arty Collections used:

Grateful Heart

Find Paradise

Bohemian Bliss

Arty Farty

Embrace Change

My first step was to use some Bling Colour Blast Paste with a paint palette knife and scrape it through the Scripted A5 Stencil onto the Faith patterned paper from the Grateful Heart Collection, making sure that it is white woodgain side. Colour Paste is as soft as butter and so lovely to spread; tip: start with just a small about (around the size of a 10 cent piece) at it spreads easily and by using only a small amount you don't waste any of it.

Continue to move the stencil around the Faith patterned paper to spread the image around the paper. See the photo above for the final positioning, let dry. The Scripted Stencil is one of my favourite Bee Arty Stencils, because it gives you bot a nice script writing and the small diamond shapes which both add lots of texture to a background and is very versatile. 

When dry I applied some Saffron Colour Spray with a Brayer to spread it out across the page.

Here is what the base looked like after the Colour Spray was applied.

Once the Saffron Colour Spray was dry I used a stiff paint brush and dipped it in a bottle of Sunset Colour Spray and flicked dots across the Faith patterned paper. 

Leave it to dry thoroughly. 

While waiting for the Colour Spray to dry mat three 10x7.5 cm photos (landscape orientation) with Festival from the Embrace Change Collection.

Cut three sperate rectangles using the following measurements and papers listed below:

27x6 cm from the Transform patterned paper in the Arty Farty Collection

21.5x11cm  from the Botanicals patterned paper (using the B side pattern) in the Find Paradise Collection

16x14cm from the Free Vibe patterned paper (using the B side pattern) in the Bohemian Bliss Collection

Once the rectangles were cut out I tore off the bottom edge from each triangle and then scrunched them to give them a distressed look.

Adhere the matted photo strip and the patterned papers to the base like in the photo above.


Fussy cut the following elements from the cut-a-part sheets:
2 x lace doilies from the Grateful Heart Collection. 
The Tile "To the Moon and Back" from the Embracing Change Collection. 

Cut the lace doilies in two and then position everything on the layout. You can see the positioning of the fussy cut elements in the final layout below. 


Well I hope that I have inspired you to pull out all your Bee Arty and see what pieces go together. It is so much fun seeing how the final layout turns out.