Showing posts with label Cut to You. Show all posts

Wednesday, 8 May 2019

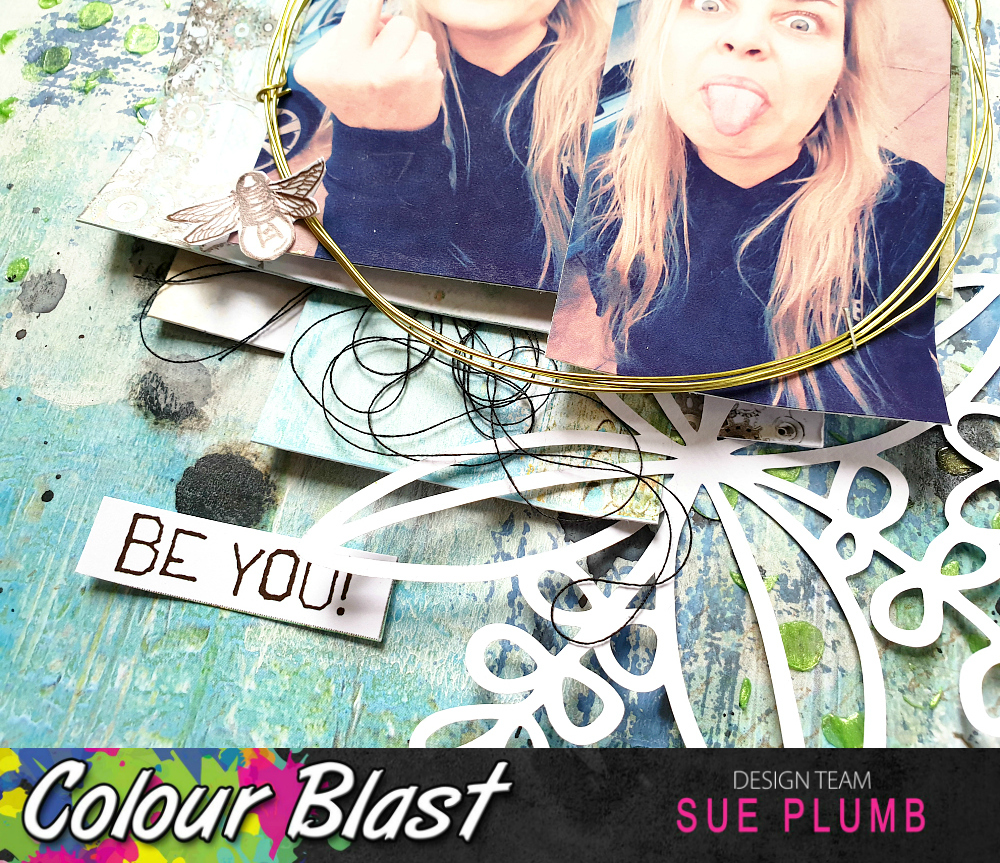
"Be You!" by Sue Plumb


Hi everyone!
It's Sue Plumb here with my latest design team project for you. Today I am sharing a mixed media scrapbook layout that I created using the 'Limited Edition' collection. The theme of this collection is all about being yourself so I thought I would document a couple of cheeky selfies (which pretty much sum me up. hehe)


Here's a look at the supplies I started with...


I began with the One of a Kind patterned paper from the 'Limited Edition' collection as my page background. The first step was to add some White Heavy Gesso to the area I decided was going to be the focal point of my page. I did this using a small brayer.


Whilst the gesso was drying, I gathered some pieces of the 'Stand Out' patterned paper and layered them together to form a mat for my photos. 


I then went back to my background sheet and added some stamping around the edge of the focal area using the Peony Dreams stamp set from the 'Spread Your Wings' collection and 'Faded Jeans' Distress Oxide.


Next, I wanted to add some subtle texture to the page. I used the 'That Way' stencil from the 'Going My Way' release with 'Apple of My Eye' Colour Paste; applying small amounts randomly around the page using a palette knife.


At this point I felt my layout needed some black to tie in with the black in my photos and also to provide a some contrast. I used 'Soot' Colour Artist Ink, and simply used the dropper from the bottle to drip some directly onto the page. I then set my page aside for a little while to dry. 


Once it was dry, I added the layered mat I had created earlier; bending up the edges of each of the pieces to give the stack more dimension, before sticking my photos on top.


I then took the floral cut files from Cut to You and tucked them in under the edges of my photos. I also created a circular frame using coloured wire, which I stapled on top of my photos.


With all of the main structure in place, it was simply a matter of adding some finishing touches. I added some messy black cotton thread, which I tucked in amongst my layers.


I fussy cut three small bees from the Glorious Tags paper and added those to the page.


I finished off my layout by adding three phrases cut from the Exception Word Sheet paper, placing two above my photos and one below.


That's all from me today, I hope I have inspired you to get messy too. Until next time, happy scrapping! 

Wednesday, 5 December 2018

"Together" scrapbook layout + process video by Sue Plumb


Hi everyone!
It's Sue Plumb here with my latest Colour Blast design team project for you. Today I have a 12x12" mixed media scrapbook layout to share that features Colour Spray, Colour Artist Inks and Colour Paste. It also features a photo of one of my most special scrappy friends and I that was taken at a scrap retreat earlier this year.


To start my page, I applied 'Indigo' Colour Spray to my cardstock using a wide brush. (I chose indigo as my base colour because it matched the highlights in my hair.) 


I then mixed some white acrylic paint with a few drops of both 'Lime' and 'Grass' Colour Artist Inks, using an old ice cream container lid as my palette.


Once the paint was tinted, I used a brayer to apply it to my page over the top of the Colour Spray I had brushed on.


Next, I added some more colour, by dripping some 'Lime' Colour Artist Ink directly onto my page using the dropper from the bottle, before tilting my page around to help the ink run. 


Once I had dried the paint and ink, I added some stamping over the top using a floral stamp from Viva Las VegaStamps and some StazOn ink. 
Then it was time to add some texture and a bit more colour. I used 'Just Blue' Colour Paste, which I applied with a palette knife through a floral stencil before drying it off with a heat gun.


With my background layers in place, I then added my papery layers using patterned papers from Cocoa Vanilla Studio and also some frayed gauze before adding my photo on top.


I also added some gorgeous floral cut files from Cut to You (which I had Gwen cut for me as it was far easier than dragging out my own Silhouette! haha) I chose not to back them, and left them white to contrast against all the colour I had already used in the background. I also bent them up from the page in places, which only added to the dimension of my layout. 


I complimented the floral theme I already had going on in my background by adding some paper flowers and leaves (all from D-lish Scraps). It's been a long time since I used flowers on a page, so it was nice to use up some supplies that had been sitting around gathering dust.


I also used up some old wood veneer pieces and phrase strips from Cocoa Vanilla Studio, as well as my cardstock title that I added directly onto the bottom edge of my photo.

I then reached for my 'Soot' Colour Artist Ink and a fine brush to add some splatters to my page.


The final step was to use my 'Clear' Colour Shimmer Brush Marker to add some subtle sparkle to the paper flowers and leaves and also to the tips of some of the cut files. 


It was hard to capture the delicious sparkle, but I did my best!


If you would like to see exactly how this layout all came together, I have a process video available on the Colour Blast YouTube channel here:


Thanks so much for stopping by today. Until next time, happy scrapping!