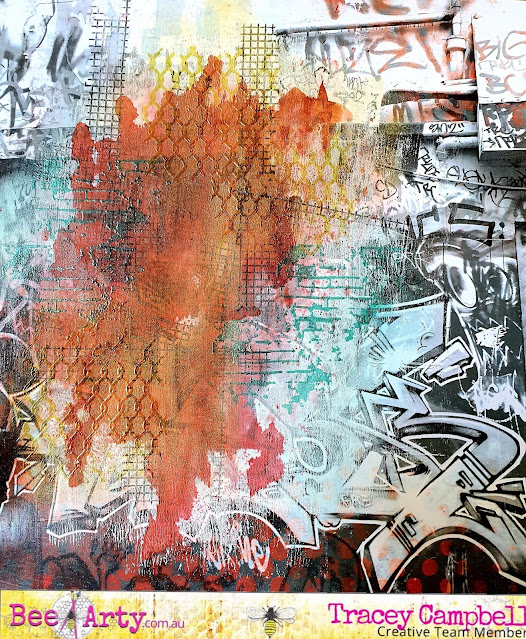
Hello wonderful people, Tracey Campbell here today to share my latest Creative Team member layout with you. I have been playing with a few of the older collections lately and wanted to show you how I used the different collections to create this fun page.
My first step was to go through my paper stash to see what patterns and colours would work well with this photo of my youngest daughter with one of her favourite characters at Movie World. I ended up pulling paper and wordsheets from the following collections: Graffiti Grunge, Trendsetter, Fearless Brave and Free, Follow Your Dreams and Covid Capers.
As I knew I wanted to add a bit of mixed media to the layout I used a brayer to apply a thin coat of Heavy White Gesso to the right-hand side of the Epic pattern paper from the Graffiti Grunge collection. Tip: Apply Gesso as a primer to your paper to help mixed media to adhere and not warp your paper.
When the Gesso is dry apply a small amount of Candy Colour Shimmer Dust and activate with a fine spray of water.
Allow the activated Shimmer Dust to pool and stand the paper upright so that the pooled colour runs down the page. Once you are happy with the dribbling effect lay the paper flat to dry or use a heat gun to speed up the drying process.
When dry use some clear embossing ink with Apple of My Eye and Sunshine Embossing Power to stamp the brick wall and chain wire images from the Life is Tough Stamp Set onto the paper. I placed the images randomly over the Gesso and Shimmer Dusted area. I have posted a photo of the positioning of the stamping below the next step.
Next I built up the texture by using some waterproof black ink I stamped the grid image from the Life is Tough stamp set horizontally and vertically across the Gesso and Shimmer Dusted area. See positioning below.
In the photo above you can see the build up of the mixed media and stamping.
I wanted to add some paper layering to my layout so I used small pieces of paper from the following collections: Graffiti Grunge, Trendsetter and Fearless Brave and Free. The biggest piece was a 6x4 rectangle and then just random stipes and pieces that I kept adding until I was happy with how it looked. I decided at the last minute to add some red into the layering to compliment Robin's uniform. I did this by adding small pieces of red cardstock behind the patterned paper layers, just enough to balance and not overwhelm the rest of the patterns. Adhere the photo and layers to the background, I positioned it over the top of the mixed media.
Using the Linked In and Direct Links metal dies cut one image from each in black cardstock, cut this image into 3 pieces. Then cut one image of the Direct Links in red cardstock. Trim the chain and the hanging arrows off from the large main arrow of the Direct Links cut image - you should now have 3 separate arrows and 3 chains in both red and black cardstock.
Tuck the 3 pieces of the Linked In image under the paper layering. Using the arrows and chains as embellishments adhere them to the page, see the final layout for positioning.
From the Covid Capers, Trendsetter, Fearless Brave & Free and Follow Your Dreams wordsheets choose phrases/words that suit your photo and cut them out. I have picked the following phrases for my layout: "Be Fearless", "Your vibe attracts your vibe", "Hero", "Suit Up", "Strong" and "Courage". That is one thing I love about the Bee Arty wordsheets there is so many choices that you and target the theme you are going for and pick and choose. Finish off by adhere the words/phrase to the layout.
Thanks for popping in, I hope that I have inspired you to pull out the older collections and see how you can mix and match them to create a unique and individual layout to suit your photos.
By for now,
Tracey


No comments:
Post a Comment