Wednesday, 27 October 2021

Road Trip Folio Part 2 by Tracy Jackson

                                                                Hello Bee Arty Fans

Welcome back to part 2 of my DT post using paper from  Road Trip Collection to decorate the folio we made a couple weeks ago.

Firstly we will make a pocket to go on one one side of the small envelope. 
I cut out two pieces of paper 9x10cm - I used my corner rounder on the top righthand corner that will be the base, then cut a diagonal on the top paper. 


Ink all around edges before gluing left, bottom and half right side so it makes a pocket.
Fussy cut and ink caravan and word then glue.
Put to the side while we make next piece of ephemera


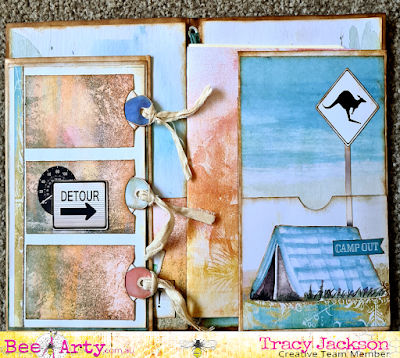
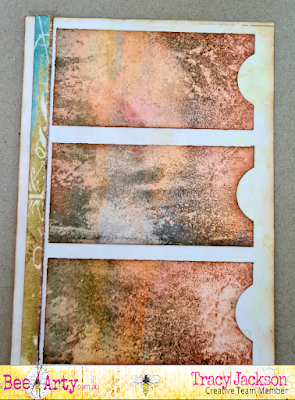
This 3 pocket ephemera will go on the envelope on the left hand side (see below)
Cut a base from the collection that will leave 2mm around edges showing when glued down. 
Then cut out three rectangles 


I hold all three rectangles together and use my circle punch to punch out a opening that a tag will easily slide in and out. I also had a scrap leftover strip that I used... I inked all pieces and glued down strip and three sides of the rectangles


Next I measured and cut out 3 tags


Pick out images you want to use - ink and glue down


Glue whole piece onto front of envelope
You can also see in photo below one of the other envelopes I decorated. This was simply a piece of paper from collection I measured the same width and punched a half circle in top to make a pocket


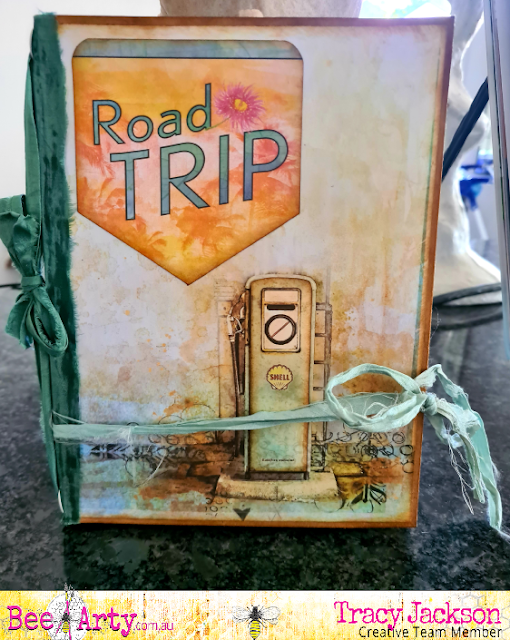
Adding a signature..... I wanted to add a signature so I glued a strip of sari silk down the outside, Once dry I punched a hole in spine about1cm top and bottom and put in an eyelet. I then threaded another piece of sari silk though both eyelets and tied in a bow on the outside.


I then prepared a signature by cutting a piece of collection paper as the signature cover and back and filled with 6 pieces of cream writing paper and folded all in half, I also used corner rounder on all signature paper I slotted under silk so it sits in like a booklet and can be replaced when needed


Below are close ups of each decorated envelopes


Front


I rally enjoyed making this folio, I hope I have inspired you to have a go.


Until next time, stay safe..
Happy crafting

Tuesday, 26 October 2021

HALLOWEEN .... Dancing in the moonlight by Linda Pearson


Hi Bee Arters .... I am back on the BLOG and catching up with my last post just in time for Halloween if your keen ... remember if Halloween is not your scene you can always try a substitute theme such as:

Bohemian Bliss,

Forever My Always,

Grateful Heart if preferred


Mini paper collection – Castle Dark collection designed by Sue Smyth …. Night Knocker paper and Gothic Favours (scull tag)
1 sheet of White Cardstock 350gsm or A4 journal page prepared with 2 coats of White Gesso
Floral delights clear stamp set
Archival Ink Pad Jet Black
Versamark Stamp pad translucent
Embossing powder – white
Catalyst silicone mini blade tool
Blank Tissue paper
Permanent Black Pen (Sharpie/Calligraphy Pen or equivalent)
Matt Medium
Paints used; DW Ruby, Elephant, Olive and Black
White Paint Pen


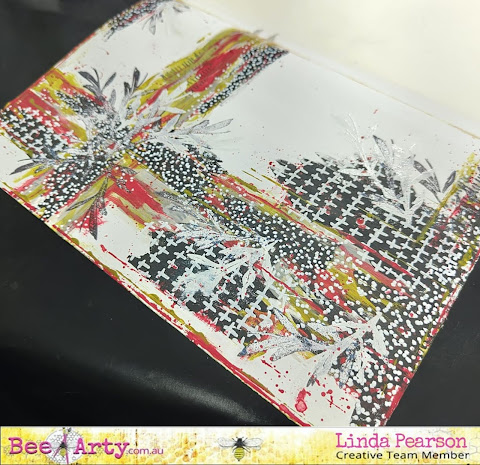
Prepare the page with two coats of White Gesso. 


Add some small torn collage paper strips over the page using Matt Medium and Silicone Palette knife

(I used self-made tissue paper … see image).


Begin adding paint marks on the page overlapping the collage paper (I opted to create a ‘crossed’ shape for this layout with a couple of smaller marked areas on the page . I started with the Elephant colour, followed by the olive colour then lastly adding Ruby (dry off after each if they blend too much).


Add small blocks of (messy) black paint to the main painted areas, including along the bottom of the page to anchor the elements.  Dry off.


Add marks to the black painted area.  Add white dots over most of the black sections, however, I left three larger blocks in order to add ‘white crosses’ to these areas.


Fussy cut the floral bouquet from the Knight Knocker (Mini paper collection – Castle Dark collection designed by Sue Smyth) and also cut the tag from the Gothic Favours sheet (Mini paper collection – Castle Dark collection designed by Sue Smyth).


Add some leaf stamping using the Floral delights clear stamp set  and Archival Ink Pad Jet Black along the edge of the cross shape where the floral bouquet will be placed later.  Add more of the leaf stamp using Versamark Stamp pad translucent then sprinkle  Embossing powder – white over the stamped image, heat set the powder.


Add border around the edge of the page using Ruby and Olive paint.  Add ‘Ruby splatters’ to the page over the painted areas mostly, try to keep as much white page as possible.

Adhere the floral bouquet cut out to the bottom edge of the page following the vertical line of pattern.  Add mounting tape behind the tag then place along the cross over of lines on top third of the page.  Could add some cotton thread if desired.


Happy creating and see you again soon! Bye for now!
Linda Pearson 
linda@yourcreativepalette.com.au 

Sunday, 24 October 2021

Blah Blah Blah - With Karyn Schultz!

 Hi Bee Arty Lovelies!

It's Karyn here and today I have a scrapbook page to share with you made using the new Chit Chat collection from Bee Arty. How cool is this new collection very funky for everyday scrapbooking and art journalling!

 
 I'm playing along with the October sketch challenge. We would love for you to join in with this challenge and be in the running to win a Bee Arty online voucher. You have until October 30th and you need to upload your challenge here (please follow challenge rules). 
 
 
I started with the Alpha paper and cut 2 of 1.5"x12" strips from the top.
 
 
 I then turned over the larger piece of Alpha paper and placed the 2 smaller pieces to the top and bottom of the page.
 
 
Next I took the Speak paper and and cut 2 of 1cmx12" strips and use these to attach the papers together.

 
I used the Marked Stencil with Dusty Charcoal Colour Paste to add some stencilling across the page. I love this stencil! It is perfect for mark making on any project. 
 
  
I added a few drops of Soot Colour Artist ink to a mini mister half filled with water and sprayed on the page.

 
 Here is my completed page - along with a gorgeous picture of my girls:)
 
 
 Under my photo I've used some tissue paper that I've painted with navy Colour Shimmer Dust then stamped with Happy stamp set. I've embellished with speech bubble die cuts from the Chit Chat metal die and  Peeps metal die. I've also added pink micro beads, enamel dots, a paper clip and leftover chipboard negatives.


 The words are cut from the Love Letter paper and the heart is cut from the cover bonus paper in the Chit Chat collection pack.
 

Thanks so much for stopping by

Crafty Hugs xx


Thursday, 21 October 2021

Relax and Recharge- Mixed Media Tag by Aditi Mahajan

 Hello everyone,


Hope you're all doing well.

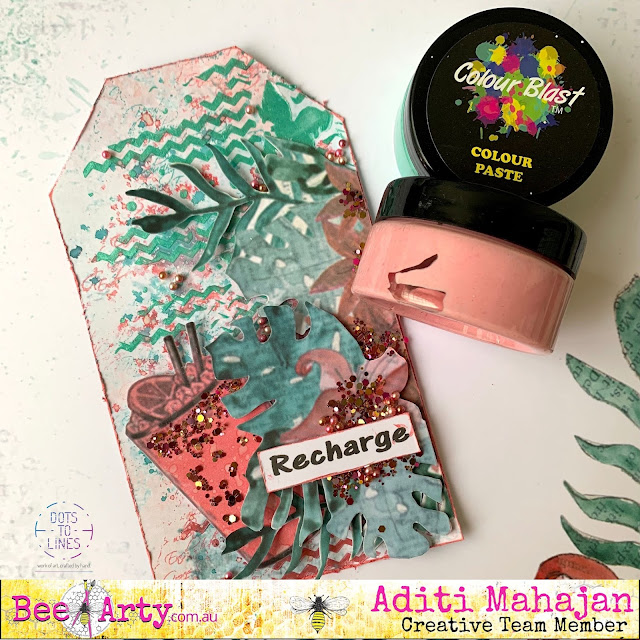
Today I'm sharing a mixed media style tag, inspired by the Find Paradise Collection. The weather is iffy, and I'm being called to the beach. So I thought, I'd use that calling and travel while I create art.

Here's a look at the tag.


This was very easy to create. I fussy cut some leaf clusters and the soda glass from assorted papers. I chose a paper for my base and cut a tag.

I then used a script stamp with pink and blue ink to add interest on the background. For more texture, I used the Colour paste with a stencil. This brought in texture, a ting of shimmer and an element of interest on my tag. I then added splatter of the remaining ink. 


I used foam tape and adhered the leaf clusters in various layers giving them depth. I adhered the glass, and completed the tag with a sentiment, some glitter and pearls.

Sunday, 17 October 2021

Paint Rainbows by Belinda Spencer

 Hello Arty Bees!!


It's Belinda here with you today to share my latest layout for Bee Arty featuring the Electric Dreams Mini Collection.


I started my layout by spritzing my 350gsm White Cardstock with a liberal amount of water. I then used a soft wet paintbrush to pick up some Fluro Yellow Colour Blast Mica Powder and applied it to parts of the wet area. I played around with the colour on the page making sure the powder was all mixed in with the water and spreading it around a little. I then repeated this process using the Fluro Pink Mica Powder. I picked up some of the colour and flicked it over the page too.


I dried my page with a heat gun and then added some stencilling using the Circulate A5 Stencil and both the Fluro Pink and Fluro Yellow Colour Blast Colour Pastes.


Next I added some stamping using the Watermark Clear Stamp Set and a fluro green ink pad and the Embrace Change Say It Clear Stamp Set with a fluro pink ink pad. 


I added a couple of pieces of cropped patterned paper from the Electric Dreams Mini Collection. Then I die cut a frame using the Frame Metal Die. I painted the frame with some of the Fluro Pink Mica Powder mixed with water.

I fussy cut some plus signs from the Electric Dreams patterned paper, painted them with the Mica Powders and added to my page once dry. I added a couple of fluro Charm's Creations too.


To finish, I added my title and a quote cut from the Electric Dreams patterned papers.


Thank you for stopping by the blog today. I hope you are inspired to have a play with some super bright colours today too.

Cheers
Belinda